Archive for February, 2008
Basket Challenge!
Feb 29, 2008 Author: mytime | Filed under: Home decor/3-D itemsAre you ready for today’s post?
I know I am pretty excited.
Jen and I challenged each other to make a Basket from our Nestabilties! Being that we both love a challenge, and altering stuff I think this was a great idea Jen had 😀 I know I had so much fun doing this.
But that wasn’t the only challenge-we had to use the Priceless stamp set from Stampin’Up!, any bkgd we choose, AND the following colors-
Orchid Opulence, So Saffron, Purely Pomegranate, Certain Celery and Chocolate Chip (optional).
WOW! Sounds like alot-but it really is a great combo.
EDITED TO ADD: I’m a dork! I used Garden Whimsy instead of Priceless! LOL! Thanks Debbie for letting me know. Goes to show how out of the Stampin’Up! loop I am. I just grabbed my (what I thought) was Priceless set-and away I went! LOL!
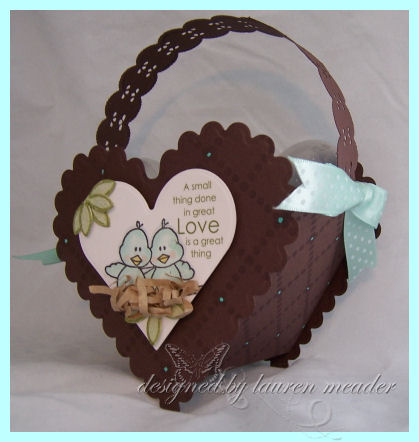
Heart’s A Flutter Basket
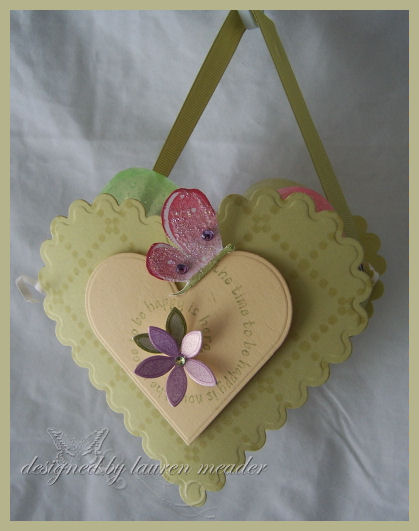
So here is my basket! I went with using the scallop heart for this design.
I ended up making 3 heart shaped baskets in all, after I got started!
The bkgd stamp is just GORGEOUS! Its called Dotted Diamonds, byCHF, and was designed by fellow Dirty Girl Lisa Strahl (in case you didn’t know :D) I thought it made a nice simple “weave” design for my basket.
I used the sentiment, and butterfly from Priceless (one of my fave SU! sets). The pomegranate ink was daubered on my stamp, as was the orchid. It gave a nice blended butterfly wing, with the touch of glitter.
I used those Bridal flowers, and colored them with my SU! markers to match. I know they LOOK coated but they take any ink 😀 Real nicely I might add.
Here is the side view
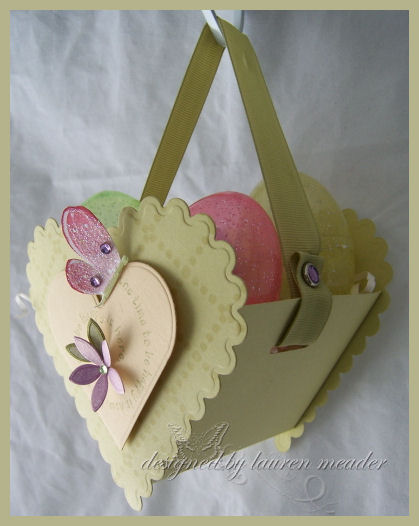
I decided to use my ribbon for a hanger. These dont stand well on their own :C You could put “feet” on it, but they also look nice in a corner-where they can stand, or hung from a hook-like this one.
I added COLORED glitter eggs (infrom the $1 store) to this basket. It will be one of the kids Teacher’s basket’s for Easter.
Well I couldn’t stop there! I have another one to share with you today-then the last one I will post tomorrow, as it has a bunch of accessories made to match-and deserves its very own post! You really won’t want to miss that one!!!
HINT-Papertrey Ink.
So next one I had an idea!
 Front view
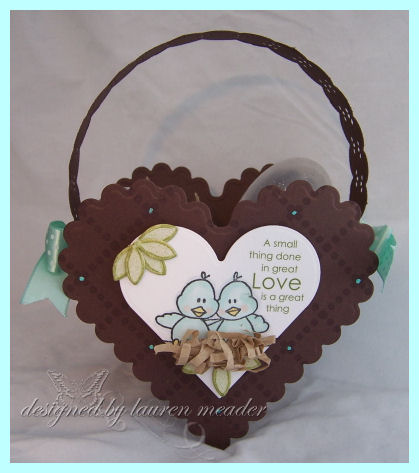
Here is the Love Nest!
I LOVE this bird image by C.C. Designs-Love Ya Much.
Last April, for the Dirty Dozen, I made a nest, using scraps of paper-you can see that–>HERE. If you can’t view it, it is because you are not a Fan Club member-SORRY!! You should join 😀
But the idea is the same. Only this time I saved myself some shredding and used gift bag filler instead! LOL!
I then used those SAME Bridal flowers, colored, and cut-for my tree leaves!
The sentiment is from the SAB rub-on’s by SU! I thought it was cute, and perfect since you would give small gifts in this basket.
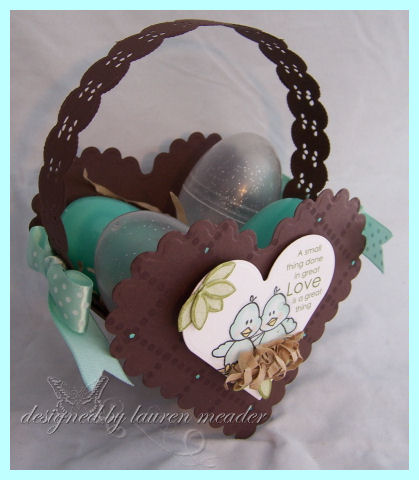
See the little eggs match!
The ribbon is the Polka Dot Aqua Mist, which was PERFECT!!!!!
I made my handle by using a Martha Stewart embossed scallop border punch. I cut a thin strip, then lined up the punch on either side to create a elegant handle.
This is the other side
Funny because this one stand well on it’s own! Maybe because the contents inside “balance it out”?
Anyway-here is some more info-
For this heart basket, I used Chocolate Chip, and the same bkgd. Just added some dots with Souffle gel pen for the flower centers!
DIRECTIONS!!!!
Now I KNOW you are going to ask HOW I made the sides!
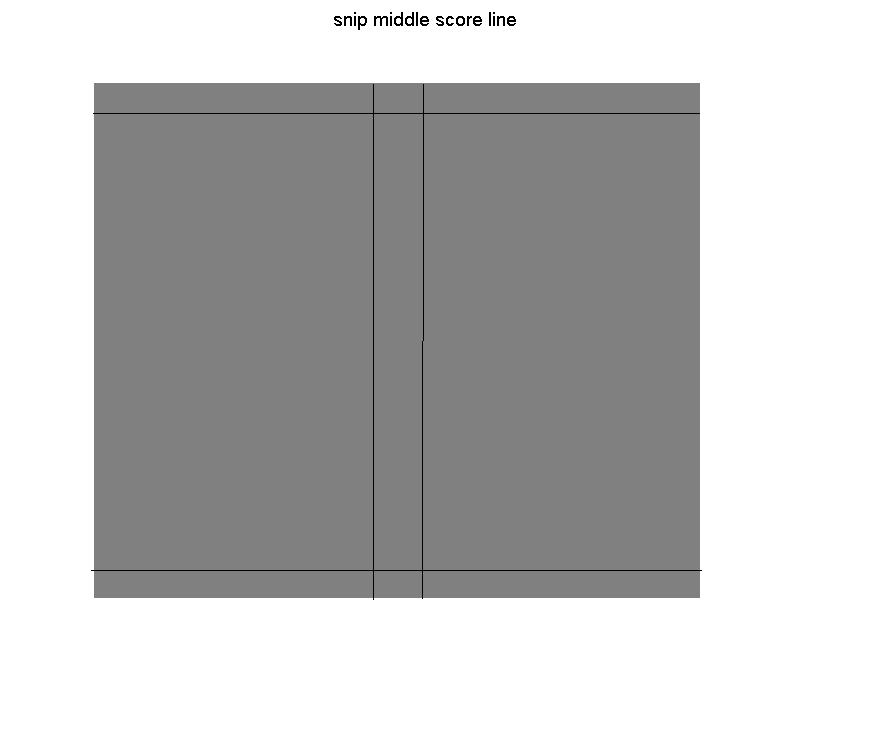
All you need is a piece of cardstock-whatever width you want-since that will affect how long your basket is. I believe mine was 4 1/2 X 6 1/2.
X wide by 6 1/2 inches long.
Using my Scor-Pal, along the 6 1/2 inch side score at 3 then 3 1/2.
Then along the width, score a 1/2 inch on either end!
Snip the sides of the center score-and put together!!! DONE!
Don’t forget to check out Jen’s version too! You can find that here—->HERE
So that is it for today! I hope you enjoyed our challenge. Feel free to create you won and post us a link in the comment’s section.
I want to thank Paulette for lending me her Scallop Heart Nestabilities. I have no idea HOW I am going to part with them now, since I am in LOVE with them! LOL! AND they aren’t around ANYWHERE! BUMMER!
Stay tuned for tomorrow’s Basket ensamble!!!
Till then.
Once upon a time, in a castle far, far away, there lived a Princess.
Her name was Lauren.
Her day to day life was more like that of a Cinderella.
She spent her day’s caring for the children, who fought and fussed. Then onto scrubbing the floors, and worse yet, chasing away rodent’s, that recently infested the Castle.
Whenever she got the chance, she would quietly escape to her stamp room, in the dungeon of the Castle. She would hope, that the children would not find her there, as she tried her best to complete this week’s blogger’s challenge. She needed to quickly re-create the layout of the Sympathy card on page 44 of the SU! Catalog.
Well what do you think?
This not only read’s like a story book (hahaha) but looks like the page of one, don’t you think?
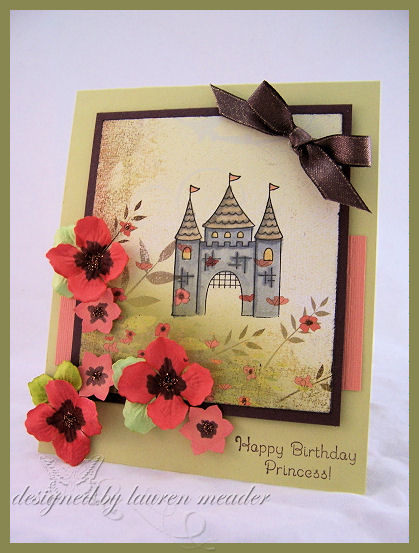
When I saw this paper from the Aerial Collection of paper I got from Kim. I fell in LOVE with it, and knew I wanted to use it, but could not bare to cover it up with any layers.
Since it looked like a place for a Castle to hide, And I am not a “scenery” maker, I stamped my castle right onto the patterned paper, and it made it look just like a scene from a story book!
I used Spring Moss cardstock, along with guava textured card-stock, and Chocolate chip, for this card-which measure’s 4 1/2 X 5 1/2.
I colored the Castle with my Copic markers.
I wanted to re-create the flower’s that are on the paper, so I used my brown Copic marker to color the center’s of my Essentials flowers. I used cinnamonstickles for the flower center’s. I then cut apart the leaves of the green flowers, for leaves. I needed some smaller flower’s so I used my new SU! flower punch, and did the same on those.
The chocolate ribbon has a golden shimmer to it. I got it at Michaels. That corner needed “something”, so I felt that added a nice balance, without over-doing it
Sentiment is also from the Once Upon a Time set.
I loved making this card. It was so fun. I am having too much fun with that set. Im especially happy with the outcome of this card. The castle is perfect. Not too big, not too small, and easy to color. Just enough details. Love it. Hope you like it too.
Well, stay tuned, cause when I come back, I have some SUPER cool stuff to share.
See you then.
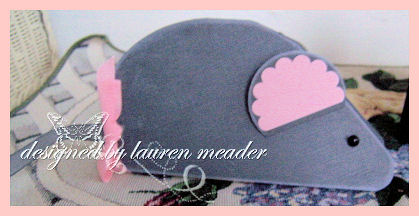
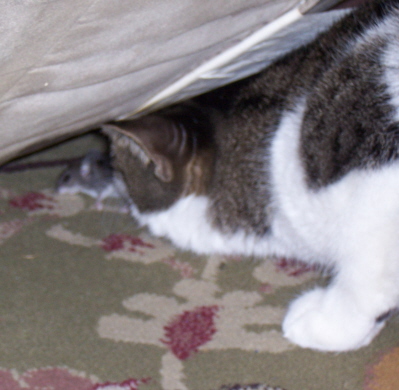
You cant tell a mouse tale without a mouse card- This is my card for my friend Paulette-who had to hear my dramatic stories and terror all week. Sorry Paulette.
PLEASE NOTE: What you are about to read is a true story about a mouse. There is a photo of the CHASE but my husband said NOT to publish it. Who really wants to see a cat chasing a mouse anyway right. It gives me the heebie geebies.
While all events sound DRAMATIC, they are true. I am a DRAMATIC person when it comes to situations like this. I would make a great hidden video candidate.
A little background first.
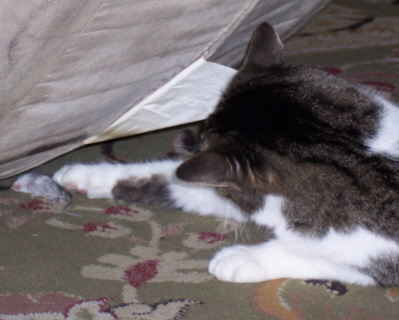
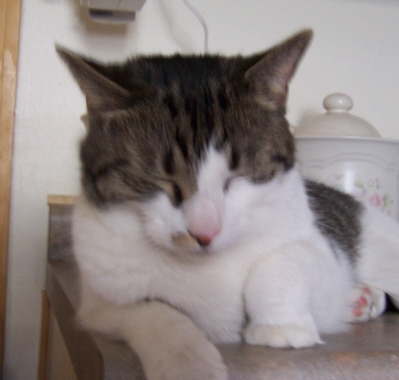 This is Lily-AKA mouse killer
Taking a break after this mornings “festivities”.
We became the proud owner of this STRAY cat, while on our honeymoon in Hawaii.
How does that happen? How do you get a cat while you are away? Well, lets share.
Lily kept coming around to our house while we were gone. Our mother’s took turns caring for our kids AND feeding this STRAY cat! Needless to say, by the time we returned home, we owned her!
She was pregnant, and full of fleas! YEAH! The pregnancy was a loss due to malnourishment. , from being a stray for so long.
So we took her in, cleaner her up, and got her fixed.
We also have to older cats who are 11. Brother and Sister. They have names, but since having kids they are referred to most as girl cat and boy cat! PATHETIC I know.
They are all de-clawed house cats. They NEVER go outside. Although Lily has “escaped” a few times. Being a stray she found her way back, when she was ready.
We knew we had “A” mouse, in the house, for about a week now. Hadn’t seen it, but knew.
When you have 3 cats, and 1 dog sitting in front of your kitchen stove ALL night, for HOURS, you KNOW “something” is under there.
Do I even want to consider there is MORE than ONE-Um, NO! I definitely do not. But since this day-Monday, when this story took place, we have caught—————ready for this———–EW!!!!!!!!!!!!!!!!——-15 MICE!!! YEAH! Im freaking! But I THINK/HOPE they are gone. I have never had this many EVER! What’s worse is we didn’t even know we had any till this incident.
Yes, I know! You are freaking out too right now, and yes I want to MOVE, and yes I check my shoes before I put them on! LOL! And NO I haven’t slept since Monday. At least not very well.
My house is clean-I dont want this story to sound like we live in the Ghetto and have food everywhere! I mean Im sure we have crumbs somewhere! LOL! You can’t have 3 kids and no hidden crumbs!
I know most people get a mouse, here and there. We get them every year around this time. I think its due to our basement. We have to seal in some cracks in the foundation. We also live near the dam, and near some houses with fields.
ANYWAY-
OK THIS is the scenario I woke up to. MONDAY!!!!
NOAH: Screaming at the top of his lungs, and crying :MOMMY HELP ME !! THERE IS A MOUSE!!! THE MOUSE JUST TRIED TO EAT ME AND BITE ME! MOMMY HELP! HELP! HELP!
(reality-it just ran across the floor near him)
ME: I fly out if bed to find Noah and Amber sitting on our dining table-Noah is crying hysterically, as he explains, the mouse ran across the floor, towards his feet, and under the video rocker.
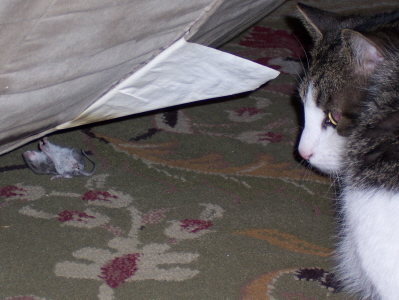
I see our cat Lily sitting with her nose under the video rocker, tail flickering, and her swatting.
I JUMP as fast as I can on a chair next to the kids. I push the rocker forward a little-from the chair.
NOW I SEE the mouse! EEEEEEEEEEKKKKKKKKKKKKKKKK!!!!!!!!!!!!!!!!!!!!!! I am screaming, the kids are screaming. Noah is balling. I want to ball too-but can’t. Trying to be strong for the kids-but its not really working.
The mouse moves in an attempt to make it out from under the chair. Lily is nose to nose with the mouse.
I am FREAKING out, as bad as Noah.
The mouse is trying to bite the cat! I can see it lunging forward, and opening its mouth! The cat keeps swatting it with both paws.
She pounces it and pounces it. It moves from the back of the rocker around to the front. Here is where I can see her going after the mouse.
After 10 minutes of swatting and pouncing I take a closer look. I think its actually dead.
Um, yeah! I think Lily is thinking the same, sine she is now sitting and just swatting like “Hello! Little play toy……..are you going to move so I can chase you?”
Um, NOPE! Not moving. It was curled up, and breathing shallowly. Poor thing. I felt bad.
Then the unthinkable! We moved the rocker,(carefully) and Lily dived forward, and grabbed the mouse IN HER MOUTH!!! I screamed! She ran. She began shaking her head violently. Then dropped it. Um yeah. Definitely dead.
Now what?
Well Daisy went to get it, so I realized “I” had to dispose of it PRONTO!
THAT in itself was a movie in the making. I grabbed a large dishtowel and quickly put it in the trash.
Later on I heard squeaking-YEAH! The mouse came back to life and was in the trash moving around! OMG!!! I opened all the doors quickly grabbed workers gloves, and ran out of the house as fast as I could-tossing the bag far into the back yard.
I needed a shower-I was SOOOOO grossed out.
Needless to say-not a good day.
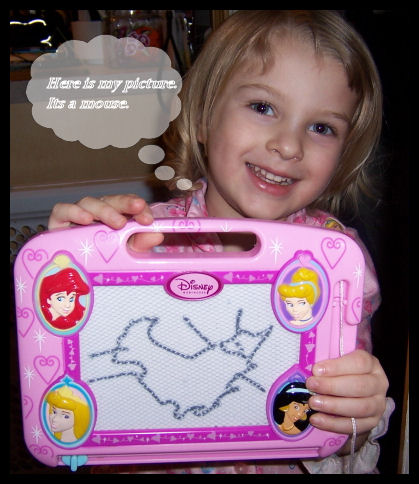
After all this mouse commotion, Amber is NOT afraid of mice. She doesn’t understand the big deal, and says she likes them! She wants to be an animal Doctor like Daisy’s doctor.
OK WHERE did this kid come from? Noah cries at the thought of a mouse, as do I and she wants a closer look!
Here is her picture-of a dead mouse. I had to laugh that it was on its back, with a smile. Pretty good for a 3 year old! LOL!
In case I didnt say-
I am petrified of mice. My fear began when I was little. I had a Hamster name Tinker. One day while cleaning his cage he got out of the “bucket”. My dad went to grab him off the counter, and he BIT my dad. I never picked up that hamster EVER again! I took care of him, but would not hold him, only pet him. He lived FIVE years!!! Anyway-after owning that hamster I have had BAD hamster/rodent dreams my whole life. My kids will NEVER own anything RODENT like-that includes BUNNIES. Sorry to the rodent lovers but I just CANT DEAL!
I HATE mice so much so that while 9 months pregnant with Amber, I did my best to hop up on a counter when a mouse skittered along the cabinets in our kitchen. What a sight that was my my husband. He always tries to scare me when this stuff happens. He gets a few too many laughs.
LAST year, I went to lay down on the couch with Amber, and “something happened” I think I needed to get a blanket, as I moved the pillow ON THE COUCH a mouse went running along the cushion! Have you ever heard of a mouse on the furniture???? OMG! It was like brand new, and I didn’t think about thae fact mice could CLIMB!!!
Do you realize I would have LAID NEXT TO A MOUSE!!! ALIVE????? OMG! I cannot tell you how I freaked out. I made my husband come home from work (he works an hour away).
That was just the worst.
Anyway, this is my sad gross story.
BLECH!
Ill be back later with a blog challenge, and tomorrow have a special post that I teamed up with Jen to do!
My Girls-My crown and glory gift
Feb 27, 2008 Author: mytime | Filed under: Home decor/3-D itemsDon’t they say that about a woman’s hair? Anyway I am using it for my title today-because I like it, and it fits my post.
I love having girls! Being a “girly girl”, its a ton of fun to be able to make things for their room. They really appreciate their mommy made things, and that makes it even more fun.
If you haven’t noticed before I LOVE to alter items and create boxes, bags and other fun items.
So when I found these Crown shaped banks at Michaels I was ECSTATIC! Especially since I had been DYING to ink my Once Upon a Time set.
(Noah informed me he wants a ROCKET bank-oh boy! I have no idea how I will pull that off! LOL!)
My girls room is like a “garden” theme. The walls are a very pale yellow, and I stenciled a picket fence around the room, as well as flowers. I painted some animals in there, and a tree with some birds. Oh yeah, and you KNOW there are butterflies.
This allows me to decorate their room with many colors-mainly purple’s and pink’s, since they both love those colors. It also is easy to fit in their love for Princess themed stuff-without totally re-doing the room.
First up we have Alexa’s Crown bank
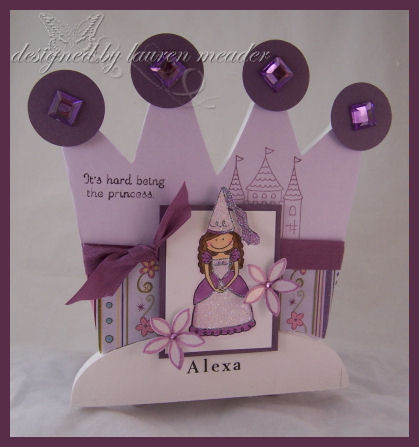
Well as promised, yesterday-see the flowers? Those are the white shimmery bridal flowers. I just colored them 2 colors using my markers! REALLY pretty huh?
I got the girls names on the banks by using Rub-On’s from Making Memories. WORKS PERFECTLY!!!
The purple paper is a pastel pack, by Martha Stewart. The pattern paper is by Cloud 9. It was a gift.
The princess is colored with Copic Markers, and them some dazzling diamonds was added.
For the sentiment-I just inked the part I wanted on the bank.
Now these banks come already painted white-which is a GREAT time saver! I chose to cover the front, and the back-which is the bank box.
You may wonder HOW to even begin to cover something like this!
Well here is what I do.
I place my item face down on the BACK of the paper I want to use. I then CLOSELY trace the outline, of the item. I them CAREFULLY cut on the INNER part of the drawn line.
Then after its cut-a lay it onto my item, making sure it is PERFECT!!
I then use Martha Stewarts modge podge glue (its clear and I LOVE it), apply all over the item, then carefully apply my paper. Once the paper is on, I cover with white scrap paper (don’t want to transfer the dye of a colored card-stock!!!) and use my rubber brayer to seal it down and smooth it out.
IF I do have any overhang, I lay the image flat, face down, and carefully trim excess with my hobby blade, once the glue is dry.
This one was more tricky because you have the crescent in the front! Again-I just cut away with my hobby blade.
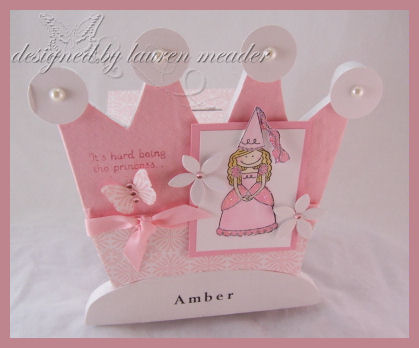
Now onto Amber’s-
Can you see tha back part a bit? This is the bank portion.
It was VERY hard to photograph these and get the back part in the detail. Sorry!!! The back was a BREEZE to cover. For the money slot I just used my hobby blade again. A sharp one really comes in handy.
I used roughly the same layout. Amber wanted a butterfly, so I have to fiddle around a bit. It was hard to keep the balance, adding it.
This is all Martha Stewart WRAPPING paper! The pink is a quilt pattern texture-really pretty IRL, but it made adhering things to it difficult for some reason. Plus it bubbled easily and I had to be VERY careful about the modge podge, and rolling.
There are those shimmery flower’s again. They really are perfect! Great size, and the embossed shimmer really takes you to a WOW!
You would think I worked for Michaels wouldn’t you! LOL! I should get a discount or SOMETHING! LOL! Lord knows I buy enough.
I didn’t have all the same pink rhinestones for the crown jewels so I used adhesive pearls (thanks Barb!!!).
Its funny because Amber and Alexa are VERY different.
Alexa

Alexa is very independent, and likes to play on her own. She loves to play with Groovy Girls-has since she was 14 months old-which is funny. She has like over 65 now. She will make them sing and dance and get dressed a hundred times, and still be entertained. She loves anything artsy. She could color and draw ALL day. She also loves to read.
But when it comes to GIRLY stuff-she doesn’t like doing the little bit of hair she has, nor wearing dresses and whatnot-unless it is of course a Princess dress! LOL! No nail polish, and its rare she will even want chapstick if she needs it.
Her favorite color is purple. That is why her’s is purple, and she has dark hair.
Amber-

this is my girly girl-LOVES to go shopping with mommy-ALL the time.
Loves to do stuff WITH people, but can occupy her own time too.
She is very girly, yet she also has some tomboy traits-too funny! Loves video games, and sports. She even watches the football/baseball games with Daddy.
She loves wearing lipstick, and any make-up she can sneak out of my pocketbook. Always has to have her nails painted, and if she isn’t in PJ’s, prefer’s dresses. She doesn’t play with babies though! Only pocketbooks and trinkets. She will also sneak into my jewelry and wear it.
She loves to sing and dance. She is always making up little songs. She has TONS of little items under her pillow (so much I don’t know HOW she sleeps on it, and her next aspiration is to have mommy get her ears pierced! Um don’t know about that!
Her favorite color is pink, and she is blond-so was her Princess.
I can’t wait to see what Alexa thinks. Amber loved hers, and insisted on carrying it around the house :C While that freaked me out-I did GIVE it to her, so I pleaded that she be careful.
I think these would make super cute gifts for girls-or if PRE-COVERED a fun party activity. The girls could decorate the crown bank, and color their Princess.
Im always on the hunt for fun party ideas.
I wishes this set were out when I had Alexa’s big Princess Party! LOL!
Oh well.
Thanks for reading. Hope you got something out of it.
Till tomorrow!
What a find! You don’t need to be royalty to get in on this bargain
Feb 26, 2008 Author: mytime | Filed under: Cards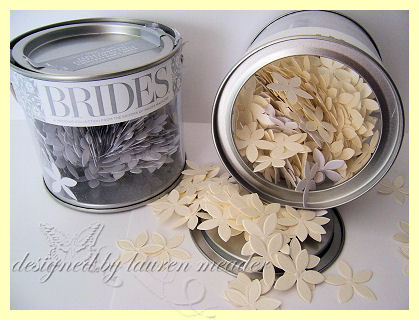
Look at all the pretty flower’s!!! Can you say SCORE!!!!
OK ladies-you don’t need to be a Bride to take advantage of this deal! I was shopping at Michaels,and I happened to browsed by the Wedding section, and for a whopping $4.99-found their BRIDE’S BUCKET, with a TON of GORGEOUS, SHIMMERY, EMBOSSED paper flower’s.
It is on an end cap! So eye’s peeled. AND PLEASE-try to restrain yourself from buying every last one, and leave some for the other crazy stampers! LOL! You really do get a bunch in each bucket.
You are looking at a cream bucket and white bucket.
These are just amazing in person. Imagine what a 50% off coupon could do too!!
WAHOOOO!!
I decided to share what they look like on a project 😀 As well as another use for them.
Keep reading!
The Princess and the Potion
I made the following 2 projects using Once Upon a Time. I had so much fun FINALLY using this set, that I created 6 projects for the day! Two I will share here now.
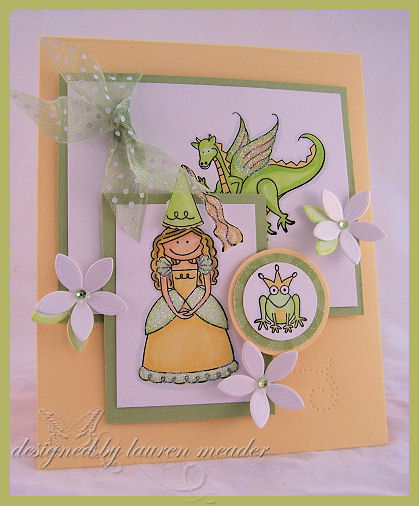
Think- invite to a VERY special princess party.
Here is a card I made to match my little potion (seen below). I went with a yellow/green theme. Not MY usual thought for Princess colors, but since I was focusing on the FROG, they worked! I like doing an unexpected color theme.
I added the little flowers randomly around my card. I colored some cut petals of those flower’s with a green Copic for “leaves” for the flowers! Don’t they look great?!!!! And the SHIMMER in person is SOOO pretty!So that is the cool thing you can do! Make leaves, and color them! More on that tomorrow.
My onare piercing template, helped make the flourish leaf/vine at the bottom flower.
Lots of glitter made it really SPARKLE! I colored my images with my Copic Markers. They really make coloring SO EASY! I actually LOVE to color. Reminds me of being a kid. Only now I have an excuse.
PRACTICE- PRACTICE- PRACTICE! I am by no means a pro when it comes to the coloring with these, but am very happy with my results. Just have fun with it.
Now onto the little gift to match my card-a party favor if you will.
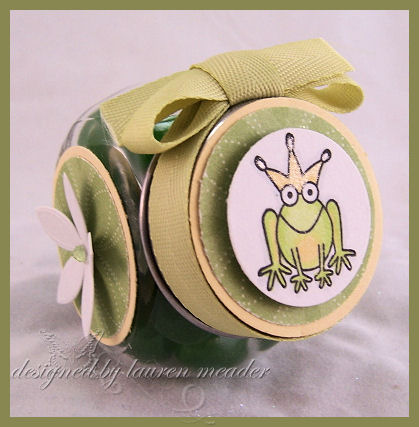 Frog to Prince Potion
Also in the bridal section, I got 20 mini jars for only $9.99-after my coupon. These little jars can hold the coolest little things. When combined with a coupon its only .50 CENTS each!
Think Princess Party Favors! I wrote a poem to match! I included this little poem, rolled up in a scroll!
FROG TO PRINCE POTION
You have a frog-Cute as can be
Is he your true love? How can he be?
Here is the potion, just make him eat three.
Before you know it, your Prince Charming he’ll be.
By Lauren Meader © 2008
————————————————————————————————–
Inside this jar, is a bunch of green Starburst Jelly Beans.
This took literally under 5 minutes to make! Assembly line and you could really whip them out.
See my pretty flowers on the side? PERFECT!
My Spring Moss Twill byPTI-is also a perfect touch! I have to say if you could only afford ONE style of ribbon, THIS is my choice. Its so not like OTHER twill. It feels soft as satin, and as you can see ties beautifully.
So that is it for my BIG FIND, and projects for today. Sorry Im late posting but had a FULL day with the kids.
I am super busy and have a ton of emails to sort through.
If you have questions about Copyright law – PLEASE check out these links. Or you may GOOGLE your own choice of site’s to browse, for info needed.
https://www.library.pitt.edu/guides/copyright/#Copyright
https://www.templetons.com/brad/copymyths.html
I have gotten a huge response from all, and ask you please research your answer’s to your questions. I do appreciate EVERYONE’S opinions on this topic, weather it be in agreement or not. This is one topic that will always have people who disagree.
Again feel free to obtain the answer’s you may need.
Thank you to all for offering your points of view.
All I ask you all be is courteous to your fellow stamper’s, and when in doubt ASK!
Thank you all for reading! You all mean so much to me. I enjoy my time spent here sharing with all of you-
Till tomorrow!
Pretty Paper(trey) Pockets
Feb 25, 2008 Author: mytime | Filed under: CardsOK so this is just a Fancy Schamancy way of saying-I made my own envelope’s to match! LOL! But I LOVE how it sounds, don’t you.
In this post I paired Papertrey Ink (Out on a limb), with Martha Stewart paper (the Candy Shoppe collection), and it was a COSMIC CONNECTION!
(Cosmic Connection-that’s a little word we use for Jay and I when we think/say the same thing at the same time, or kill our friends in a game. Corny inside joke I guess. I means an amazing combination of two things-thats us! hehehehe)
I always forget the IMPACT, a pretty envelope-made to match, can have on your creation and the presentation, until I see one stamped, or I create one to match.
My friend Renee is famous for also stamping her envelope’s. I love it, but am often too lazy to bother! I’m lucky I actually mail stuff out on occassion. My other friend Geny, she always lines the inside panel of her card, and stamps the inside! Its those extra little touches that makes me always say- AWE!
I recently made these cards, with matching envelope’s as a sample to go with my Envelope Tutorial <—click to view, for Scor-Pal, at CHA.
PLEASE note this formula is copyrighted by ME. Not to be submitted for contest/publication/tutorial elsewhere.
I was very upset to hear that my Onesie Card appeared the other day (the 23rd)on Stamper’s Showcase! That means that it was entered to win a contest, even after I posted a friendly reminder (after I was alerted someone tried to copy/paste my instructions, with their project for publication) that the template using my punch idea was not to be used for publication/contest. This is very disheartening to me, and really makes me question sharing certain things in the future.
EDITED TO ADD:
It it my “formula” that is copyrighted.
So you could not get paid for a tutorial or write up USING my formula. Please check out the site if that part confuses you. It will make sense if you see HOW I configure a way to make envelopes for every size.
You can make as many envelopes as you want. Be it using my formula or your own template.
There are MANY ways/templates.
But my FORMULA for creating envelopes for any size is what is owned by me-not the concept of making your own envelopes.
Hope that clears up some questions 😀
OK moving on-
This helps people SEE what the finished products can look like, using all sized cards, when you use my formula. I heard that people really liked them, so that made me so happy.
Once y9ou get going, you can really whip up a nice envelope in like 3 minutes! After the measuring is done, its a breeze.
All you need is a card/note to make an envelope for! Measure it, then follow the directions to get your size/formula for scoring. Then get creating.
Use your Scor-Pal, Scor-Tape, corner rounder, double sided or plain Paper, and a little creativity, then you are ready to go!
Here is a 2 X 3 note card, made using my rectangle scallop nestability
This is your standard A 2 size card-flower is on the closure.
This is a 5 1/2 squared card
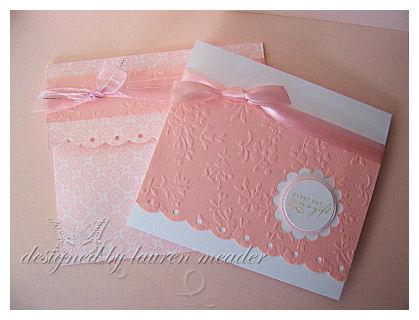
So see how extremely SIMPLE each card is, but paired with that matching envelope, it becomes a more elegant presentation of your note-card/card. Makes quite the statement.
I find it nicer to use double sided paper. But you could certainly add a liner. That always looks elegant.
I would NOT use heavy card-stock. That is too bulky.
My envelopes are held together using the Scor- Tape. I love to add ribbon, scallops and/or flowers.
Well that’s it for now.
Ill be back tomorrow.
Till then.
One Girl, One Boy…………..and a Blue Bird.
Feb 24, 2008 Author: mytime | Filed under: CardsOK let me start by saying that Amber and I had fun shopping. I didn’t go to the stamp store :C
I went to Target and M’s. I just got more stamps in for my design work, and decided I better “play” with that stuff first. Plus it all looked so yummy.
Problem was I got into “re-organizing” rather than stamping.
I got some AWESOME stuff, for up and coming project ideas 😀 YEAH!
Now I have too many alterables! LOL! I also have too many Prima’s and glitter. Is there REALLY such a thing? I think its more like not enough ROOM. I need more CD racks for my UM sets. Thats my next shopping venture. Organizing is endless. If you have it you need to find it. If you can’t find it you don’t use it. If you dont use it, you accumulate MORE stuff, and its a waste of $$$. If you DO use it, then your purchases are totally justified.
OK theres my “insight” for the day.
OK onto the cards.
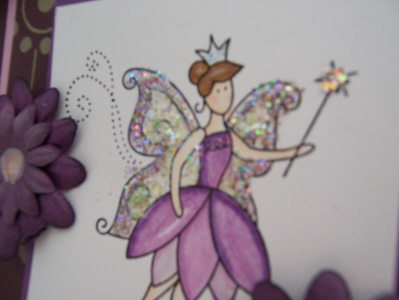
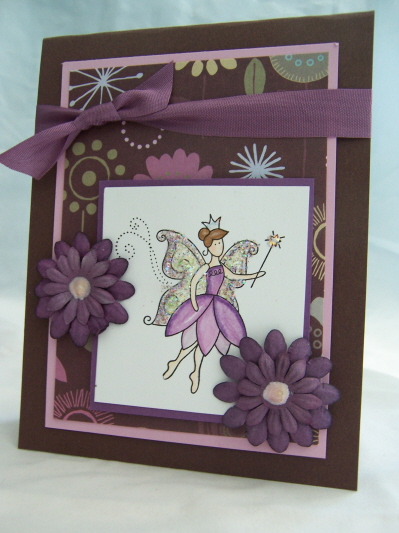 Fairy Wishes
Kids cards are so exciting! Maybe because I LOVE whimsical images, and cutesy stuff.
Don’t get me wrong-I love elegant images and whatnot, just as much, I just have fun with this style too.
So I will share a card for a girl, and a boy in this post. These use the Little Bits, and can be found ->HERE
I used-the Fairy, Cowboy, and Stars bkgd.
I made these 2 samples I am sharing here, a while ago! I know-you never saw them.
Here is why- did you know that Lizzie Anne Designs has a Catalog?! Its BRAND SPANKIN NEW!
Not only does it feature their sets, but it has samples created by all of their designers. Cool huh?
I am in there, several times! REALLY EXCITING! It never gets old, seeing your creations in print.
I am awaitng my copy! YEAH!!
The Fairy one I believe is on the back cover, and is also seen when you click in their website on some of the forum icons! Like the Sketchbook—HERE (check out the left corner!!! See my Fairy card)
I got the OK to share my design samples, so I am starting with these 2.
Its things like this that keep me busy “behind the scenes”, and why Im not online much. If I’m online, I’m not “working”. I have alot that I do, that doesn’t get to be viewed for sometimes, up to a YEAR later! Other time’s it is seen in bulk for a reveal, or over the course of a month. It varies.
Howdy Pardner
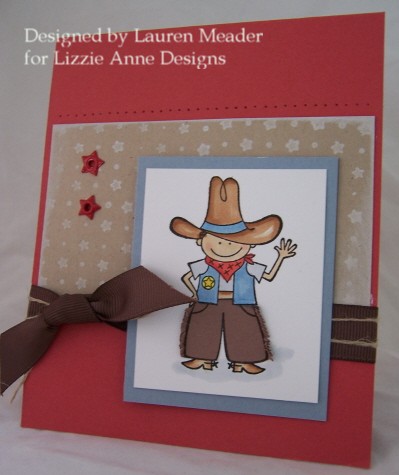
Sometimes, its the smallest details that really make a card. This is pretty simple. On this one, not only did I paper piece the pants (not sure of the western name for them), I made FRINGE!
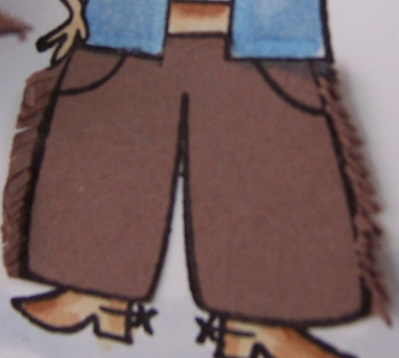
Is that not SOOOO cute! And it took NO time at all.
Now not ALL our samples get picked. That must be the hard part for them, deciding WHAT goes, and what doesn’t!
This one was one of my faves, that did NOT get in-
 Blue Bird
This uses on of my favorite sets that almost got TRASHED before being produced! Its calledL’Amor.
Now what is cool about this bird, is that-it was stamped on Vellum card-stock-colored from the back, and my embossing stylus was rubbed behind it, to make it PUFF out, like a 3D bird! It was then layered over a stamped bird image in my card base.
Really pretty and elegant in person.
I also loved the vellum flowers I punched/sponged, and added to my swirly flourish, which was my “branch”. The swirl is from So Swirly.
So there you have it. Some insight on WHY I am always so busy, even though you may only see a few things I pump out a week.
Hope you are having a great weekend.
Till tomorrow
For the love of Papertrey!
Feb 23, 2008 Author: mytime | Filed under: UncategorizedDid you see the WINNER of the PTI stamps for a year was announced?!!
HERE it is! THAT is one lucky lady!
AND did you see that Lisa Johnson has a tutorial on her blog? If you get the Papertrey Ink newsletter you may have. If you don’t then -> Check out the Treat-A-Lope
Great way to make favors for any shower.
Do you know what time it is?????????
Feb 23, 2008 Author: mytime | Filed under: Cards, Saturday SketchSorry this is late. Instead of stamping yesterday, I took a nap!
Amber was more than willing to cozy up with me and take a nice 2 hour nap! Gotta LOVE that. Its not often, and after this week, I was just wiped out. It was very needed.
When I posted 2 weeks ago about what stamp companies people wanted to see me use in my Saturday Sketch, MOST of you had never heard of Green Grass Stamps! WOW!
I have had samples on here over the last year, but think they have just gone un-noticed. So I decided today to introduce you-if you haven’t been before-to Green Grass Stamps——HERE
If you want to check out daily samples-the Owner Tammy, has a blog, and she as well as the other Green Grass Stamps designers, have daily samples for you to get plenty of ideas.
You will see many of my samples there as well. Just scroll away! I have one there for yesterday, as a matter of fact.
So check it out——>HERE.
OK so the Sketch! Click for a larger view

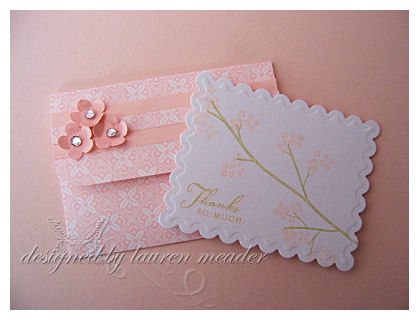
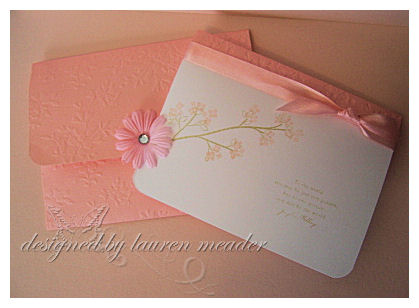
Here is my Thank You bloom
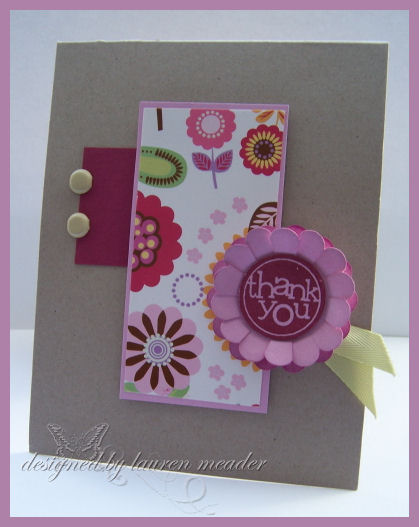
I love this combo of colors. Its Kraft, pomegranate, pale plum, and Spring Moss (by PTI)
I have NO idea who makes this paper, and Im so bummed because I NEED more! Im in love with it.
I used the Thank You set for the flower center on this card. Stamped with Pomegranate, onto the plum, then punched with the ? 1 inch circle.
I then punched 2 pieces of plum card-stock with SU! Scallop. Used scissors to snip the scallops, for flower petals. Then sponged them with ink. The first one in plum, the second with pomegranate ink. Layered them together-then added the “thank you” center.
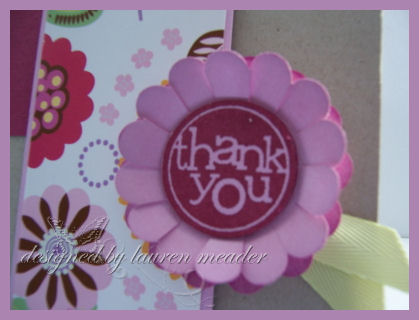 close up of the flower/leaves
The “leaves” for my flower are the PTISpring Moss twill (which is WAY better than Twill you find else-where. Its thinner, and luxurious. Its my favorite of the ribbons-as it has a pretty look with a satin like texture-gorgeous!.
I believe I first saw this flower, created from the SU! Scallop punch idea on MJ’s blog. Sorry I don’t have time to hunt it down, since it was months ago. But, you can check her out. She has TONS of amazing ways to use that punch. You can just get lost there for a few hours.
So there is your sketch!!
I hope you have time to give it a try. Its never too late 😀
Just send us all a link in the comment’s section, so we can all see your take on it.
If you check out Green Grass I’d love to hear what set caught your eye, and what set YOU think is MY favorite!
Well Im off! Amber wants to take a trip with mommy to the stamp store. Can’t say NO to that, now can I?
Till tomorrow
Funky colors + A Funky stamp set = A funky card
Feb 22, 2008 Author: mytime | Filed under: blogger challenge, CardsYES! Today is Friday! LOVE Fridays.
Well as you may now, if you frequent my blog, that Friday is my day to participate in a Blogger’s Challenge.
This week was DEFINITELY a challenge.
We had to use the following colors-which TOGETHER I honestly HATE.
Purely Pomegranate, Old Olive, and Brilliant Blue-BLECH!! When have you ever seen me use BRILLIANT BLUE? If you answered never-then you would be correct.
Anyway, here is what I did for the “challenge”. The colors are true to the challenge but my lighting was off. Being limited for time I didn’t get out my photo set up-but rather took it by the window-on a gloomy day :C SORRY!
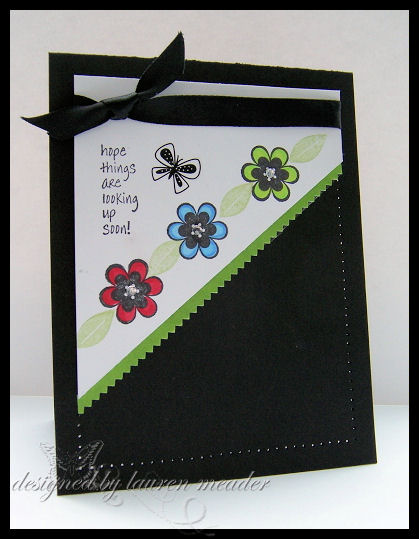 Funky Flower border
When in doubt go with black! LOL! That is how I balance any weird color scheme. OR white. I try to make them “accent” colors. I would most likely NEVER use this combo again. I felt really limited by it.
Since this combo was FUNKY-I decided to go with a funky layout. I like the end result, that being my layout. But again, not THRILLED.
The 1/2 rectangle is paper pierced to continue to look. It would be too plain otherwise. I had some Paper Frills, but they weren’t the color I needed, so I used my markers to make them Olive, then layered it under my main layer, for a little more interest.
I went with a funky flower to create a border using Fun to be Floral. I love that flower image. The leaf is from the In the Tree Top set.
I stamped them in black, then colored with my Copic markers. The flower center’s have some BLING 😀
The sentiment is High Hello’s.
That butterfly is from the SAB rub-on set. Its a really great set of Rub-On’s.
That is pretty much it.
It is snowing here-AGAIN. So Im off to stamp land.
Be sure to check in tomorrow for my Saturday Sketch challenge 😀
I *may* return here later-we shall see.
Till then.
My Etsy

Who I Designed For
Blogroll
- Alicia
- Alli Miles
- Ally Blankenship
- Amber
- Andi @ crafts on a whim
- Angel R
- Angie Z
- Anne Kranitz
- Becky O
- Bee
- Beth Silaka
- Bethany Paull
- Beverly Nash
- Bobbie
- Cambria
- Cammie
- Card of the Week
- Card Positioning System (CPS)
- Cards for Cancer
- Catherine Doucette
- Charmaine
- Cheryl Sims
- Chriss Rollins
- Christina
- Christine Ewing
- Christine Wooden
- Colleen Schaan
- Craft Critique
- Craft Gossip
- Crystal
- Dawn Easton
- Emily Giovanni
- Geny
- Holly
- Igne Groot
- Inspirational Craft Blogs
- Irene
- Jami Sibley
- Jeanne Streiff
- Jen del Muro
- Jeni Bond
- JenMarie
- Jenn Balcer
- Jenn Diercks
- Jenn O
- Jennifer E
- Jennifer Mick
- Jennifer Pereda
- Jennifer-Sweet Treat
- Joanne Basile
- Jodi Collins
- Julia Stainton
- Julie Masse
- Karen
- Kathryn Berthiaume
- Katie Cotton
- Kelley Holland
- Kendra
- Kim Scholfield
- Kris’s Color Stripes! Get inspired here
- Kristen Dubosque
- Kristin Eberline
- Kristine
- Laura @ Sunshine Stamper
- Laura Turnmire
- Laurie Schmidlin
- Lesa Rapp
- Linda Duke
- Linda-LSN
- Lindsey Botkin
- Lisa (lakind scs)
- Lisa Kind
- Lori Craig
- Maggie
- Mara Campbell
- Maria
- Maria Levine
- Mary
- MaryJo
- Melanie M
- Monique Hansen
- Moxie Fab World
- Pam Imholz
- PaperCrafts Connection
- Peppers and Pollywogs Kids party site
- Rebecca Grohall
- Rita
- Robyn
- Rose Ann
- Sarah Vrolyk
- Sharon Harnist
- Sharon Johnson
- Sharon Rivera (a chemisrty with paper)
- Sherrie
- Sophia Landry
- Storage Units, Ink, & More Blog
- Sue Berker
- Susan (Rainy)
- Tangii Crane
- Tracy
- Tricia Traxler
- Trudee
- Velta
- VivLyn
- Zena
MTME Pretty Palette Color Team
MTME Pretty Patterns Sketch Team
My Time Made Easy TM LLC
Shop till you drop!
Lauren Meader
About Me
Copyrighted material
Subscribe To My Blog
Pages
- About me
- Alexa’s Story!
- My Crafty Corner!
- My Time Made Easy™ LLC
- Our Make A Wish Trip to Disney!
- Resume/Publication List
Calendar
Archives
- August 2013
- July 2013
- June 2013
- May 2013
- April 2013
- March 2013
- February 2013
- January 2013
- December 2012
- November 2012
- October 2012
- September 2012
- August 2012
- July 2012
- June 2012
- May 2012
- April 2012
- March 2012
- February 2012
- January 2012
- December 2011
- November 2011
- October 2011
- September 2011
- August 2011
- July 2011
- June 2011
- May 2011
- April 2011
- March 2011
- February 2011
- January 2011
- December 2010
- November 2010
- October 2010
- September 2010
- August 2010
- July 2010
- June 2010
- May 2010
- April 2010
- March 2010
- February 2010
- January 2010
- December 2009
- November 2009
- October 2009
- September 2009
- August 2009
- July 2009
- June 2009
- May 2009
- April 2009
- March 2009
- February 2009
- January 2009
- December 2008
- November 2008
- October 2008
- September 2008
- August 2008
- July 2008
- June 2008
- May 2008
- April 2008
- March 2008
- February 2008
- January 2008
- December 2007
- November 2007
- October 2007
- September 2007
- August 2007
- July 2007
- June 2007
- May 2007
- April 2007
- March 2007
- January 2007
Categories
- About Me
- All That Scraps
- blogger challenge
- camera/photo play
- Cards
- Contests
- family stuff
- FOR SALE
- Home decor/3-D items
- How to FAKE it!
- Introduction
- JUGS Challenge
- JustRite Stampers
- Lizzie Anne Designs
- My family stuff
- My Stamping Space
- My Time Made Easy
- My Time To Color Challenge
- My Time to Create Challenge
- My Timeless Template Challenge
- My Timeless Templates
- Mytime Mail
- MYTIME MOVIE/VIDEOs
- Papertrey Newsletter
- Pink Cat Studio
- Pretty Palette Challenge
- Pretty Patterns Sketch
- Product Opinions and Must haves
- Recipe's
- Saturday Sketch
- Smilebox Creations
- Stampavie
- Tutorials
- Uncategorized
- videos
Most Popular
- Create your own Onesie Card Tutorial-and important NOTE! PLEASE READ (2529)
- Saturday Sketch-Boxed bag holder (2333)
- Going GREEN! Fancy Flower Flourish-Closure Video (1478)
- Fabulous Favorite - Giveaway! (1336)
- a Prayer Request (1232)
- QUICK-Easter Baskets from Nestabilities-PTI style-and blog challenge (1063)
- Teaser Sketch (999)
- February Release Giveway! (and a little peek) (996)
- Group Post and Rambling Rose Video Tutorial (985)
- GIVEAWAY! Who wants it all?! (895)
Recent Comments (RSS)
- 첫충사이트: 완전히 흥미로운 블로그 게시입니다. 저는
- sarah: Wow, Lauren, what a stunning
- hedie: خرید راهبند
- 야동: Love to read it,Waiting For
- 야동: This seller is in a
- 바카라사이트: 여기 처음 왔어요. 나는이 게시판을
- 야동티비: I was surfing the Internet
- 바카라사이트: 비슷한 주제에 대한 흥미로운 정보를
- 바카라사이트: "여기에 제공해 주신 귀중한 정보와
- 온라인홀덤: 유익한 웹 사이트를 게시하는 데
Copyright © 2007 - My Time, My Creations, My Stampendence - is proudly powered by WordPress
This blog has been Tweaked and Designed by Sara Williams