Archive for the ‘Recipe’s’ Category
JRS Last Minute Gift Ideas
Dec 2, 2009 Author: mytime | Filed under: Home decor/3-D items, JustRite Stampers, Recipe's
As I said yesterday, the team at JustRite Stampers is having a blog hop!
This one is SURE to get the creative wheels turning! The focus is on last minute gift ideas. I think this hop will be helpful for ANY time of year. I know I’m often in a scramble for last minute ideas myself.
With the economy where it is I know we are ALL looking for inexpensive ways to acknowledge those around us. When you give anything handmade, I truly believe it speaks to the heart of the receiver. They know you took the TIME to make them something special. Even the smallest gifts can seem that much MORE special. I feel like this is my life long SPEECH! LOL! It’s truly what I live by and WHY I make all the gift packaging that I do. Simply put-dressing up something inexpensive makes it seem like it cost way more and more importantly….. is always given from the heart, and the bottom line is, that matters!
This year for the extra people I want to thank, I am giving my favorite recipe, all bottled up, and dressed for the winter season.
Snow(man) on the go
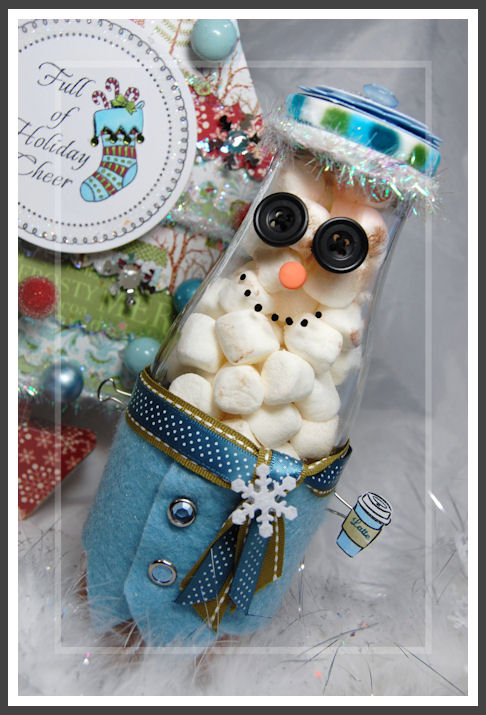
How cute is he?
Made from a simple frapuccino bottle. Just wash in dishwasher, and let dry completely!
Now if you have MANY people on your list buying and drinking that much Starbucks can be PRICEY so check out
—> THIS PLACE <—for a ton of various EMPTY bottles you can purchase! Can you say WOW!
Then alter your design from there. THIS ONE is pretty perfect.
Decorate your bottle , then add your mix.
This is my FAVORITE home made Hot Cocoa Recipe! You can make up several batches in no time!
I found it on the Food Network. Keep in mind the better quality ingredients often make tastier cocoas ![]() (add it to a coffee and YUM!)
(add it to a coffee and YUM!)
Ingredients
- 3/4 cup powdered milk

- 1/2 teaspoon ground cinnamon
- 3/4 cup sugar
- 1/2 cup cocoa powder
- 4 ounces bittersweet chocolate
- Marshmallows
Directions
Combine all the dry ingredients in a large bowl and mix well. Take the bittersweet chocolate and roughly chop it up to give a chunky but consistent size. Mix well with a wooden spoon and then store in a dry airtight container.
This is where YOU need to keep track of how much mix YOU put into each container, so you can print your instructions for the receiver. I like to print mine on a adhesive label sheet, then punch out and stick onto bottom of Snowman Jar.
To make the hot chocolate:
Add 1 cup of water per 1/2 cup of hot cocoa mix.
Heat in a small saucepan over low heat, stirring with a whisk.
Heat until hot, but do not boil, about 6 to 7 minutes.
Serve with marshmallows. (already in your jar :D)
As you can see-my mix is layered in the bottom of my jar. I then topped with marshmallows (and as you can see this makes him LOOK like a snowman!)
You can also make a Snow girl….or SANTA!
Now details…..
The hat

The lid-I punched a circle from blue cardstock. I then layered a scalloped circle piece, with dimensionals for POP.
I used the snowflake image from Merry Little Christmas Borders & Centers Round 1-5/8”. Stamped it in blue ink. (every snowman needs SNOWFLAKES!) I then layered on a silver piece of snowflake table confetti, then added a blinged out button. Gotta have BLING somewhere, even if its a Snow MAN.
The hat rim was created using velvet white ribbon from May Arts, that I used my Copic markers to COLOR!
Just under the lid, I added some tinsel ribbon for that extra WOW!
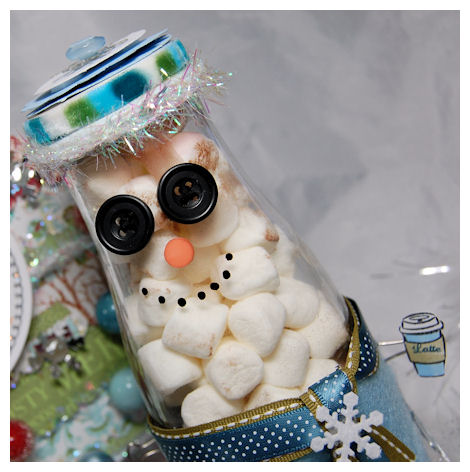
His cute lil face…
Easy peasy!
Two buttons for the eyes (adhered with CLEAR glue dots). An orange piece of Bella Dots for the nose. Then I used a Vitrea Glass Paint Pen in black to dot on my “coal” mouth.
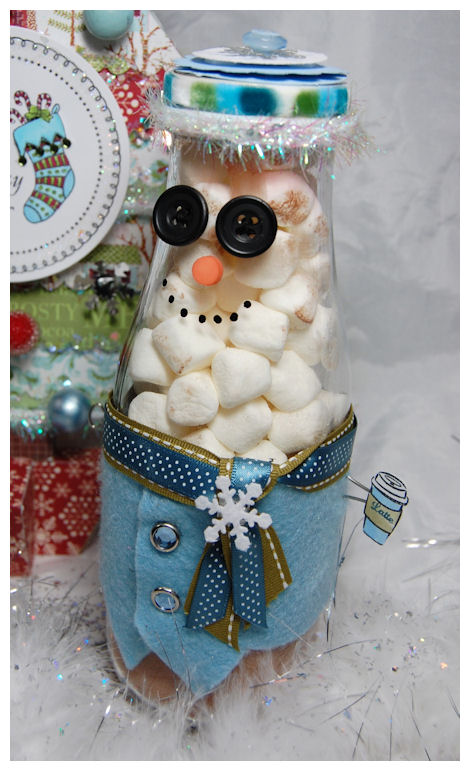
Now the outfit!
I took some felt and free-hand cut a “vest”. It is secured with double sided tape too, so it doesn’t move/shift.
Bling center brads became my “buttons”. Some ribbon for the scarf. I had some felt snowflake ribbon, so I cut a piece for the snowflake there.
Now look at his “hand”. That is a binder clip, inserted into the felt. I used the coffee cup image (and stamped the “latte” sentiment) from Just A Little Caffeine Borders & Centers Set 2″ . Just stamped, colored and cut out. Isn’t that cute, Its attached with a clear glue dot as well. I loved that idea. The cup from Something Sweet Borders & Centers Round 2-3/8” would have worked too.
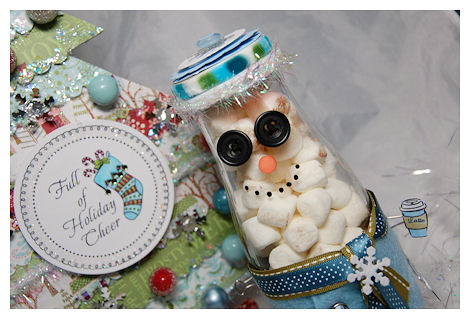
Now isn’t he just delicious?!
If you are eyeing the tree in the background…..you can see THAT project HERE!
I also made a Wreath ornament—->HERE!
Now it is time to move on for MORE last minute gift ideas!
JustRite Blog
Angela Barkhouse
Barb Schram
Becca Feeken
Debbie Olson
Heidi Blankenship
Kathy Jones
Kellie Fortin
Lauren Meader <—-You are here.
Lisa Somerville
Michele Kovack
Michelle Wooderson
Sharon Harnist
Sharon Johnson
Terre Fry
Thanks for stopping by, and letting me share!! I hope you enjoyed this project :DHappy Holidays
Spooky Sweets
Aug 31, 2009 Author: mytime | Filed under: family stuff, Home decor/3-D items, My Timeless Templates, Papertrey Newsletter, Recipe'sWOW! It is September ALREADY! Time for a Papertrey Ink Senior Design Team Challenge.
These are always so fun, and really get me thinking.
Before you know it Halloween will be here, and gone! Never too soon to start thinking WHAT you will do!
Nichole posed such a challenge for the team this month-Make a small Halloween treat!
I thought of WOWING you all with some fancy treat idea. I actually found a TON of really cool stuff to make. I wanted to top myself from last years treats in which I actually made—> EDIBLE EYEBALLS! As I searched, and agonized over WHAT to do, I asked myself “Would I actually MASS PRODUCE these treats for my kids classmates?” Given the fact I loathe cooking, the HONEST answer would be NO! Then it occurred to me…….if you are ANYTHING like me, then you are BUSY, (maybe you don’t enjoy cooking either) money may be tight, and if you have more than a handful of people that you want to spoil with something (like your co-workers, neighborhood party/trick or treaters, your own children’s classmates/teachers-let alone the fact if you have MORE than one child that can really add up!) you really don’t have enough hours in the day (or energy) to slave over something.
I wanted a SIMPLE WOW!
SO……today I will share my true to life treats! This is a SUPER tasty treat that is QUICK, EASY, and INEXPENSIVE! Totally up my alley! It focuses on the PRESENTATION (which I thoroughly enjoy working on far more than cooking :D)
It takes a simple bag of MICROWAVE popcorn (directions below :D) and turns it into a gourmet treat that is loved by everyone! You can make it for ANY occasion and you can also let your children do most of the work 😀 (I love it even more now!)
Now here are the 2 ideas that JUMPED into my head 😀 Both use my template Pretty Petite version of Pack a Picnic 😀
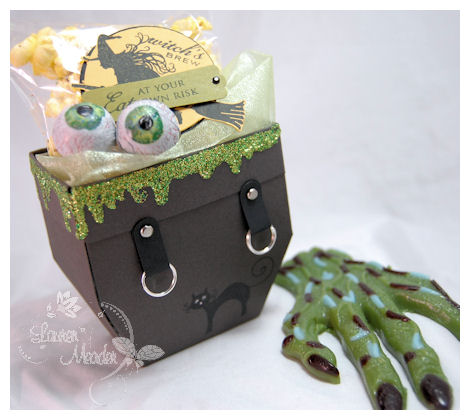
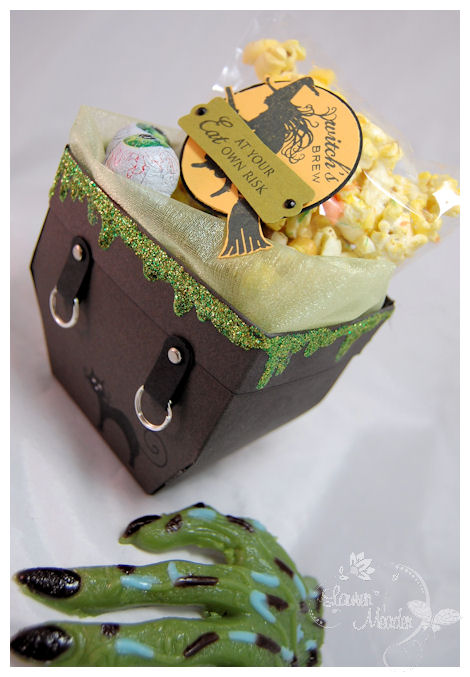
So, first up…….A Witches Cauldron
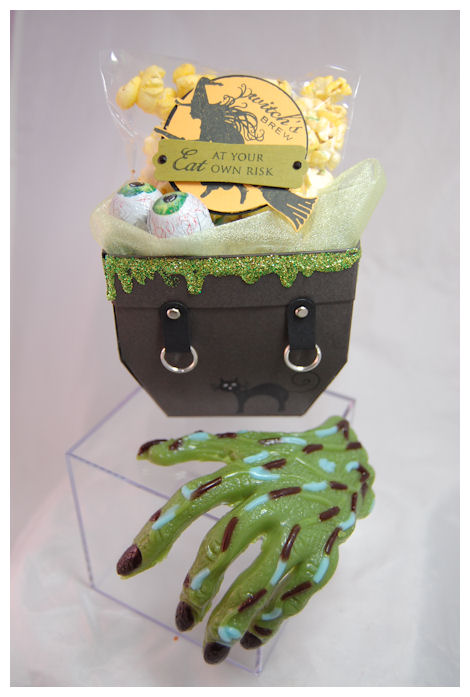
filled with a Popcorn Potion!
I turned the Pretty Petite version of the My Timeless Template-Pack a Picnic into a Cauldron in MINUTES!!
NOTE: You can also take this same idea and make ONE huge Witches Cauldron (using the standard version of Pack a Picnic) to hold all your Halloween bags of popcorn potion, rather than do individual templates for each person/child.
I printed the template onto Smokey Shadow cardstock.
Prior to assembling, I stamped the black cat from Spooky Sweets II, onto the front.
I used a singlo white gel pen for the eyes, then dotted the centers black. Made the nose pink 😀 So cute and easy peasy.
I then cut, scored and assembled as directed.
Then it was time to add the pot handles 😀
I just used my word window punch and folded the paper punched pieces around some jump rings.
I attached them to the pot using silver brads! Perfect pot handles!
I then wanted the Cauldron to appear to be boiling over!
So green stickels to the rescue! Just drizzle large amounts around the entire top!
Let dry a couple hours (its a lot of glittery glue! SO worth it)
In the meantime you can make your Popcorn Potion, package it into the bags, and then make your tags!
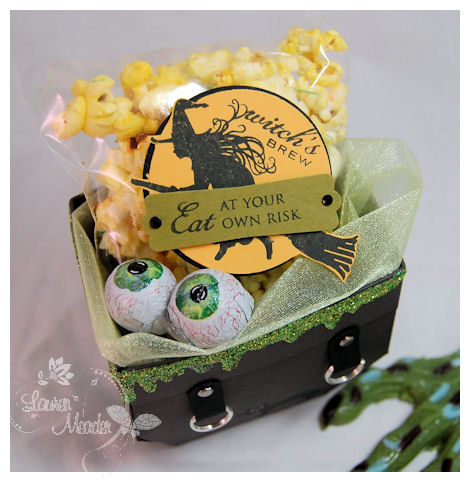
My tag images/sentiments are also from Spooky Sweets II.
I put the bag into the Cauldron, and added 2 chocolate eyeballs! The eyeballs and creepy hand (a huge gummy candy that was actually DELISH! LOL!) were bought at Michael’s Craft store-just add to the fun!
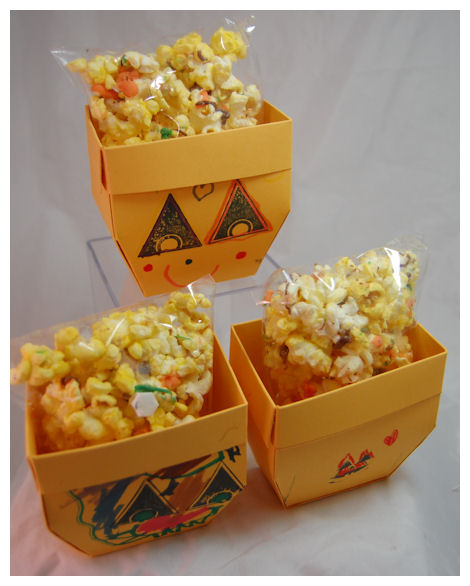
Now I have another idea 😀 and this one is WAY easy.
This SAME template made the CUTEST pumpkin!
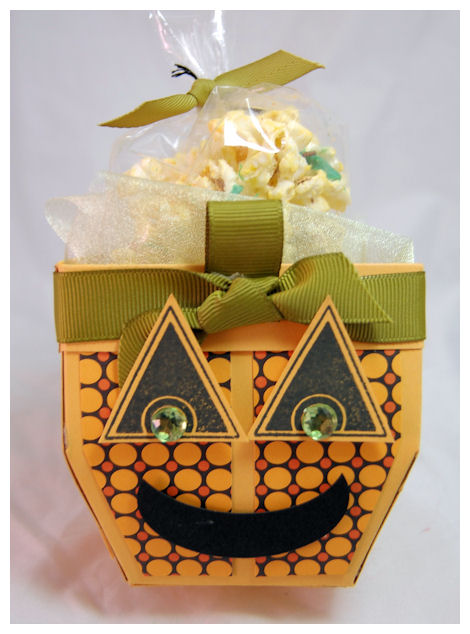
Seriously HOW CUTE is that?
Again you can make a LARGE version too 😀
In case you are KICKING yourself for NOT having Spooky Sweets II (there is plenty of time to order it :D) I decided to use Spooky Sweets (first edition!) for this one.
The NEW! Hocus Pocus paper was perfect for making my pumpkin have some POP!
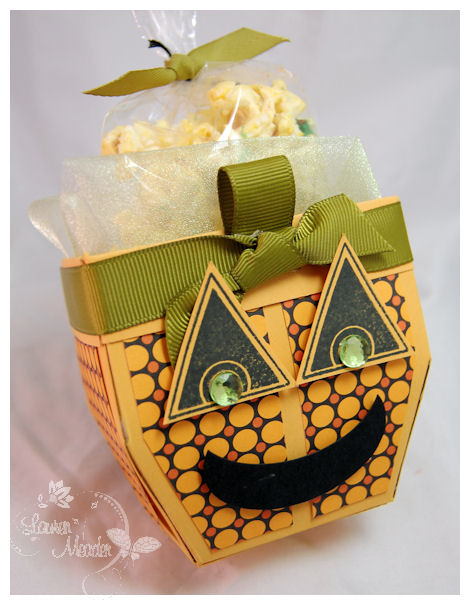
I adore the “make your own pumpkin face” images in that set, and it was SO prefect for this one!
I just stamped and cut out the eyes-adding some BLING 😀 For the mouth I just used oval punches.
I then tied around some ripe avocado grosgrain for the topper
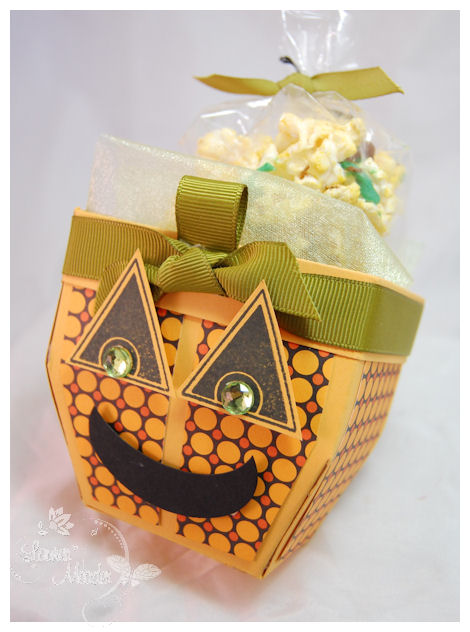
Then filled with my popcorn potion
Now you may be wondering-HOW do you make the POPCORN POTION?!
Well, in just a few minutes you can have a LOT of YUM!!
Popcorn Potion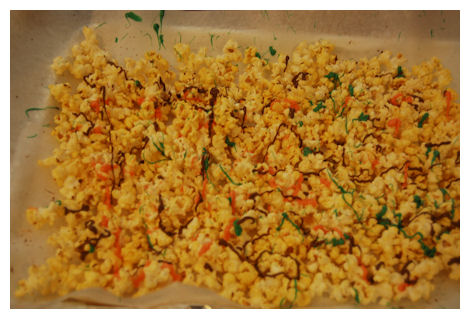
All you need is some Microwave popcorn (or pre-popped popcorn)
Chocolate melting waffers in colors of choice (I chose orange, green and milk choc. only $3 for a large bag that goes a LONG way!!!)
Note: Usually 3 colors is perfect-o!
Directions:
Pop (or pour out) as much popcorn as you need.
Pour Popcorn onto parchment or wax paper-remove kernals!!!!
Let COOL completely!
Melt chocolate wafers in squeeze bottles.
Squirt generously over popcorn.
Let chocolate cool.
Package into baggies!
DONE
This project is SOOOOO easy my kids actually made it themselves:D
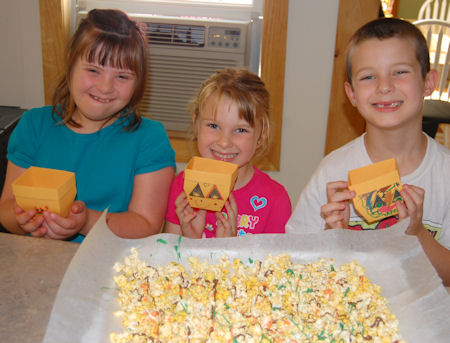
I did a video of this venture, and it was such a FUNNY disaster, that I decided to NOT share it! After-all, I’m trying to be PROFESSIONAL here! LOL! Anything that COULD go wrong did! But my kids did make the popcorn, and they made their own versions of the Pumpkin templates!!
NOTE: ALL the templates make FAB kid project in one way or another 🙂
Top: Amber
Bottom left: Noah
Bottom Right: Alexa
I just assembled the templates FLAT, let them decorate (they stamped the faces and colored), then we put them together. You could have your kids do ALL of it! From making the popcorn (each of my kids had a color) to decorating the templates!
You can make a couple a day and let them decorate them-OR just assemble the template BLANK and let the kids you give them to decorate them for them-self.
ANOTHER idea-the LARGE version could be your child’s Trick or Treat container too 😀
Pretty cool huh?
Can you tell I make my kids do lots of crafts? That means more craft time for me if they do! LOL!
More photos of the kids pumpkins
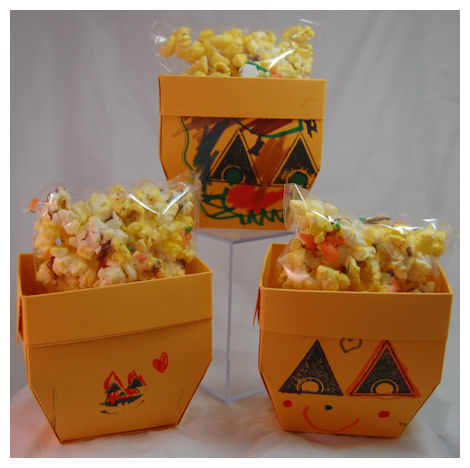
They had fun and were so proud.
As soon as the photo was done the popcorn got eaten.
Bottom line-this was so FUN, inexpensive, , and got the kids involved- as it was total hands on! I love that. Oh and the popcorn really is YUMMY!!! We demolish a huge bag of it 😀
Now it is time to go check out what the team did-
and check out our Guest Designer : Teri Anderson
I HOPE you liked my projects 😀 I really wanted to share something do-able and affordable. I’d love to hear what you thought.
I’ll see you back here tomorrow as I have TONS to share this week 😀
Until then
Baked with Love
OK its time to FINALLY share my recipe 😀
I had to make another batch just THINKING about it!
Trust me, they are BETTER than they look.
Sadly they are an easy 400 calories a COOKIE. But don’t tell that to the person you give them too 😀
Alexa and the cookie bag
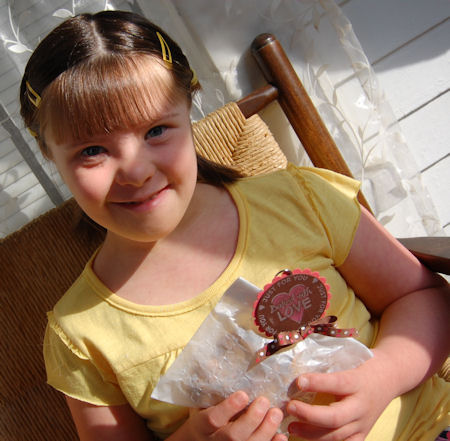
Here is Alexa with the bag of 2 large Coffee House Cookies for one of the teacher’s aids in the class, for a little snack 😀
My kids use 2 hands when eatting mine
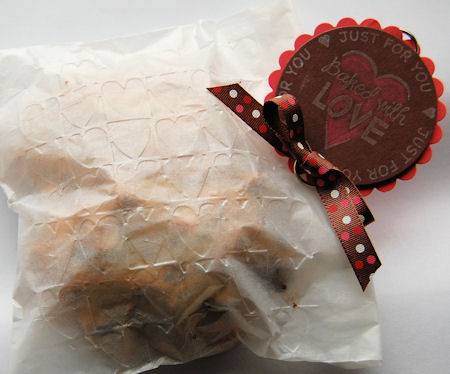
I used a large glassine bag,that I embossed in my cuttlebug machine with the Heart Blocks folder
I then put in my cookies, and with a large paper clip, closed it up.
I didn’t want the clip to be plain so I just made a SIMPLE tag from JustRite Stampers-Homemdae Treats & Borders set
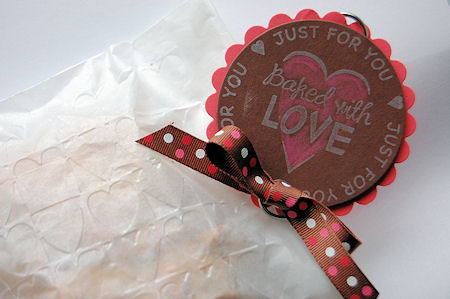
I stamped the sentiment in white craft ink, then colored in the heart with my Primsacolor pencil
Punched, layered and DONE!
Now I know you are DYING for the RECIPE!
Coffee House Cookies
3 Cups all purpose flour
1 tsp baking soda
1/2 tsp salt
1 Cup of softened butter (you can use margarine but butter is better for taste-not the waist)
1 1/2 Cups packed brown sugar
2 eggs
1 cup of chocolate chunks
1 cup of white chocolate chips
1 cup of Peanut Butter Chips
1 cup of butterscotch chips
(you can omit or decrease the amounts and add favorite nuts instead :D)
I mix it all together, in that order. There is not right or wrong 😀
Preheat oven to 350 degrees
I used ice cream scooper to scoop out large amounts of the cookie dough onto my baking sheet. Slightly push down center.
Bake 15 minutes, or until edges are golden brown
EAT WHEN WARM! YUM!
*You can also make these into YUMMY Cookie Candy Bars*
Just bake all of it in a bar pan! Cook about 25 minutes.
Now I don’t cook often :D) But any time I brings these somewhere people go CRAZY!
It also makes a great Cookies in a jar! You can also cut recipe in half 😀
So that is that!
I hope you enjoy.
Vintage Picnic Possibilities
Jun 12, 2009 Author: mytime | Filed under: My Timeless Templates, Papertrey Newsletter, Recipe's, UncategorizedHold onto your seats everyone! I have a LOT to share, and as usual am also long winded!
Sorry, but when I get excited I “talk” a lot. Imagine me in person! LOL! I don’t shut up :D) I can admit it.
For today’s post, I’m very excited, as we have a group project, using the NEW! stamp set inspired my Mish, called Vintage Picnic.
I cannot say enough about this set. I fell in LOVE with it when I saw it! So much so that I ran down to my craft room, to design one of this months releases Pack a Picnic!
I can’t begin to tell you just how much I LOVE Vintage Picnic set. Especially used WITH my Pack a Picnic template. I found there to be SO many possibilities with this set, that I actually had to put the stamp set away so I could get my other projects done!
I kid you not!! I will be using this a TON in the future 😀
So I did 2 projects for today’s post-each using my newest template releases Pack a Picnic, and Card Couture. I also think it would ROCK using Basket Basics 😀
I hope you like them :D) I fashioned them both to be alike/similar.
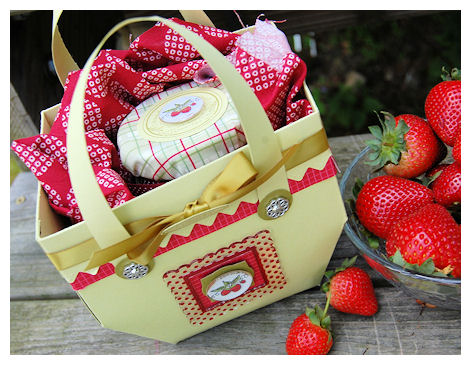
Strawberry Jam Basket
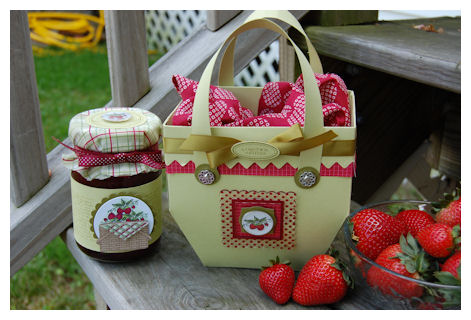
What better way to give a simple gift of jam, than to really dress it up, in my Pack a Picnic Basket?
When I saw this stamp set I was SO taken with the tiny strawberry image in the set, that I had to use it as my design focus.
I then commissioned the mother of my BFF Paulette, to make me some Strawberry Jam, to package as teacher gifts this year.( No! I don’t make my own jam! I’d rather buy it! LOL!-But its STILL homemade :D)
OH! BOY! I opened a jar for me, and I have been eatting it like crazy! NOT a good thing! Boy is it yummy.
Anyway I don’t need 16 jars, so they are being given as gifts.
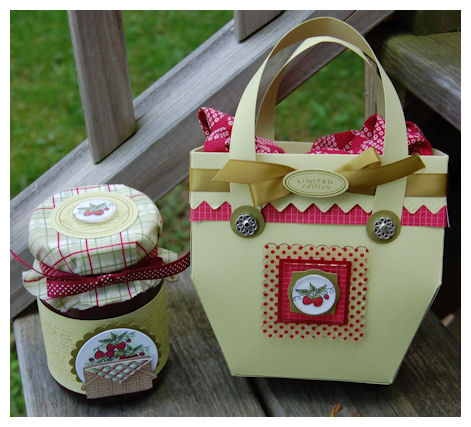
Here is a better view of the basket front.
I used an acrylic frame from Making Memories, on the front of my basket.
I used the Trademarks stamp set from the new release as my center on the basket top!
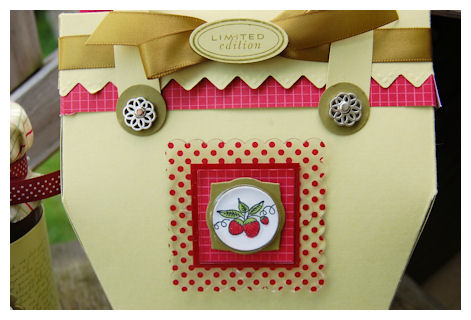
Aren’t the strawberries from the set just so cute? All alone-perfect!
I added a making memories page pebble over the image as well for more WOW!
I think it looks really cool.
I also love the basket handle holders! They are SU! brads. I think they are a nice touch.
The paper round the edge is from the NEW! Release too. Really loving it.
Now we go onto the jar of jam
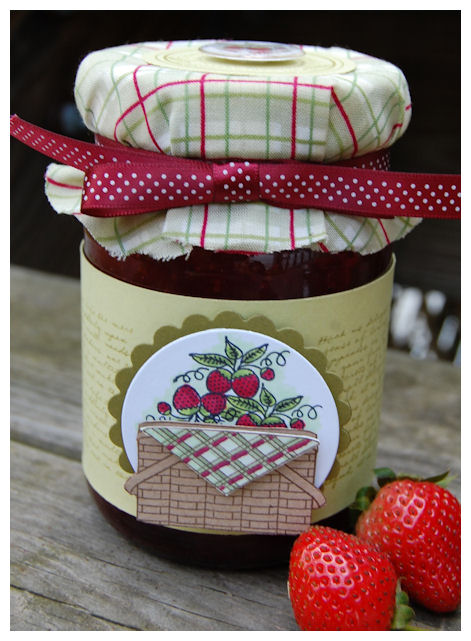
Here I used the strawberry image, stamped 3 X’s to fill my basket with strawberries!
The basket is simply stamped on Kraft cardstock, cut out, and on dimensionals.
I then stamped, colored and cut the napkin image from the set, and layered it onto my basket. The coloring was inspired by my fabric cover, which is tied with Scarlet ribbon.
I had some fabric leftover from my sewing days 😀 It was PERFECT for my jam jar, and actually inspired the entire project! I love how you start with ONE thing, and it has a domino effect!
The wrap was stamped with Text Style bkgd. It had a nice Americana kind of country feel to it. Just that little something extra!
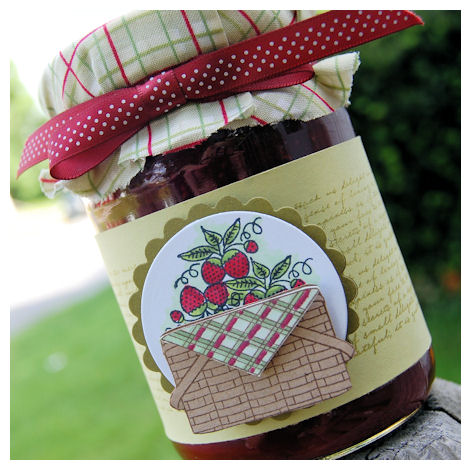
Now for my jar top! I LOVE this idea
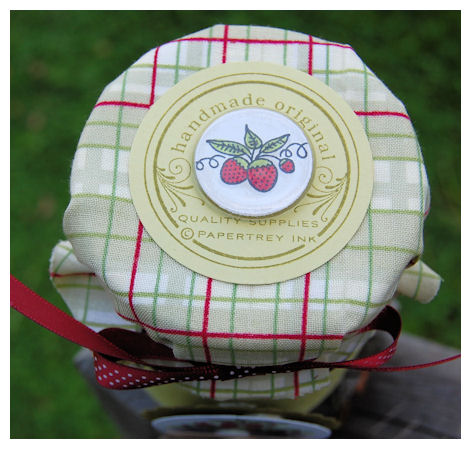
I used ANOTHER image from the Trademarks set, and placed it on the jar lid 😀 Im totally loving these possibilities for this set with ANY/ALL My Timeless Templates!!!
Added the strawberry image, with the making memories page pebble.
This project went to the Principal of our school (I heard he went to bat for me at a meeting-so he is on my good side 😀 where Alexa is concerned!) I also included a package of Pound Cake from Tastefully Simple.
Jam in basket
The Principal was in shock that I remembered to give him and end of year gift! This was his first year as our Principal and I have to say he is doing a great job 😀 Hopefully he remembers this next time I have a problem with the school! LOL! Which I am HOPING not too!
Supplies:
My Timeless Template: Pack a Picnic
Stamps: Vintage Picnic, Trademarks, Text Style bkgs
Cardstock: Spring Moss, Ripe Avocado, White
Ink:Ripe Avocado, Black & Copic markers
Ribbon: Satin avocado, Bitty Dot Scarlet
Other: Making Memories page pebbles & Acrylic Frame, SU! Brads, nestabilities, fabric, Strawberry Jam
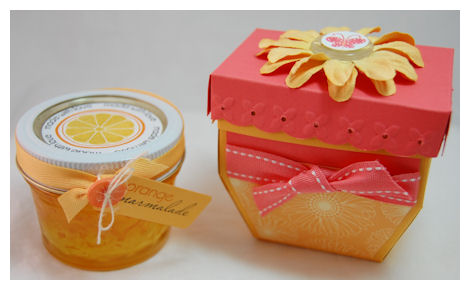
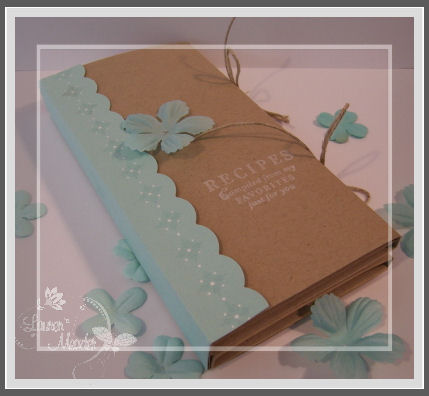
Next up! My other project using Card Couture ©
From the Kitchen of:
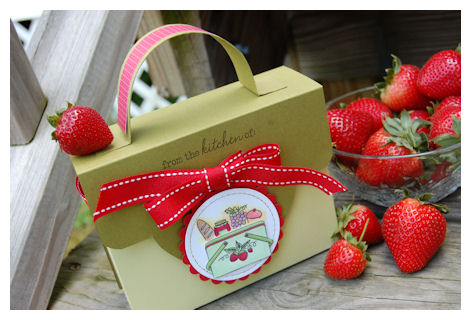
Well as you may have guessed it, this template is PERFECT for recipe’s!!!!
How can you not LOVE the idea of this? It is like the PERFECT presentation for a recipe card holder!
Plus its pretty simple! Love that when making a ton of gifts.
YOUR COST to make : $1.90! Includes cost of recipe cards!
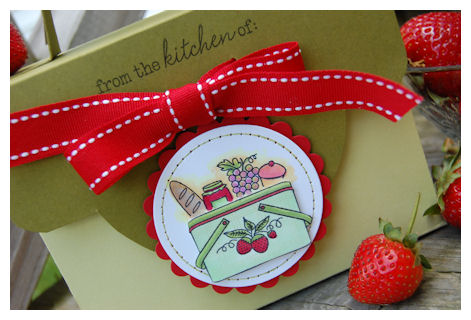
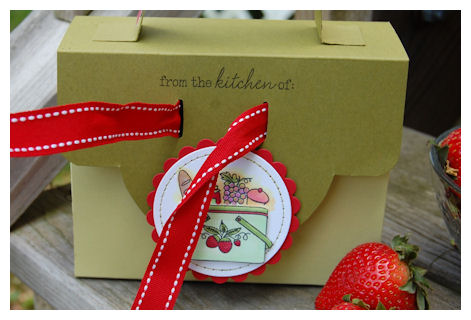
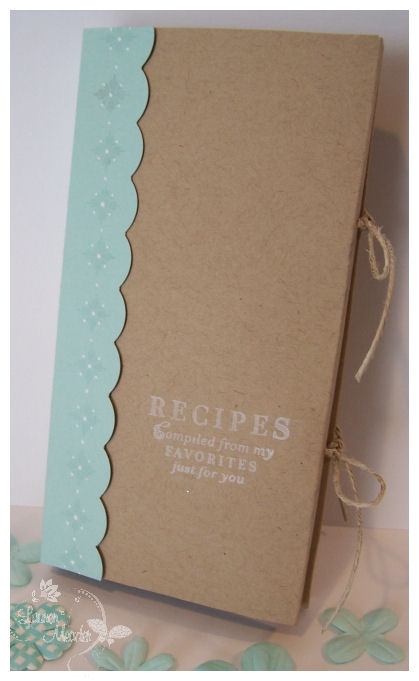
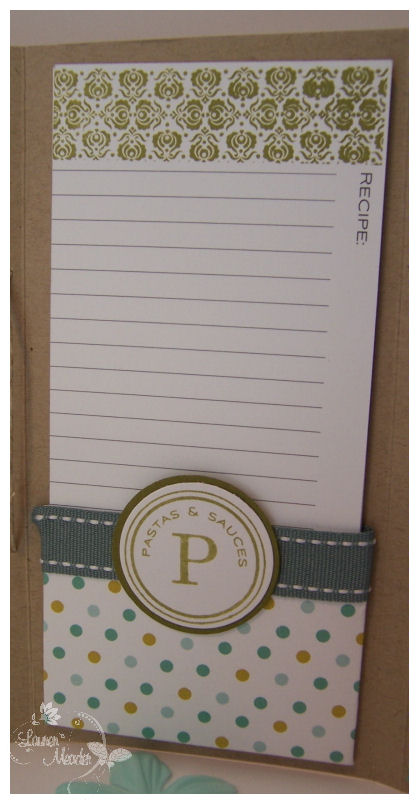
Now for this one, I stamped my food border (which I totally LOVE all the border ideas :D) onto the white cardstock.
I stamped the PLAIN Vintage Picnic basket onto scrap paper.
Then stamped the same mini strawberry image (told you I LOVE it) in the basket center.
I colored my basket with my marker, THEN…………(sadly you cannot SEE it well) I stamped the plaid basket over the colored image in spring moss cardstock, so it has a faint pattern on it!
Then I cut it out, and layered it on the food circle, using a dimensional.
Seriously-LOVE this set. AND the basket takes NO time to cut out either. I don’t enjoy lots of intricate cutting. so Im over the moon about that.
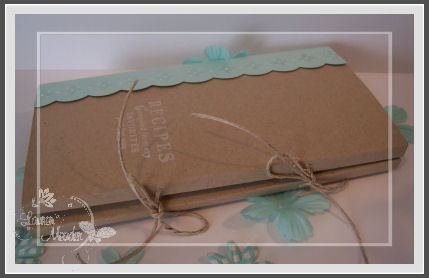
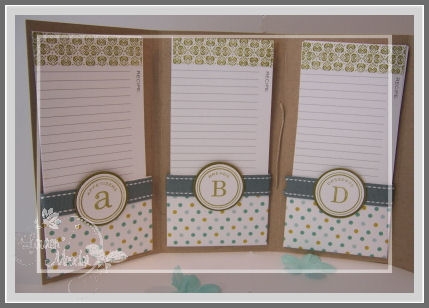
Here is my side view-I used the same patterned paper as my set above, for the side panels
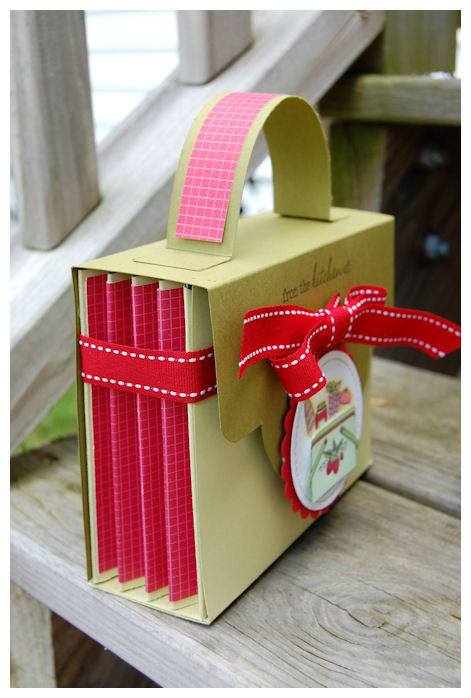
Now I put my ribbon around my template prior to adhering my template flap closure.
In the flap I hammered 2 slots for my ribbon to insert into!
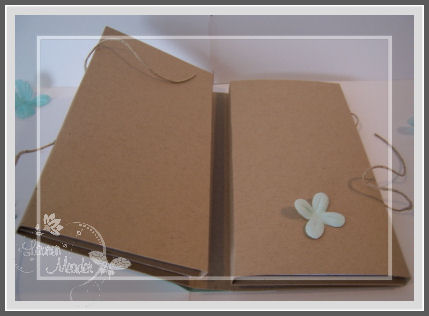
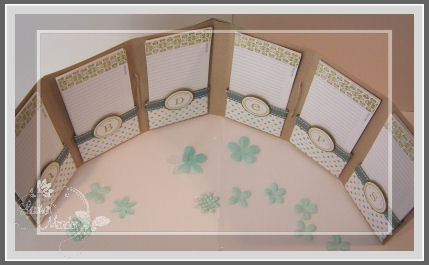
You just untie it, and then Voila…….
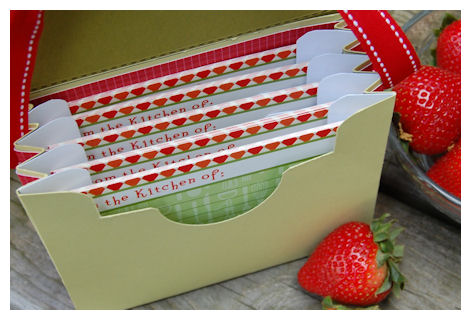
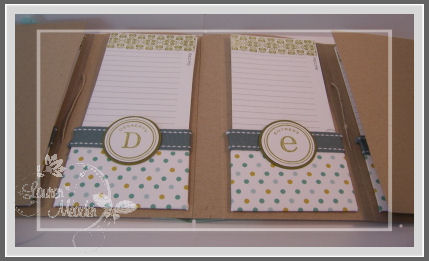
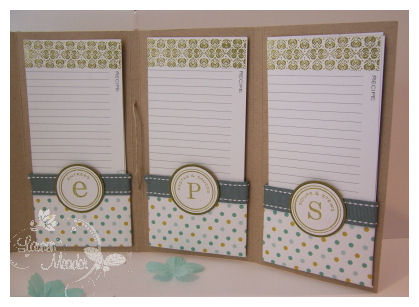
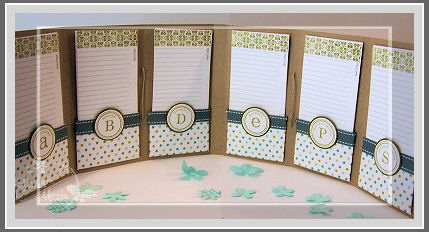
It opens to reveal a box full of recipe cards! 30 cards total-6 in each partition
I love that you can easily see and grab each item in my design.
This template is seriously so fun, and PURTY 😀 (my word for pretty).
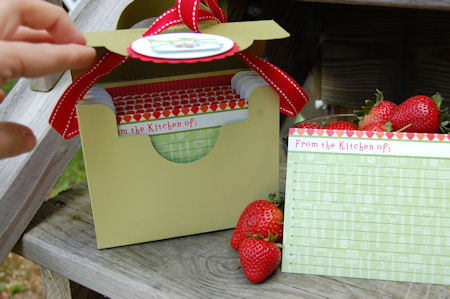
I got these at Michaels the $1 spot. Trimmed them down a bit (I wanted to cut off the nasty looking tomato in the lower rigth corner ANYWAY!) and was done. They match perfectly!
This was given to Alexa’s 2nd Grade Teacher, who I just LOVED this year, and will miss greatly. She loved Alexa (actually requested to have her!) and truly made a huge difference for her this year. Alexa has grown in leaps and bounds this year, especially socially!
Supplies:
My Timeless Template: Card Couture
Stamps: Vintage Picnic
Cardstock: White, Ripe Avocado, Spring Moss, Pure Poppy
Ink: Black, ripe avocado, Copic markers
Ribbon: Saddle stitched grosgrain in pure poppy
recipe cards, nestabilties, making memories slot tool
So there you have 2 templates, both using same stamp set, and colors, and both are super gift ideas! Gotta love that.
I could have made so many variations with these 2 templates and ONE stamp set! I’m just in LOVE!!!!
Make sure you hop around to see just what the other team members have done using Vintage Picnic too!
Thanks again for stopping by! Oh and ALL your super duper sweet comment over my templates 😀
PLEASE Check out Kristen’s Blog for the Saturday Challenge!
Here is a peek at what the girls are all doing-Ill try to play this week.
She will be taking my place as Hostess this week! The end of school and the release has really kept me over the top busy!! SORRY! I just couldn’t squeeze out ONE more thing!
I WILL be posting my Coffee House Cookie Recipe-most likely tomorrow. I have a bit to finish first, and it didn’t really FIT in with my UBER long post! LOL!!!!
Template Peek : Card Couture
Jun 10, 2009 Author: mytime | Filed under: Cards, Home decor/3-D items, My Timeless Templates, Papertrey Newsletter, Recipe'sIts time to share a NEW! My Timeless Template peek with you all.
I want to say THANK YOU.
I love reading your feedback on the ideas I share here during the countdown. Lots of hours, and many late nights go into all of it, and knowing you are excited, and can’t wait to try your own, is a true DREAM for me 😀 Thanks for sharing your excitment with me 😀 And always being so supportive of my creative efforts. I so appreciate that.
If you have emailed me in the last few days I have a email JAM, and I haven’t been home AT ALL! My kids have tons going on, so that is where I am at. Ill work on returning emails this weekend sometime (crossing fingers!) Plus lots of stuff has been getting stuck in my SPAM folder-GRR!
Without further delay-
Introducing ……… Card Couture
Merci

This will be released on the 15th.
There is nothing better than organization that is decorative, and beautiful! We don’t all want to shove everything into a closet or cabinet-and even then, we want it to somehow be pretty, don’t we? Well keeping up with the trends is very important, as is keeping things together. This is not only the PERFECT organizer, but make a fabulous couture presentation. I love giving a variety of cards as a gift. Often the receiver has no idea how to store them until used. Maybe they have begun collecting various occasion cards, and need something to help them stay organized! Well problem solved. We now have a very fashionable organizer that you can make for those special people in your life, or make it for yourself to keep organized!Talk about a fashionable way to store, sort and organize your card creations! Now remember this couture case isn’t *JUST* for cards-you can use it for your children’s notes, your own receipts or coupons, photos, inspirational items, sketches, a birthday organizer, meal planner, …….you name it.
All I know is WHATEVER you decide to use this for, you will certainly be the most fashionable.
So this was my concept project for the template-I made the Couture Holder, without the CARDS! LOL! Oh! WELL! You get the idea right?
It can easily hold standard A2 size cards (4 1/4 X 5 1/2) with envelopes, only in a much more FANCY way.
Close up of the closure:
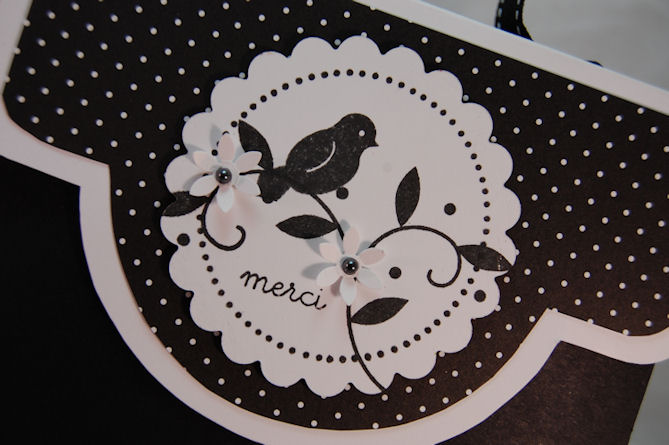
I love the curves, and mat layers.
Now for the side view:
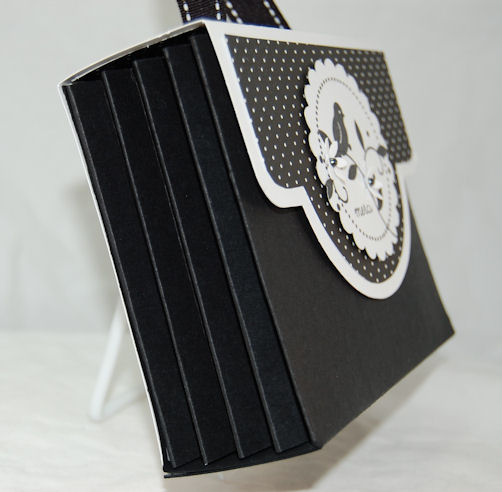
See the fan folding?
Now you would think this is difficult to put together, but after MUCH work and tweaking, it all folds together easily!
Now the MOD/Couture part is the very pretty curvy details of the lid, decorative layers, and the inserts
INSIDE VIEW
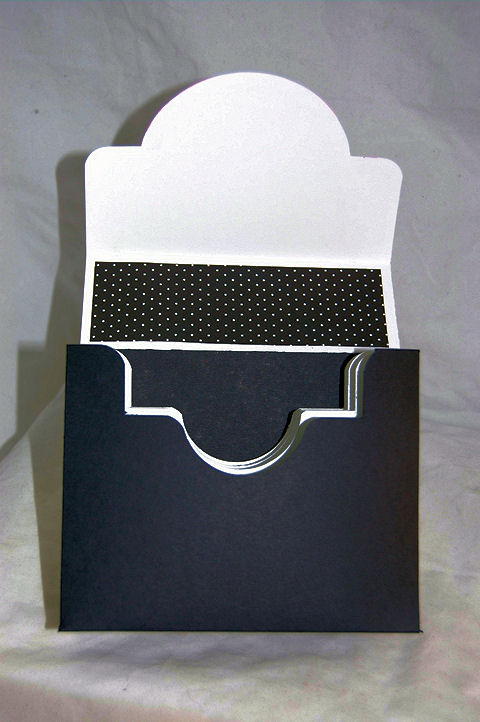
EEK! Bad photo. It was a late night when I designed this one-SORRY
Now you get the idea. You can make the inserts POP! Or make them blend. Up to you.
Supplies:
Stamps: Beyond Basic Borders, Bird Watching, Mega Mixed Messages, Borders & Corners circle
Cardstock: Black, white, Bitty Dots 2008
Ink: True Black
Ribbon: Saddle Stitch black
Here is a sample of another idea use Card Couture
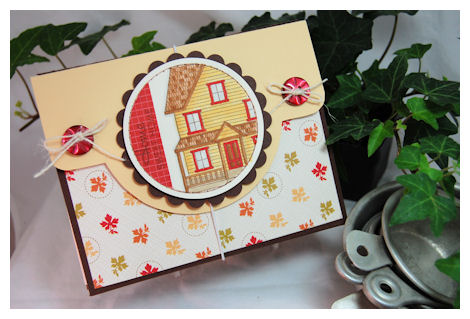
Home Sweet Home- Rolodex
Now-Who doesn’t need a way to keep phone numbers/addresses organized AND handy?
Better yet, have an attractive way to keep then on display, while in reach?!
I know I do!
This idea would make the perfect TEACHER gift, and or a NEW! Home, Bridal shower……any time really! Oh! or new business! All you Demo’s out there , for home based companies-perfect!
Top view:
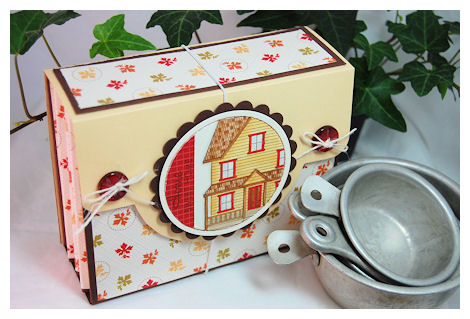
This has an elastic closure.
I got some elastic white ribbon at Joann’s. It is just perfect for this!
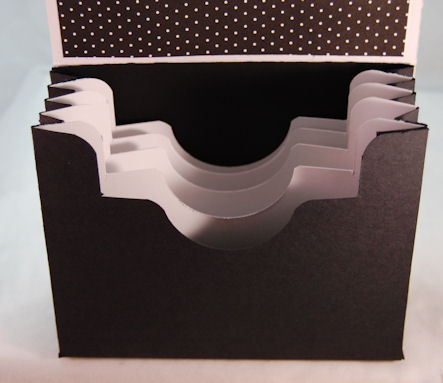
I used some pretty paper First Fruits-for this design. The leaf paper lines my fanned side panels, and top/front decorative layers as well.
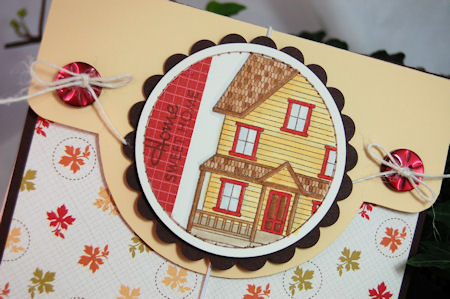
I LOVE the house image from Boards & Beams
I used masking to get only a portion of it in my paper pierced circle. Love the look pf the partial image. Plus it’s a big house to color! LOL!
Loving the twine too .
OK how about an inside view?
Now what I LOVE is the fun curves the holder has! Each insert is so cute!
It also makes it easier to see what is in each section, and easy to pull particular items from the pockets out.
I bought the inserts at Staples! They fit perfectly!! I added some lined index cards too! VERY inexpensive.
Most pre-made Rolodex systems are $10 and UP! Mine was made for just a few dollars (like $3), and I was able to PERSONALIZE it.
Use your stamps and you don’t even have to buy inserts! (Sorry! I’m too lazy for that these days! LOL!) It is more cost effective, and you can make a bunch for gifts at once.
Supplies:
Stamps:Boards & Beams
Cardstock: Chocolate, Rustic Cream, Holiday Vintage Prints, saffron
Ink: Dark Chocolate, asst Copic Markers
Rustic Twine in Cream
Vintage Buttons in Scarlet
Nestabilities, Rolodex inserts, index cards
So what do you think? Pretty cute, functional and fun huh? Oh and you can’t pass up ORGANIZATION, right? :D) Can you tell I have OCD?! LOL!
I know most of you are cramming for Teacher gifts right now! Hopefully with the INSTANT download, you will have time to put the ideas to use 😀
Let’s not forget the IDEA book, that you get with 5 exclusive ideas, with each template purchase 😀
OK Im so tired I may not even be making sense, so I’m signing off. Thank you for taking time out of your own busy life to visit me 😀
In the mean time…….go see more ideas : Nichole’s Blog , Lisa, and Heather
More TEMPLATE peeks from My Timeless Template Guest designers blog Leigh Ann Baird
Also Kelly has another peek.
Thanks for stopping by!
Till tomorrow-MORE fun projects.
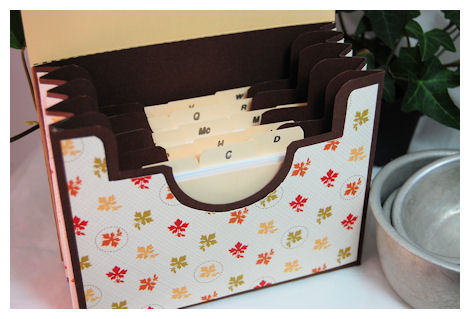
Home-Made Recipe Box
May 21, 2009 Author: mytime | Filed under: Home decor/3-D items, JustRite Stampers, Recipe's, UncategorizedI have promised myself I would clean my house-in its entirety top to bottom today, before I got ANYTHING recreational/work related done. I have been neglecting that duty far too long. Due to all my hustle and bustle for release after release I notice a nice layer of FUZZ growing on my nick knacks! Its no wonder I feel like I have allergies this year-my house is a DUSTY mess!! So not like me. I also notice things creeping into corners that don’t belong. In other words-SPRING CLEANING is in need. My mom owns a cleaning company. Maybe I should hire her to come to help me get my life back together! My closets look like someone ransacked it! Not good :C
You know its getting unkempt when your HUSBAND notices! LOL! Granted I do a quick clean daily, but my house really needs a scrubbin. Now I don’t want it to sound like my house is a disaster! Its always picked up and my bathroom is ALWAYS clean, but the BIG cleaning hasn’t been done. So I’m decaffeinated up and on a mission before the holiday weekend.
Now here is the FUNNY part. Thinking of cleaning my house, got me into creating a house! LOL! See what the mind can do when you are trying to subconsciously AVOID something?! I somehow ALWAYS manage to get distracted. I really do have stamper ADD.
Now I really AM cleaning today, but wanted to share this first 😀
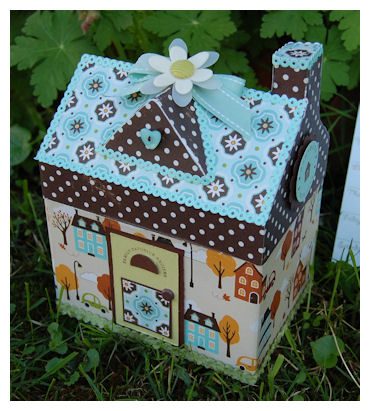
It is a House Box I altered, filled with recipes inside!
I about did a cartwheel for this project! I swear 😀 Lots of time and love went into this
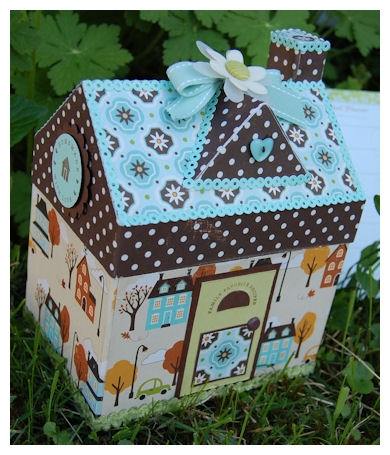
I just fell in love with this paper from October Afternoon-Weathervane. I did a little distressing too.
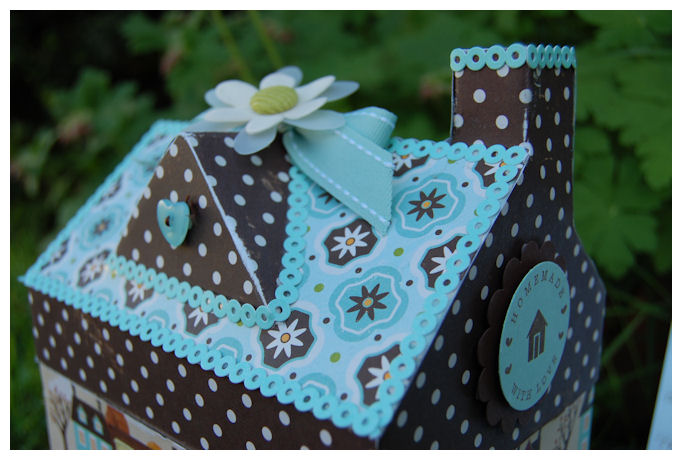
I lined the edges of my chimney, roof, and peak with Doodlebug Paper Frills. Makes is all nice and neat.
Having new paper is just the BEST feeling. See it applied to a project like this is SO rewarding.
I love the colors and everything about this box! LOVE! I am parting with it though-its going up on my Etsy Shop!
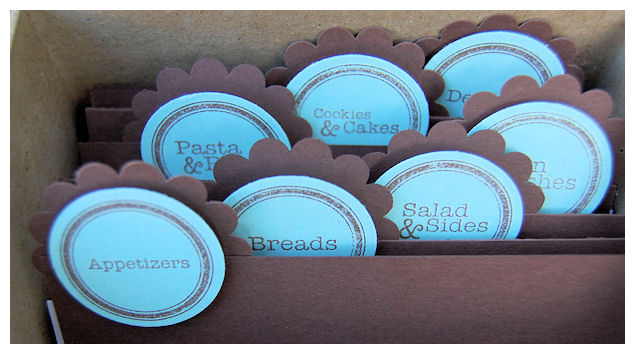
I purchased the Recipe Borders and Centers and have been DYING to make my own version of a recipe box!
I love all the little recipes that can be punched with the 1 1/4 circle OR the 1 3/8 circle-which is what I used 😀
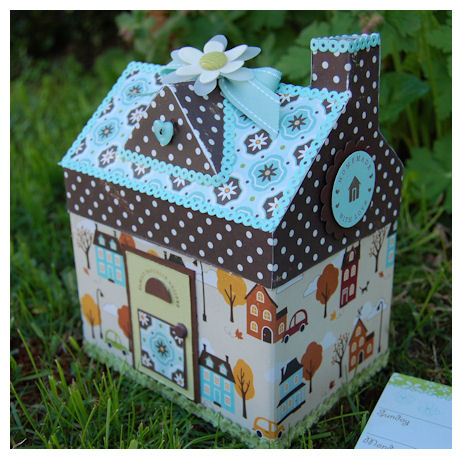
I used the “Homemade” border sentiment for the sides of my box 😀 I love the “pun”. The little house in the center is from Papertrey Ink Holiday Treats set, as is the ribbon, and button in Aqua mist. Flowers are May Arts. Also found atPapertrey Ink
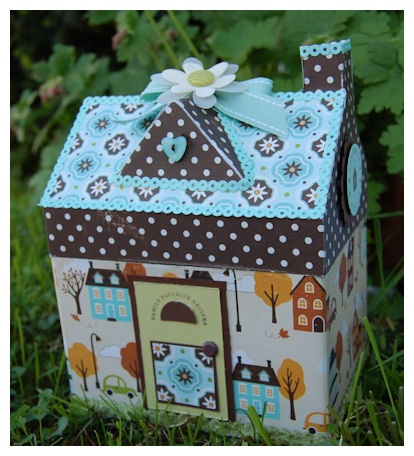
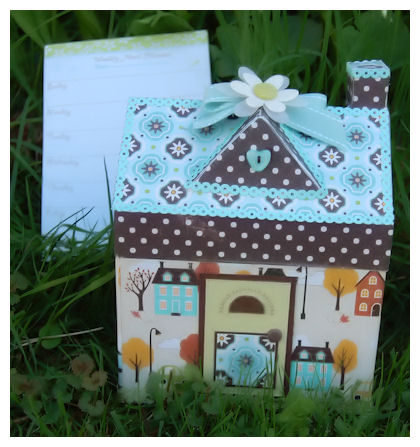
On the door I used the “Family Favorite Recipe” border! I thought it was wicked cute 😀
You can also get this set as ATS–>HERE!
I also used some May Arts velvet ric rac in Sweet Pea along the bottom for my “grass”. You can’t see it in the photo, but its a sweet touch I think!
The top peak comes off and reveals the recipe cards inside.
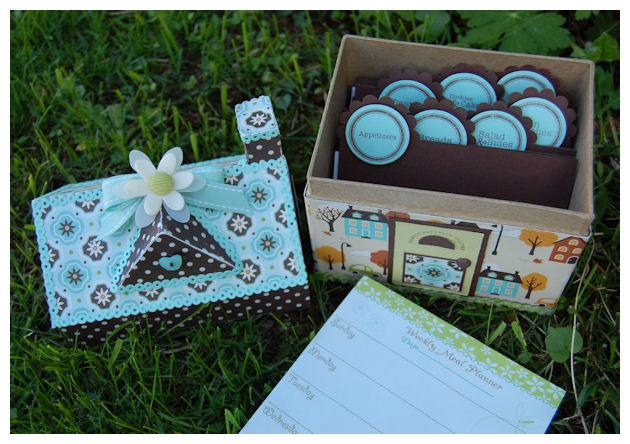
I also found a Weekly Meal Planner magnetic note pad to match!
I had no real recipe cards (EEK! I have some on order though!), so I used blank index cards, and then made my dividers.
This went together easy peasy!!
OK now I can’t go on and on like my usual-I need to get back to cleaning!!
I hope you have a great day, and THANK YOU for stopping by to visit. I know first hand how busy everyone is, and to think YOU took time out of YOUR busy day, to visit me, makes me so happy!! I myself rarely get “out on the net”. I’m in my own little crafting world here, caring for the kids, and “working”! So I want you to know I appreciate you! With ALL the amazing blogs and talent out there, I’m just amazed anyone ever stop by here :D) So thanks again!!!
Till tomorrow……..
Do you cookie swap?
Dec 23, 2008 Author: mytime | Filed under: Home decor/3-D items, My Timeless Templates, Recipe'sOr know someone who does?
Then this is THE post for you 😀
This is a super last minute gift idea, that I hope you find useful.
I needed to finish making teacher gifts, and Amber’s teacher is a HUGE cookie swapper. She has special parties several times a year where they swap cookies and recipe’s!
While pondering what on earth to make her (she stamps too!) I figured why not a Cookie Swap Recipe Holder?! She can bring it with her and have her recipe’s ready to go, and it’s a great holder to house the favorite one’s she receives.
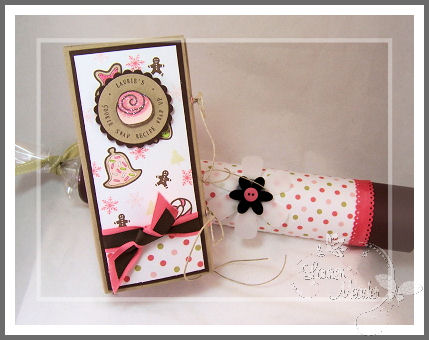
Here it is! Laurie’s Cookie Swap Recipe Wrap up
My Timeless Templates ©to the rescue. I mean it when I say my own templates saved me time this season on time, creative effort, and $$ . I have had fun sharing all these homemade treats with so many people. I keep hearing that I should open a store! LOL! Um, not sure about that.
I used my FREE template-the Recipe Wrap-Up for this gift. I have to say I have really enjoyed being able to easily personalize my gifts with my HUGE collection of JustRite Stamper Letter sets. I have several and they also saved me this year too. I use my small alpha ALL the time. Not sure how I lived without that one. As you can see it made this wrap really special and personal.
I then stamped, colored and cut a cookie for the center design.
Since she loves pink, I thought of a way to combine her favorite color for the holder, and keep it cookie related-using Kraft, dark chocolate, sweet blush, berry sorbet, and white. Ribbon is also from Papertrey Ink.
The polka dot patterned paper is from Polka Dot Parade.
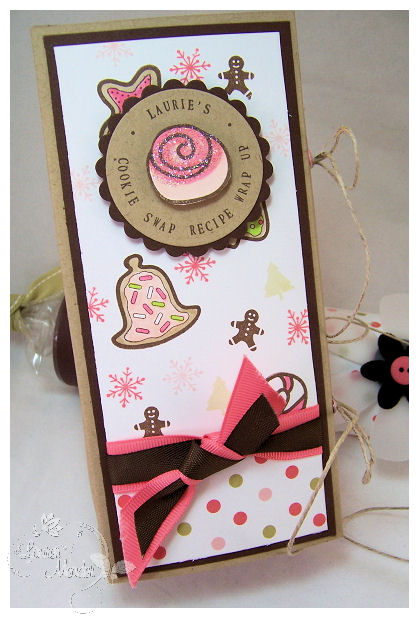
The main paper you see-with all the cookies, and snowflakes, I made myself! I’m beyond in LOVE with the way it came out. I would TOTALLY BUY IT if I saw it.
I have had this set from A Chemistry With Paper called Holiday Treats. I LOVE that set, and it was absolutely perfect for what I needed today. I also used some other small stamp elements from the Holiday Treats from Papertrey Ink.
Here is a close up view to the ties.
I decided that I would use eyelets to keep this sturdy for lots of wear and tear from tying closed, swap to swap.
All unwrapped
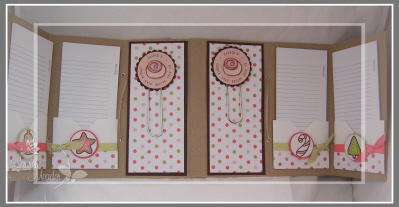
As you can see In modified this version from the original as I didn’t make 6 pockets for my recipe cards, instead I did 2 panels with a altered large paper clip to house any little notes or other things she may want to have handy!
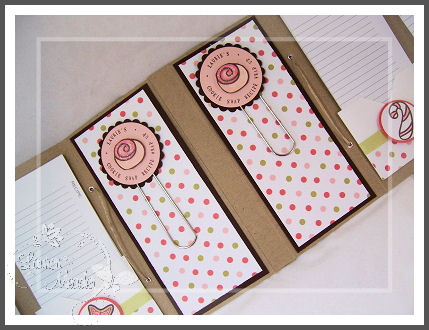
Here is a closer view of the clip-
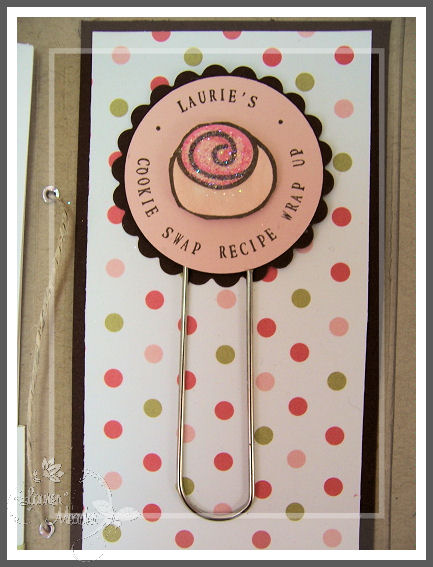
I used my same design element, as on the cover of my Wrap-Up! Stamping again my personalized info
Close up view on the pockets-left
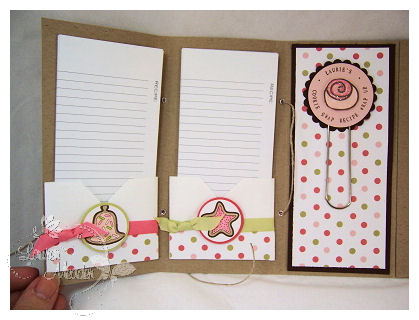
Now do you see my pockets? I found a way to make this go even quicker! Little envelopes that usually hold 3 X 3 notecards! They are PERFECT for the Recipe Wrap Up, and the recipe cards. I just added a strip of designer paper, and some ribbon, then my cookie decoration embellishments, made to match 😀
Other view of pockets on right
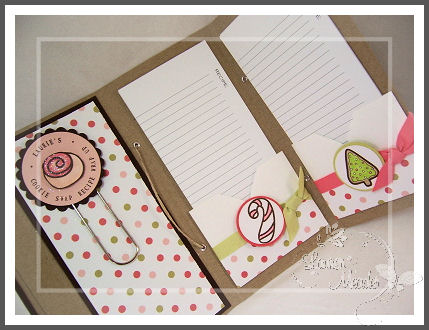
Each pocket holds 10 cards for this one. So she has 40 swap cards, blank- for her to do with what she likes.
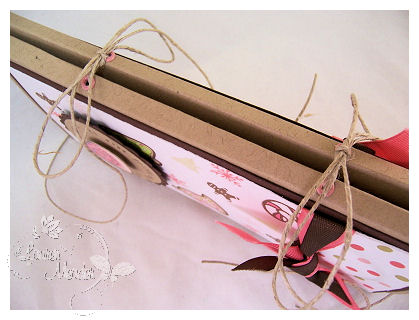
Now you may be wondering what the LONG Tube like thing is!
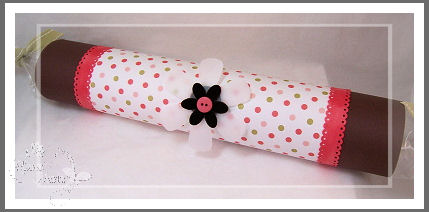
Well, I thought a great companion for her gift would be a magazine of all Gourmet Cookie Recipes, so I purchased the newest Martha Stewart Cookie magazine to give her some great recipes to try for her next swap. I honestly contemplated keeping it for me! LOL!
I didn’t want to give it in a plain ole bag, or plainly wrap it, so I made a tube from cardstock, and added cellophane to the ends. Rolled it up, and decorated. Just untie the ends, and slide out the magazine! Pretty cute huh?
I think it was a really nice co-ordinated gift 😀 Plus it was fun to make.
The dotted borders are actually Doodlebug Paper Frills-colored with my Copic’s to match 😀
PERFECTION!
Since we are talking cookies, and swapping-PLEASE share your favorite cookie recipe here if you have time!
I will share my favorite cookie-the easy way 😀
Do you likeRaspberry Linzer Cookies? They are beyond amazing! My favorite cookie-I think. I have a thing for Raspberry and Lemon stuff (like little tarts or lemon square/bars, tarts-anything! PIE!! OMG! I need to go have dinner)
Short on time? Here is my cheater way to get them done F-A-S-T!
Can you tell I loathe cooking? It totally cuts into my stamp time 😀
I just buy the pre-made Pillsbury sugar cookie dough.
Roll it out, and cut with my circle cookie cutter.
Now, make sure that exactly 1/2 of the circle cookies have a shape cut in the center.
(you can also do shapes like a heart, then do a little heart cut in the center)
FYI-You need 2 cookies for the sandwich-one has a hold in it.
Bake as directed.
Let cool.
Spread Seedless Raspberry Jam on the solid shape, and apply top cookie with cut out. Sprinkle on powdered sugar and you are DONE!!
Easy peasy, and so yummy. No one will guess how super simple that was.
On more DIVINE Raspberry treat! You can have this made in less than 15 minutes-tops! (Doesn’t count chilling time)
Its a Trifle. If you use what I tell you-really low fat and pretty low calories too-if you don’t over eat!
NOTE: I omitted the macaroons for a healthier, yet still scrumptious version
2 pkgs pound cake (Sara Lee frozen section)
1 tub of Fat Free Cool Whip (it does still taste fab)
1- 4 pk of Fat Free vanilla pudding cups (they are Handi-snacks. Then you don’t have to make the pudding-just pour it out of the containers!) (OK you MAY need 2 pks, I can’t remember :C)
1 jar of seedless raspberry jam
1 pkg of fat free/sugar free raspberry jello (make per instructions)
OK direction time
Cut pound cake into slices. Spread on raspberry jam, making pound cake/jam sandwiches.
Once sandwiches are made, cut into smaller sandwich cubes.
Layer sandwich cubes on bottom to trifle bowl.
Layer vanilla pudding, whipped cream.
Repeat steps until you are at top (DO NOT TOP WITH WHIP CREAM YET!)
Now take the prepared jello mixture, and pour it over the dessert. (TRUST ME ITS AMAZING)
Be sure to poke lots of holes so the jello does coagulate and form pockets of jello. You want the pound cake to soak up the juice (and no its NOT a soggy bread thing-that would NOT go over well with me!)
Let sit at least 4 hours in fridge.
Top with whipped cream before serving.
Scoop out & enjoy!
So that does it for me here.
I will be back tomorrow to post and wish you all a happy holiday!
Thank you for stopping by
Papertrey Ink Blog Hop-Polka Dot Parade
Oct 25, 2008 Author: mytime | Filed under: Home decor/3-D items, Papertrey Newsletter, Recipe's, UncategorizedWell today is the 25th. That means there is a PTI Blog Hop! Details HERE!
I wasn’t sure I was going to get to play, let alone upload, but I got it done! Feels so good to get stamping.
I LOVE polka dots, and the Polka Dot Parade patterned paper was a no brainer for me!
With the holidays quickly approaching I wanted to make some gifts that were thoughtful, inexpensive, well made, but not time consuming. I decided a recipe wrap-(AKA recipe card holder), would be a great gift idea, even for male recipients! I would include some great grilling recipes on the cards for the guy’s, or a favorite meal, once I decide who is getting what. In the mean time I can just get them ready!! We do lots of Yankee swaps and I think this would be a fun thing to give with a special set of seasonings 😀 Don’t you?
SO I got to work using the recipe cards, the Recipe Box set, and recipe labels
So when I made my Recipe Wrap card holder I wanted it unfold, and store easily. I also wanted it to hold a nice number of recipe’s without being too much. You know when you get overwhelmed with too much of something, you end up NOT using it. That also makes me thing of it being a great FIRST APARTMENT gift idea too!!! You could even include a shopping list with the recipes you choose! This takes up NO counter space either. Something I personally love, since I don’t like too much on mine.
Front view, all tied closed.
I used my Kraft cardstock, and Aquamist for my mail color on the front.
The Recipe Wrap has 6 categories. You can make more or less if that suits you. Each slot holds 5 recipe’s! I think this is a great gift. Especially if you are a consultant for Tasefully Simple, or Pampered Chef!! The list goes on 😀
Side view of Recipe holder
Untied, and open
Unfolded again
Close up of first 3 categories
Close up of last 3 categories
Recipe-all unwrapped
View from the top
This is a close-up of the pocket that I created to hold the 5 cards per category. I wrapped some ocean tides ribbon across the top, for a nice finished look.
This polka dot paper makes this either masculine or for everyday, anyone. I love the colors.
I stamped the tops of my recipe cards using ripe avocado ink, and one of the card topper images from the set. I think its a nice touch.
Well what do you think? A great, simple gift for those hard to buy for on the list, or if you need a gift for someone you may not know well, or are swapping with!
Well that is all I got for you tonight.
Enjoy the blog hop 😀
Halloween Treats!
Jul 31, 2008 Author: mytime | Filed under: Cards, Papertrey Newsletter, Recipe's, TutorialsThis is post 1 of 3 for today! Please SCROLL down so you see all three!!! PLEASE READ THEM! LOL! I think I developed carpal tunnel typing them all up 😀
It’s the first of August! Can you believe that? WOW! Time is flying by. Before you know it, it WILL be Halloween. I am always looking for cool and fun things to do with my kids and/or for their classmates. Maybe this time I will be ahead of the dash (yeah right! LOL!)
Nichole has challenged the team to come up with some fun Halloween treats.
You can see what everyone else has done here:
I decided to share a cool recipe that is fun, and you can let this kids help with. Hope you like it, and give it a try!
Here goes…………….I would like to share with you my Little Pumpkin Pop-In ©
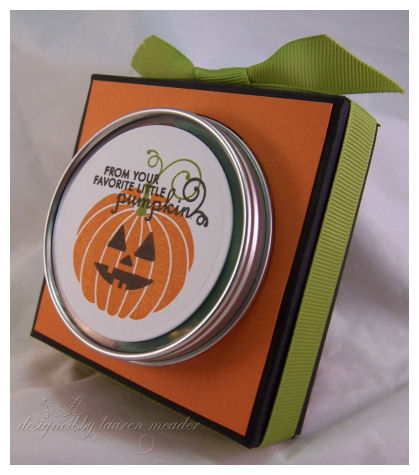
This is a little container cover I made to “pop-in” the super cute 2.5 oz. clear top round tins. Buy them now people! LOL!
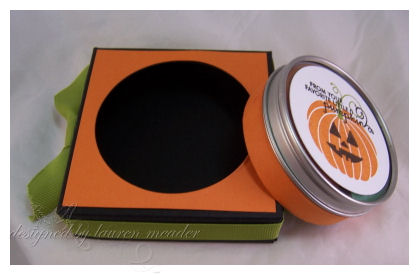 Tin out of the Pop-In ©
I love how it dresses this little tin up. Rather than just having a wrap around the bottom, it really gives you an entirely new gift option.
Please don’t ask me for directions. This is a teaser of more to come!! I am so excited, I can hardly stand it, but that is all I’m saying for now (BHWAHAHAHAHAHA insert my evil little happy laugh). Let’s just say I have been busy, busy, busy.
OK moving on.
I used the Spooky Sweets set for my lid.
I wanted my lids to be super quick and easy to mass produce-think 3 kids……. X’s however many students they have in their classes……………so about 40 kids minimum. SIMPLE.
By now you are saying OK so how is this sharing a fun & cute Halloween treat?
Well its what’s inside that is the FUN part!
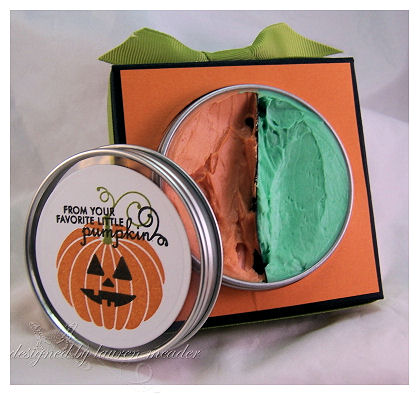
Monster Mash Make-up!
2 TBS solid shortening (AKA Crisco)
1 TBS cornstarch
4-5 drops of food coloring
Make-Up sponges
1) Mix shortening and cornstarch together in a small bowl, until smooth.
2) Add in food coloring. Mix till well blended.
READY TO GO!!
When you are done just rinse off with warm soap & water.
You can whip this up at home in minutes! The kids will love it.
OK I know you are saying EW! But the kids are saying YEAH!!!
Trust me me-Kid tested!! MOM Approved 😀
My Little Pumpkin Amber
OK I never claimed to be an artist! This is as good as it gets. Amber saw the tin and wanted her face to be painted like the pumpkin stamp. I have to admit I was nervous that her face would be stained orange by the food coloring, but it came right off and NO perma-pumpkin face! LOL!
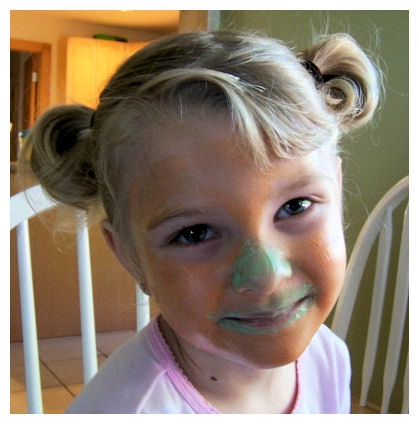
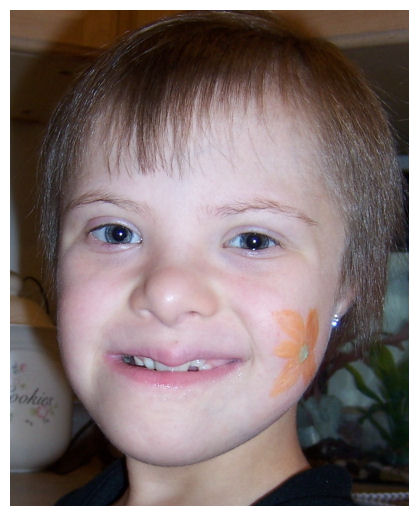
Next up is Alexa-my flower child. She was not wanting her face painted! She said she just want a little flower on her cheek. UGH! That meant I had to “draw/paint”. YIKES!
Now we have Noah-who wanted to be half “The Hulk”, and half boy.
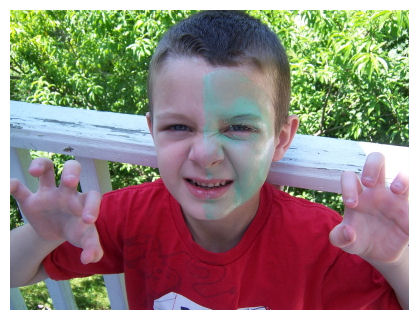
Unfortunately he was “itchy” and scratched it off while I got the camera. It’s one of those things-when you know you can’t touch something you have too! That is his mean face. Still looks cute to me!
All in all it was a super fun & easy afternoon craft and would make great “make-up” for girls or obviously face painting. No expensive paint kits to buy.
I love the idea of making several colors and giving these to the kids classmates. It really whips up quick, just add to the recipe to suit the number of people. The batch above fits perfectly into the tins, if that is any indication. SO each color batch makes a 1/2 of the tin.
So that’s it for me. I hope you like my idea of a fun Halloween treat! Afterall they get PLENTY of candy right?
Thank you again for checking in with me.
Well it is Wednesday. I have lots to do to prepare for the 4th!! Its my grandfather’s birthday that day, so we always try to have a celebration for him.
I am making a KILLER summer Trifle that I hope to share photos this weekend with you all 😀 REALLY FABULOUS! Need to go buy a trifle bowl, and the ingredients today to hopefully I beat the mad holiday rush.
Here is the ingredients for a PERFECT summer triffle 😀
Buy 2 pre-sliced Sarah Lee Pound cakes (usually frozen-just de-that that before)
Frozen Strawberries (de-thawed)
Whipped cream
Raspberry Jello
Snack pack cups of Vanilla pudding (lazy man’s way) or make your own vanilla pudding
Seedless Raspberry Jam
Macaroon cookies
Using the pound-cake-and raspberry jam, and make sandwiches. Cut into small sandwich cubes.
Layer on bottom of bowl
Squish up frozen strawberries (and a little sugar) and layer over cake
Another layer of sandwich cubes
layer macaroons, then vanilla pudding. End with cake layer.
Make raspberry jello-poke a LOT of holes into the dessert and pour into trifle mix. Make sure you make a LOT of holes so you don’t get Jello POCKETS. Refrigerate for 2 hours. When ready to serve top with whipped cream (and fresh strawberries optional)
That is it. Its is SO delicious. If you have someone with Coconut allergies OMIT the macaroons. What I love about is its NO BAKE!!! YEAH!! So simple to whip up last minute 😀
So speaking of celebrations………………MFT is having their 2 year Birthday release and celebration tonight. She is releasing 4 sets and 2 singles. I have a good 8 samples in all to share! LOL! But figured I’d do a little at a time 😀
This one is of my FAVORITE creations from the release:
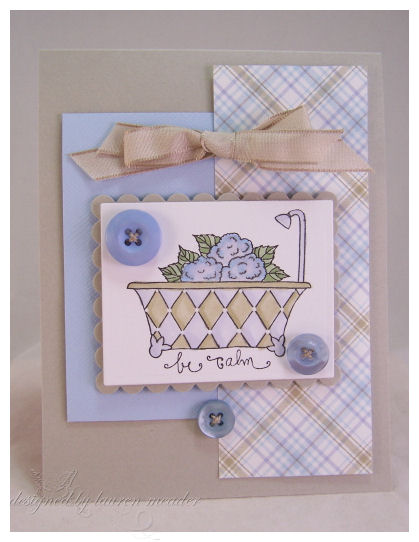
Be calm
Isn’t this card just that? Calming. I so love it. I love the colors and the layout. Crisp clean and simple. One of those simple OH’s!
I am on such a button kick its ridiculous! I have no idea why, but I love it. I have this large mix bag of buttons (I believe its from Foo Fa La) and they are just the prettiest collection, of all colors. Soooooooo happy I splurged the $5 for the bag because digging through and finding all the perfect pretty buttons to match, and actually finding them is so fun.
Next is another of my favorites :
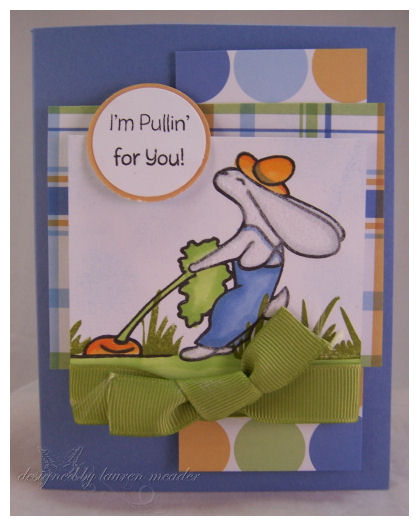
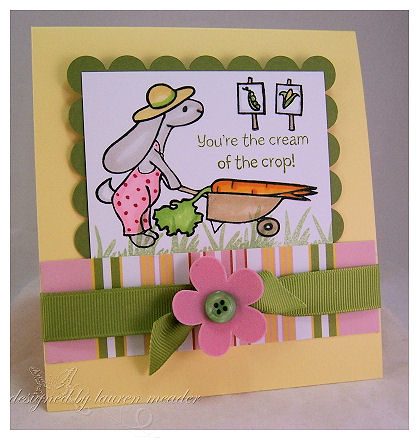 Gardener Flopsy
I love this one too. Summer colors, simple clean layout. I love the velvet flower in the center. Just FUN!
Call Me! PUT the sunglasses on for this one! LOL!

I love this layout too. I do love the bright cheery colors, even though its a little much. This SCREAMS teen card doesn’t it? I know I sat on the phone like this endlessly talking to my BFF’s! Or boys! LOL! This set MAKES you want to be bright & cheery.
This Making Memories paper is so fun. I have used it on numerous cards, and always like the colors.
I just took the phone from the main image and popped it out with a square punch, to make it like 2 people chatting it up 😀 The bling Bella Dots are the perfect teen touch too.
So that is that.
My Favorite Things will be hosting a New Release Cocktail Party tonight (July 2nd) 9-11pm EST EASTERN time. July marks MFT’s 2nd birthday AND Kim’s 40th birthday, so there are LOTS of discounts and deals this month in addition to all the MFTeasers and your chance to become MFT’s next Guest Designer! Check out the MFT forum for all the details!
We are releasing:
Gardener Flopsey
I’m Pullin for You
Peppermint – Annie LaPoint
Be Calm – Annie LaPoint
Bunny Slippers
Call Me! – MINI of the month
To celebrate the MFT birthday:
*$2.00 US shipping for under under $40, and for Intl orders and US orders over $40, they’ll receive the same $2.75 discount until July 15th.
*FIRST 50 orders will receive a full sized stickles glitter glue!
*The Girl Who Wants It All special for the July Collection is $49.95. These specials will ONLY run for the release month.
I hope to see you later at the MFT party!!
My Etsy

Who I Designed For
Blogroll
- Alicia
- Alli Miles
- Ally Blankenship
- Amber
- Andi @ crafts on a whim
- Angel R
- Angie Z
- Anne Kranitz
- Becky O
- Bee
- Beth Silaka
- Bethany Paull
- Beverly Nash
- Bobbie
- Cambria
- Cammie
- Card of the Week
- Card Positioning System (CPS)
- Cards for Cancer
- Catherine Doucette
- Charmaine
- Cheryl Sims
- Chriss Rollins
- Christina
- Christine Ewing
- Christine Wooden
- Colleen Schaan
- Craft Critique
- Craft Gossip
- Crystal
- Dawn Easton
- Emily Giovanni
- Geny
- Holly
- Igne Groot
- Inspirational Craft Blogs
- Irene
- Jami Sibley
- Jeanne Streiff
- Jen del Muro
- Jeni Bond
- JenMarie
- Jenn Balcer
- Jenn Diercks
- Jenn O
- Jennifer E
- Jennifer Mick
- Jennifer Pereda
- Jennifer-Sweet Treat
- Joanne Basile
- Jodi Collins
- Julia Stainton
- Julie Masse
- Karen
- Kathryn Berthiaume
- Katie Cotton
- Kelley Holland
- Kendra
- Kim Scholfield
- Kris’s Color Stripes! Get inspired here
- Kristen Dubosque
- Kristin Eberline
- Kristine
- Laura @ Sunshine Stamper
- Laura Turnmire
- Laurie Schmidlin
- Lesa Rapp
- Linda Duke
- Linda-LSN
- Lindsey Botkin
- Lisa (lakind scs)
- Lisa Kind
- Lori Craig
- Maggie
- Mara Campbell
- Maria
- Maria Levine
- Mary
- MaryJo
- Melanie M
- Monique Hansen
- Moxie Fab World
- Pam Imholz
- PaperCrafts Connection
- Peppers and Pollywogs Kids party site
- Rebecca Grohall
- Rita
- Robyn
- Rose Ann
- Sarah Vrolyk
- Sharon Harnist
- Sharon Johnson
- Sharon Rivera (a chemisrty with paper)
- Sherrie
- Sophia Landry
- Storage Units, Ink, & More Blog
- Sue Berker
- Susan (Rainy)
- Tangii Crane
- Tracy
- Tricia Traxler
- Trudee
- Velta
- VivLyn
- Zena
MTME Pretty Palette Color Team
MTME Pretty Patterns Sketch Team
My Time Made Easy TM LLC
Shop till you drop!
Lauren Meader
About Me
Copyrighted material
Subscribe To My Blog
Pages
- About me
- Alexa’s Story!
- My Crafty Corner!
- My Time Made Easy™ LLC
- Our Make A Wish Trip to Disney!
- Resume/Publication List
Calendar
| M | T | W | T | F | S | S |
|---|---|---|---|---|---|---|
| 1 | 2 | 3 | 4 | 5 | 6 | 7 |
| 8 | 9 | 10 | 11 | 12 | 13 | 14 |
| 15 | 16 | 17 | 18 | 19 | 20 | 21 |
| 22 | 23 | 24 | 25 | 26 | 27 | 28 |
| 29 | 30 | |||||
Archives
- August 2013
- July 2013
- June 2013
- May 2013
- April 2013
- March 2013
- February 2013
- January 2013
- December 2012
- November 2012
- October 2012
- September 2012
- August 2012
- July 2012
- June 2012
- May 2012
- April 2012
- March 2012
- February 2012
- January 2012
- December 2011
- November 2011
- October 2011
- September 2011
- August 2011
- July 2011
- June 2011
- May 2011
- April 2011
- March 2011
- February 2011
- January 2011
- December 2010
- November 2010
- October 2010
- September 2010
- August 2010
- July 2010
- June 2010
- May 2010
- April 2010
- March 2010
- February 2010
- January 2010
- December 2009
- November 2009
- October 2009
- September 2009
- August 2009
- July 2009
- June 2009
- May 2009
- April 2009
- March 2009
- February 2009
- January 2009
- December 2008
- November 2008
- October 2008
- September 2008
- August 2008
- July 2008
- June 2008
- May 2008
- April 2008
- March 2008
- February 2008
- January 2008
- December 2007
- November 2007
- October 2007
- September 2007
- August 2007
- July 2007
- June 2007
- May 2007
- April 2007
- March 2007
- January 2007
Categories
- About Me
- All That Scraps
- blogger challenge
- camera/photo play
- Cards
- Contests
- family stuff
- FOR SALE
- Home decor/3-D items
- How to FAKE it!
- Introduction
- JUGS Challenge
- JustRite Stampers
- Lizzie Anne Designs
- My family stuff
- My Stamping Space
- My Time Made Easy
- My Time To Color Challenge
- My Time to Create Challenge
- My Timeless Template Challenge
- My Timeless Templates
- Mytime Mail
- MYTIME MOVIE/VIDEOs
- Papertrey Newsletter
- Pink Cat Studio
- Pretty Palette Challenge
- Pretty Patterns Sketch
- Product Opinions and Must haves
- Recipe's
- Saturday Sketch
- Smilebox Creations
- Stampavie
- Tutorials
- Uncategorized
- videos
Most Popular
- Create your own Onesie Card Tutorial-and important NOTE! PLEASE READ (2529)
- Saturday Sketch-Boxed bag holder (2333)
- Going GREEN! Fancy Flower Flourish-Closure Video (1478)
- Fabulous Favorite - Giveaway! (1336)
- a Prayer Request (1232)
- QUICK-Easter Baskets from Nestabilities-PTI style-and blog challenge (1063)
- Teaser Sketch (999)
- February Release Giveway! (and a little peek) (996)
- Group Post and Rambling Rose Video Tutorial (985)
- GIVEAWAY! Who wants it all?! (895)
Recent Comments (RSS)
- 첫충사이트: 완전히 흥미로운 블로그 게시입니다. 저는
- sarah: Wow, Lauren, what a stunning
- hedie: خرید راهبند
- 야동: Love to read it,Waiting For
- 야동: This seller is in a
- 바카라사이트: 여기 처음 왔어요. 나는이 게시판을
- 야동티비: I was surfing the Internet
- 바카라사이트: 비슷한 주제에 대한 흥미로운 정보를
- 바카라사이트: "여기에 제공해 주신 귀중한 정보와
- 온라인홀덤: 유익한 웹 사이트를 게시하는 데
Copyright © 2007 - My Time, My Creations, My Stampendence - is proudly powered by WordPress
This blog has been Tweaked and Designed by Sara Williams