Just plain cute
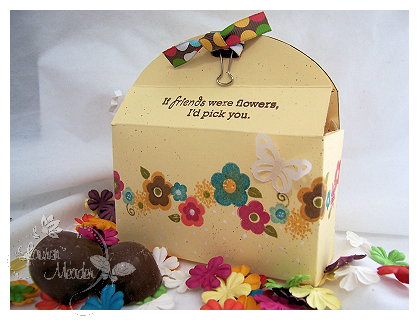
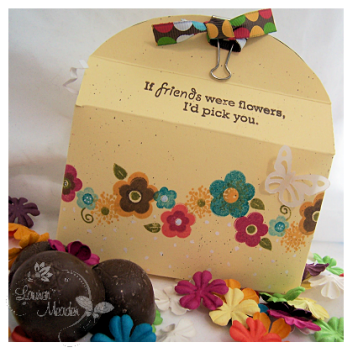
Feb 12, 2009If friends……
As you have witnessed, the Rounded Wrap up! © box can be a variety of things. It can be a character, can have layers, or be very simple! Any way you decorate it, its just so adorable!
I love it because there are so many “little” treats we look to package ALL year, and this really fits the bill. Especially if you are mass producing.
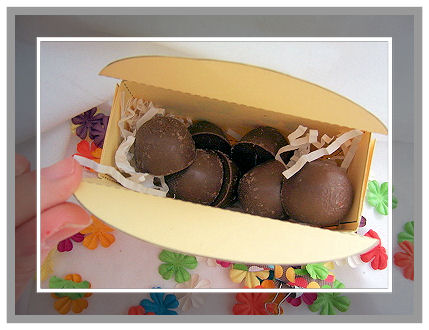
I was inspired by my Prima flowers to make the design for this box-which holds some YUMMY decadent truffles (OK honestly I DID snitch 2! LOL! But thats it I swear)
I will say that unless I were giving this immediately I would have added them inside a ziplock bag for freshness 😀
I printed my template onto Lemon Tart cardstock. Very cheery I think.
I used a clip to keep this one closed, tied with a little ribbon.
Now I just used Green Thumb and layered my flowers for a fun look. I used a white gel pen to add my “dots”.
I loved the colors and simple look this has! The flowers go all the way around. This came together really quickly-like most of my projects.
Thanks for checking in 😀
I’d love to hear what your favorite CHOCOLATE is!!
Mine is Godiva 😀 Raspberry Starfish-YUM!! Or for a CHEAP alternative I LOVE Caramello bars 😀 and Take 10. Oh and Flipz (chocolate covered pretzels)
OK I need to STOP talking about chocolate.
Till tomorrow

Ahhh…..The simple joys…..
Feb 11, 2009WOW! Has this been an exciting month at Papertrey Ink or what?!!
I’m going to have quite the creative meltdown when its over.
I have my favorite project to share with you today that I made using my Basket Basics © template (being released the 15th)
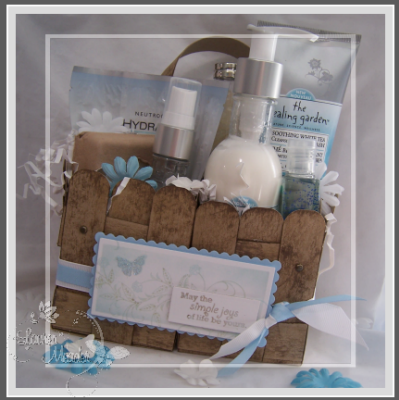
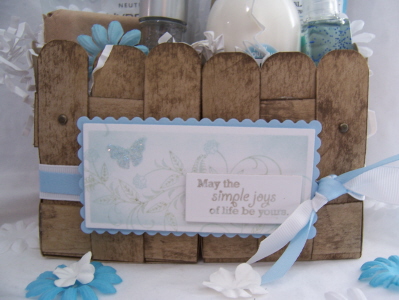
Simple Joys
For today’s project I combined 2 of the completedBasket Basic’s templates to make a basket duo!! Just make 2 baskets as directed, then using redline tape, adhere the sides together to give you one larger basket with 2 compartments.
Now you could even made it a quadruple basket and add all kinds of amazingness to it!
I used Kraft cardtock for my template, then distressed it with Tim Holtz tea and walnut inks.
I was so inspired by the design on the bath products that I used that as my inspiration for the gift. Its great to be able to personal your packaging to match you gift!
Its quite sparkly in person.
Spring rain was the perfect color.
The With Sympathy was used for my main image. Sentiment is from Green Thumb.
I put my handle in the back to look like many other store bought baskets I have purchased.
I LOVE packaging bath and beauty products, and now with this template you can save your money on the packaging (since the template is SO CHEAP!! with endless use :D) and use it on what’s inside.
Here is the side view:
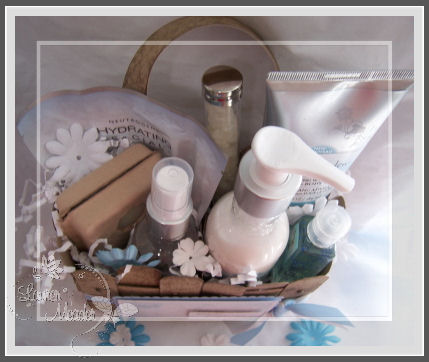
Look at everything that can fit in there!
Top view:
We have a large body lotion, body wash, hand sanitizer, bath salts tube. body spray, bar of soap and a hydrating face mask! With a little room to spare.
Now speaking of a little pampering and SIMPLE joys……..
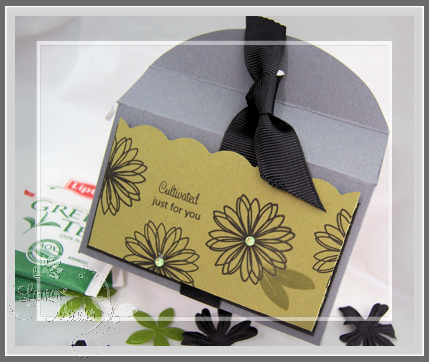
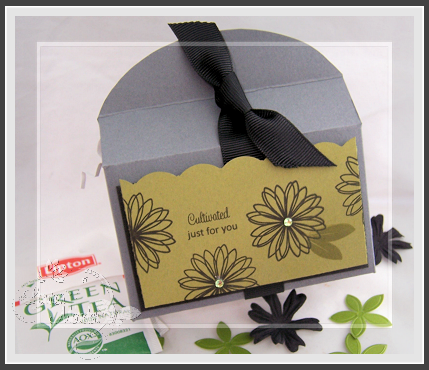
How about using our Round Wrap Up! © to package some tea packets?
Better yet, green tea!!
I know I package this stuff with like every template! LOL! But it really can be a thoughtful gift. Plus its very inexpensive. I love that.
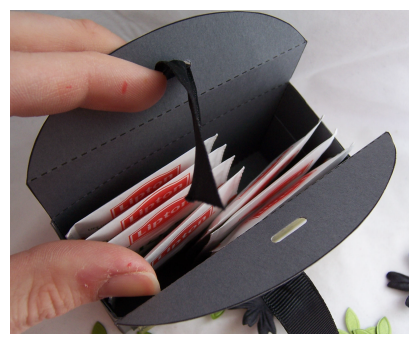
You can get 1/2 a box of tea packets into this little template (OK I drank some so not all shown in photo-sorry! But you get the idea)
I’m on a gray and black kick. Add that pop of Ripe avocado and its really pretty striking don’t you think?
Another view:
This box of tea literally took me a commercial break to make! Cutting and assembling included!!
I LOVE the Garden of Life set, and thought the sentiment was PERFECT for this little gift.
So there you have my peeks for today.
I hope you enjoyed them!
Thanks for checking in with me 😀
Be sure to checkNichole’s blog for more creative clicks and samples.
Till tomorrow 😀

There are 2 posts!
Feb 11, 2009Don’t miss the 2 posts for today. Each one peeks a NEW! My Timeless Template idea 😀
Oh and if you missed yesterday (another 2 poster) scroll down!

A tisket, a tasket…
Feb 10, 2009If you are new to My Timeless Templates © from Papertrey Ink please view my Step by Step video in —- >THIS POST
I have received MANY emails asking for an easy basket template. Mainly from stampers who are basket collectors! Some even sell Longaberger baskets, and wanted to incorporate their love of the two.
Introducing Basket Basics ©: From My Timeless Templates ©
“There are MANY complex ways of creating woven baskets. I spent quite a while finding the fastest and easiest way to create a template for this one. With the template and some step by step instructions/ photos- you can create your own from cardstock!! From the beginning paper crafter to the more seasoned, I think everyone will love just how easy this one is!”
I think baskets are the top presentation of any gift. The problem can be they are expensive! When giving some gifts the basket may even cost more than the gift itself!! Now you can create a paper basket that suits your project perfectly!
I’m excited to bring this template to you today.
Over the next few days I’ll also share the versatility of gifts and items that can be used, as well as some variations of the template 😀
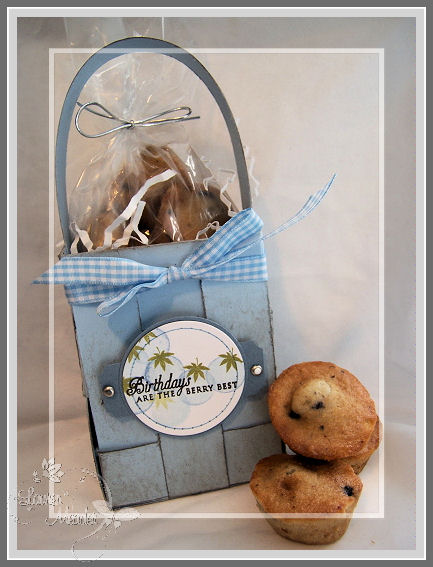
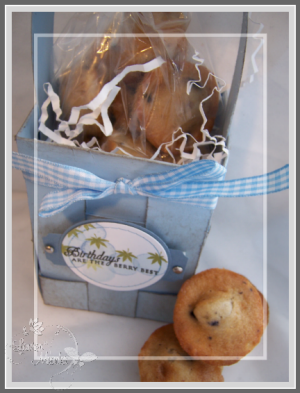
I made mini blueberry muffins, and placed them in the basket. I believe I fit about 10 in here
I printed my template onto Spring Rain cardstock:D
Before assembling I “distressed” it a bit with a sponge. I didn’t want the basket to crisp and new looking
This came together in minutes!
The idea for a template for this was conceived after Alexa had brought home a basket project we did from the hospital. It was in the summer, and was a “strawberry” basket. So, it was a bit different, in the fact that is had no base, just a weaving of strips to create a pocket. I figured if a bunch of 8 year olds could do it, so could we!
Now you may be asking yourself: “When did Papertrey Ink come out with a blueberry stamp?”
Well, they didn’t!
I made my own 😀
I used the solid circle from Shapes by Design-for the blueberry. Using the rock and roll technique for the 2 tome coloring.
I then used a leaf image from Mailbox Greetings!
Sentiment is from Year Round Puns
PLEASE NOTE: The template shared today will not be available for download until the 15th.
If you are new to this whole template thing-read this.
Got some questions? Maybe they are answered here. Also you can email me anytime at [email protected] for any questions you may have as well.
Want to see some samples with the past templates go HERE, and don’t forget each download has an exclusive full color idea booklet with supplies/instructions.
So that is all for my basket peek today!! I have had a blast with this one.
I hope you like it.
Thanks for reading, and I can’t wait to hear what YOU would love to package in here.
Till tomorrow-where I will share even MORE ideas!

Wrapped with elegance or simplicity
Feb 10, 2009OK new template peek time!
This is the most exciting time of the month for me. I swear I don’t even sleep. The ideas just FLOOD my brain. I get so happy to be able to share what I LOVE with the world 😀 Its the most amazing feeling ever. So thanks for bearing with me as I get excited and just gush and babble.
This will release on the 15th —>HERE!
So lets get started
For the happy couple or a Birthday wish-
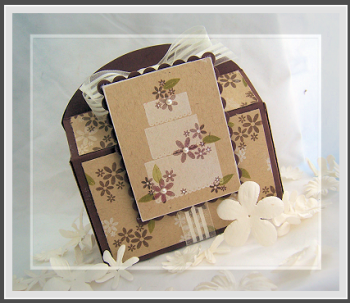
Here we have a peek at my newest template called Rounded Recipe Wrap © Im totally loving this one.
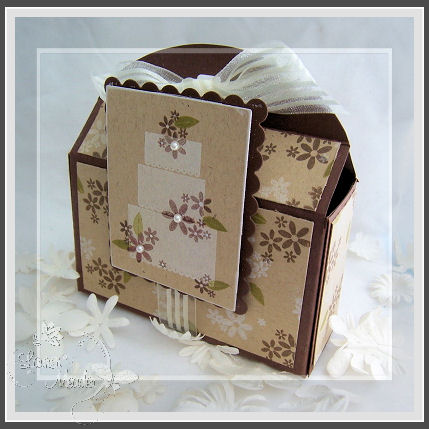
Its the perfect little boxlet ever! Its great for sending your wedding guests home with a sliver of cake, maybe some chocolates. Maybe give the something old, something new…….
How about for the Bride/Groom! Give them some money or a gift card? Perfect presentation! I bet it would be the first gift opened. OR (if you are the bride) you could leave these in your guests rooms, filled with tea packets to thank them! Package your groomsmen/bridesmaids gift in.
OOOHH!! Change it up for a baby shower!
As always, endless possibilities for what can be packaged in here! Lets not forget ways to design your package to suit the occasion!
Print these out and let the kids decorate them at a party!
OK! Im stopping there. You get the idea. I’ll just share more visuals as the days go on.
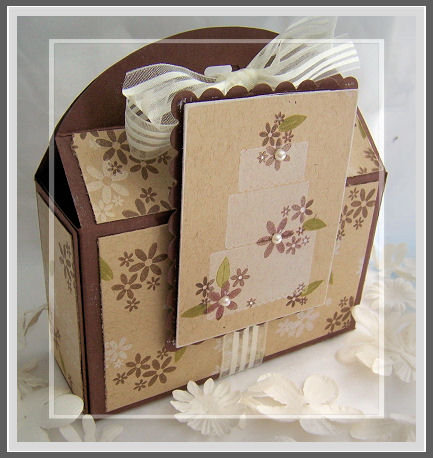
I used Piece of Cake on this Rounded Wrap Up ©. Printed my template onto chocolate cardstock. Stamped my flowers on Kraft with chocolate, and vintage cream ink. I added some adhesive pearls to my flowers 😀
I tied it closed with some beautiful Vintage Cream Sheer Stripe ribbon
Lets here more details on this cute little boxlet.
Rounded Wrap-up ©:
“This is a fun little box! I was inspired by the days when I was a child and we would have to go door to door selling candy bars! I LOVED the box! I would just love carrying it around. So THAT was my inspiration for this template. While a bit smaller, the rounded top of this makes it a fun way to wrap any small gift. Maybe even some bit size candy bars”
Here I will share my concept project!
A bit more simpler of a design, so show you it is simple and versatile. You can dress it up or down. It’s totally up to you! These template are made to fit any style.
For you-can you say UNDER 5 minute project-start to finish! Easy Peasy!
GREAT party favor idea too 😀
I used a piece of patterned cardstock to wrap around my box, punched a hole and tied it closed through the flower.
I used Limitless Labels. Chocolate Remix paper, and a Maya Road sheer flower.
That is it!
Simple.
I hope you like today’s peek! I am excited to hear your thoughts on it too.
So thanks for reading!!
Tomorrow I will have so much more to share.
Till then

#1-Meet the Moon’s-video
Feb 9, 2009Meet the Moon Family
OK I have the first peek at ourPapertrey Ink countdown AND My Timeless Templates ©
All I can say is I am just over the moon for today’s post!! I hope you will be too.
That is a HUGE hint 😀
The stamp set I am peeking today is from a new sentiment set called Handwritten Notes. It has handwritten sentiments from EACH design team member.
I am sharing one of MY contributions of the sentiment set –>”I’m over the moon”
If you read my blog you know I say this A LOT. I think it comes from my watching the movie “It’s a Wonderful Life” a million times with my mom, since I was a little girl. When Mary gives George the picture of him lassoing the moon for her. I loved that.
Anyway-its a cute set, that we all hope you will enjoy.
Now comes my project!!!
[veoh v17412221edFGthbs]
When I think of “moon’s” I also think OWLS! I don’t know why I just do.
Anyway, Amber came home from school the other day with a paper-bag owl project that was just the cutest thing ever!! I fell in love with it. (You will see the owl in the video :D) When looking at it I thought “How can I make my own version of this cute owl?”
Well, wouldn’t you know I was ALSO working on my newest My Timeless Template © peeks for this week when I “saw” it!! My Rounded Wrap Up! boxlet would be PERFECT! So I went to work.
Now this template will be releases on the 15th. It’s a super cute and versatile template.
If you are new to the templates you may want to watch THIS VIDEO. It takes you through the HOW TO on how the templates work.
Details about the TEMPLATE itself will be provided with tomorrows post. Today I want to focus on the step by step of this project.
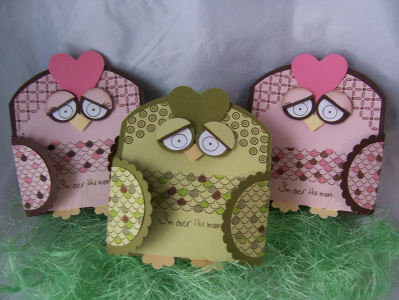
Meet the Moon Family!
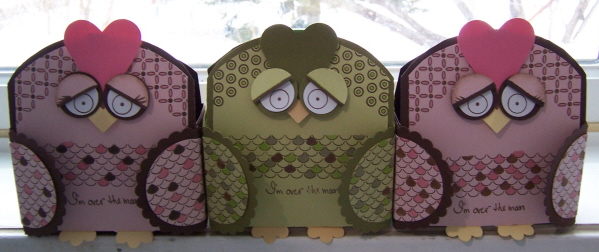
There is Owlette the “mommy”-named by Amber. Whootie-the “daddy” named by Alexa
and little baby Owlivia named by me ![]() (and Noah approved)
(and Noah approved)
Once upon a time there was a little pink owl named Owlette Branch. She was lonely and needed someone to love.
One moon lit night, in her favorite Oak tree, she met a stunning mate name Whootie Moon!
They shared some mice for dinner, and have been together ever since.
They were just “over the moon” for each-other!
They fell in love, and before you know it, one starlit night, then came Owlivia.
They are such a happy little family!
They bring smiles and treats where ever they go!
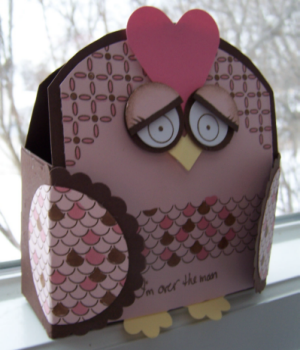
Now for some detail photos of Owlette Moon
Supplies
Rounded Wrap Up! © (available on the 15th)
Printed on dark chocolate, and copy paper (or back of sweet blush cardstock)
Stamps: Handwritten Notes, Border Basics: Retro (released on the 15h)
Cardstock: Sweet Blush, Berry Sorbet, Lemon Tart, Dark Chocolate
Ink-Dark Chocolate and copic markers
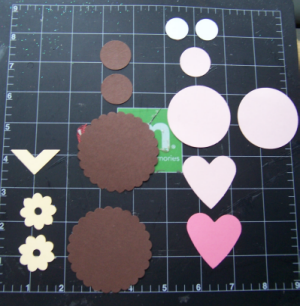
Photo of punched pieces needed
1- photo corner punch to create beak
2- little scallops or scallop flower to create the feet (here is a cute one)
3- 2 Giga scallop circlesfrom dark chocolate cardstock-for wings
4-2 sweet blush 2 inch circles for wing centers
5- 2 (large) hearts punch in sweet blush (makes a tail-optional) and berry sorbet (makes front piece)
6- 2- 1 inch circles from dark chocolate-makes eye base
7-1-1 inch circle from sweet blush (will be cut in half) to make eyelids
8- 2 3/4 inch circles-for eyeballs
DIRECTIONS (for those who can’t view the video)
BODY
Print your Rounded Wrap Up! ©on dark chocolate cardstock.
Cut score and assemble per instructions. Set aside
On copy paper print the Rounded wrap up again. You will cut out JUST the front portion of the template onto sweet blush cardstock. This creates your owl body.
Stamp the scallop border pattern from Border Basics: Retro in dark chocolate ink x2, onto belly, and again on 2 of the punched 2 inch round circles. Color with markers.
Stamp sentiment from hand written notes-under belly using dark chocolate ink.
Stamp choice of other border pattern on sides of box to create head/face. Color as desired
EYES / BEAK
Stamp circle from border set onto 3/4 white circles.
Layer near bottom of dark chocolate 1 inch circle.
Cut/punch 1 inch circle from sweet blush. Cut in half. Draw on lid and eyelashes with marker. Layer on eye lids with dimensionals.
For beak use photo corner punch from lemon tart cardstock. Layer onto face with dimensional, then layer on eyes.
Apply heart punched from Berry Sorbet cardstock to top of head, between eyes.
FEET
Use scallops or flowers for feet. Score bottoms so they bend forward, and layer behind owl body. Adhere body to Rounded Wrap Up! © box template.
WINGS
Layer 2 inch stamped circles (that you stamped/colored in steps above)onto dark chocolate giga scallop circles.
Score from between scallops to other side, and adhere stamped pieces to center.
Adhere to sides of Rounded Wrap Up! ©
Now fill with choice of candy or other treat! Use paper clip or item of choice to hold top closed (if you choose)!
So there you have it!!
This takes about 25 minutes to make, but that is for a tutorial!! If you go and mass produce these Im sure its much quicker with practice. My 3 came together in well under an hour.
That is HOW you make my Owlette!!!
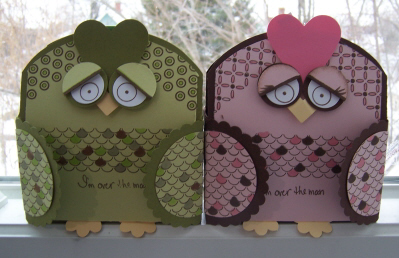
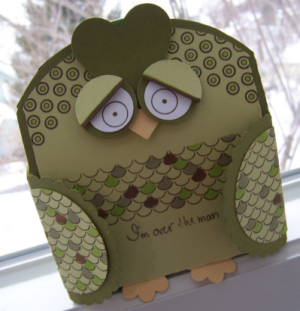
This is the “boy” version–> Whootie done in green for my son Noah.
He loves green and told me that was what I had to use for his owlette treat holder! He actually thought this was a parakeet! LOL! I guess it COULD be!! I also see making bunnies, and chicks with the box template 😀
Now don’t think this template is JUST for character boxes! Oh! NO!! So much more to come. Just wait and see what the peeks bring OK. This was just one of those “ideas” that popped into my head. This would be a super cute party project for kids even. Its really that easy! You just pre-stamp it. They can color and assemble-maybe?
I love to hear your thoughts on today’s post and the template peek!
Thank you for reading.
Don’t forget to check in with Nichole and see what she has to share, as well as other creative clicks for today.
Thanks for all the kind words and support!
Owl Hugs from the Moon Family!!

ATC=Art to cherish
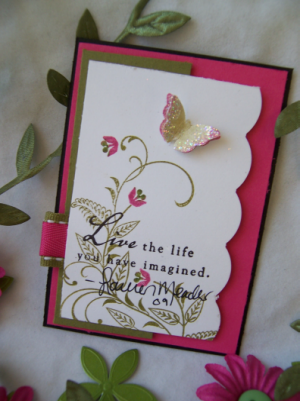
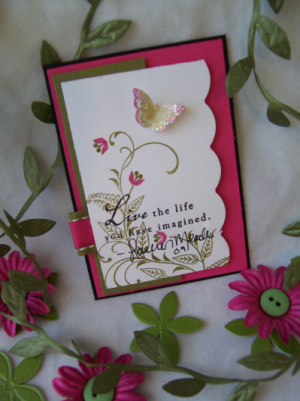
Feb 9, 2009I haven’t made an ATC (for those of you wondering Artist Trading Card size 3 1/2 X 2 1/2) in YEARS!!!!!!!! I use to join Jen del Muro’s exclusive ATC swaps years ago, and that was the ONLY time I would make them. That was FOREVER and a day ago. WOW! Time flies. We are all now so busy, I think swapping is the LAST thing on our minds (or to do lists).
Nichole had the girls on the Papertrey Ink team partake in a special project-for some lucky winner 😀 Read about that HERE!!!
We each had to create an ATC.
Our ATC is suppose to be a mini canvas, that should represent us and our personal style. It also had to be signed (OYE! I HATE my handwriting but OK!)
Anyway I KNEW exactly what I wanted to do!!!
I think this is very reflective of me, my personality, and stamping style.
My favorite colors these days are Raspberry Fizz, Ripe Avocado, and a pop of black!
I’m in LOVE with the new With Sympathy set.
I love butterflies so that was a no brainer. I had to make it 3d with some sparkle of course!!
I love flourishes, and tulips are my FAVORITE flower-so I used the blossom from Borders & Corners Rectangle set
The sentiment from Out on a limb sent is the perfect message I hope to convey to the world every day! I try to do that myself.
So this is what I came up with.
Live the life you imagined.
Aside from my signature-I love it and feel it is reflective of me.
What do YOU think?
I had SOOOOO much fun making an ATC again. I love to then take the mini masterpiece and layer it onto a card.
One more view.
Now time to see what everyone else did.
Its an amazing collection of our personal style’s I feel. You will be amazed at how different such a small area to work with can actually be.
Thanks for stopping by.
Now I would LOVE to know-
What would YOU include in a mini “masterpiece” that YOU feel is a reflection of yourself , personal style (like colors, simple layout etc) and what you love?

Friends ‘Till the End Kit
Feb 8, 2009Today’s post features a special new set from Papertrey Ink called Friends ‘Til the End.
I am in absolute LOVE with this set, and have made several things with it already (haven’t been able to share—>YET!) I love the flower images, and of course the sentiments are perfection!! All I can say is its simply gorgeous. It could easily become my favorite!!
I like that the flowers can be colored, or just stamped as is. You can also choose a variety of techniques with it as well.
The exciting news is that this set is sold as a kit!!! This means you get all the components you need to create several amazing cards in ONE kit!
As you will see today—-> Go to Nichole’s Blog, each design team member has taken ONLY supplies you receive with your kits, to create versatile card/layouts to get your ideas jump started! Now you can even get together with friends to stamp and already have a bunch of great ideas ready to go!
I think this is an exciting venture for Papertrey Ink.
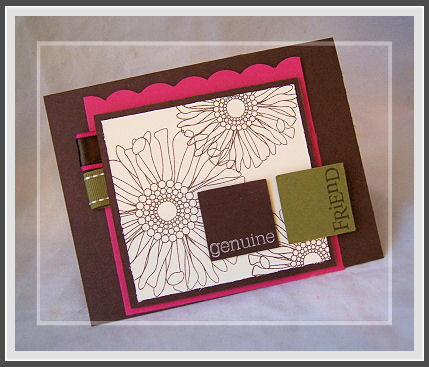
Genuine Friend
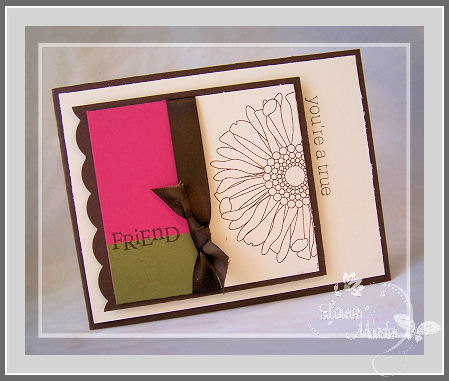
Another view of my card.
I LOVE how it turned out, and I love my layout! LOL!
I’m in love with the colors in the kit, as they have been my recent favorite color combo! Raspberry Fizz, Ripe Avocado, Chocolate Chip and the kit neutral Vintage Cream.
I created a fun and SIMPLE card using ALL the elements of the kit! This would be an easy one to mass produce for your PSF’s! (pretend stamping friends-aka online friends you never met but LOVE!). Just stamp the flowers on vintage cream then cut up into panels. I need to take my own advice here!
I had fun using this Kit so I made ONE more to share today! You know I get stamping, then get carried away!!
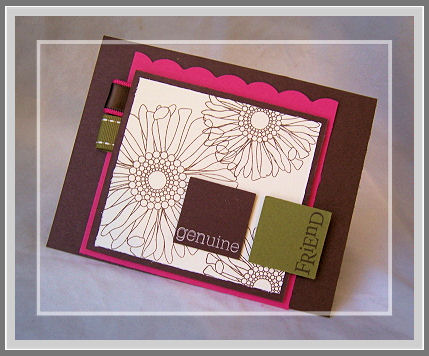
You’re a true friend
I loved having just one large flower stamped on a portion of the panel. I used the same scallop layer, just mixed it up a bit for a different look. I also like the friend stamped on both color blocks.
Which one do you like best?
I love the top one to be honest. But this is nice too 😀
Well go check out all the excitement on Nichole’s blog.
Tomorrow starts my INSANE week of samples using my newest release of My Timeless Templates ©!!!! AND the first peek of the Papertrey Ink countdown. I have to say I have the CUTEST project -ever!!!!!!!!!!!!!
OK that is just MY opinion but I think you will flip! Oh and guess what? Its all step by step via video for you too!
What do you think it is?
HINT: I’m over the moon!

Sketch time
Feb 7, 2009Sorry this is LATE!!
Im running around crazy here, and Jason FINALLY decides he has the engery to move the kids play room to our newly finished room (my brother was living there for several months) in the basement. We now have to run out and get the carpeting purchased, so he can install that later this afternoon, then we will begin the BIG move.
Boy do my kids have a TON of crap! That’s it. Next Christmas NO GIFTS! LOL!! That’s how I feel most years, but obviously that doesn;t happen. What is worse is I do go through ALL their stuff like every 3 months, yet it somehow manages to get out of control, even still.
Every have a day where you turn around and REALLY “see” a room and the clutter? I despise clutter! And now I’m in panic mode. I feel like I need to clean and re-organize everything (which I so don’t have time for). I think “I” am getting that nesting thing that my brother and his girlfriend SHOULD be getting, but haven’t got yet.
Anyway-I hope she calls me SOON. I’m excited for this baby to come. I feel like I get to have a baby without all the “work” and weight gain! LOL!
OK here is the sketch
Mytimess23
I’m sure you want to kill me when you hear I don’t have a good sample for you :C I have just not had time to make one. But I swear I will!!
I have been too busy working on stuff Im not suppose to be.
PLUS-We are in the process of switching to a new computer so we have to transfer everything from this one, and I’m STILL trying to get my email properly running. Fairpoint doesn’t have great timing on this.
OK I know, noboady needs to hear the blah blah blah-sorry. Im just on a little tangent.
In the meantime check out the Sketch Team!
Later.

Perfect Match Box © goes Organizer!
Feb 6, 2009Hi everyone!!
Am I busy? Yes.
Should I be blogging? No. Not really.
But I love what I do and sharing here, so I figured if that is what I want to do, then I am gonna do it 😀 Its like a break from the craziness KWIM?
(I feel like a little kid who broke the rules! LOL!Now I know WHERE my kids get it from)
Plus I was SOOOOO excited I HAD to share my latest creation !
WARNING: This is what happens when you are SUPPOSE to be doing something, then you get sidetracked doing something else, that you AREN’T suppose to be doing-its like stampers ADD! LOL!
You know how much I LOVE organization right? Well when you combine it WITH stamping I REALLY love it. There is nothing like being able to create something that allows you to personalize your crafting area. Oh, and give as gifts 😀
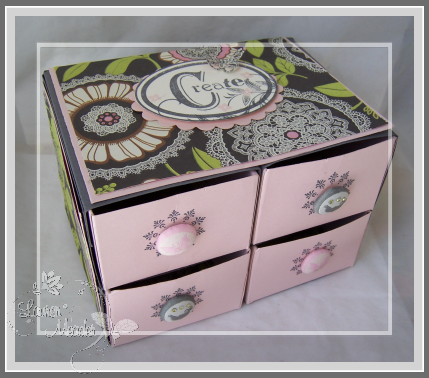
Anyway I was in Michaels and I saw a 4 drawer organizer that I liked. Problem-it was like $17. Now for only chipboard covered with a UGLY pattern paper on it-NO WAY! I looked at it and thought-WOW! I could make that EASY PEASY!
On my drive home (without the organizer) I realized that my Perfect Match Box © template would make it SOOOOO much easier, so I flew home and grabbed some Amy Butler paper (I have a handbag to match :D) and whipped up my own in less than a 1/2 hour!
Create and Store
SO for the cost of a few pieces of paper, and some fabric brads-I have my very own PRETTY 4 drawer organizer!!!
OK I should have pushed the drawers in more! SORRY! I was just so excited I HAD to get it photographed and uploaded.
(This doesn’t match my stamp room actually! LOL! I just loved the paper and colors :D)
I printed my Perfect Match Box template 4 times.
The base was in gray (4x’s) and the slider box was in sweet blush (4x’s).
SO I print, cut, scored and assembled each box as directed by the instructions.
NOTE: Before putting the slider box together (pink insert), I stamped the FRONT with my Simple Stationery circle in gray ink, then applied my fabric covered Amy Butler brads (pink one’s have butterflies, gray ones have birds :D)
I then lined my drawers with the patterned paper.
Now once you have your 4 gray base templates done, you just adhere them ALL together!!!
LOTS of redline tape 😀
I then prettied it up by covering the top and sides with patterned paper (Amy Butler).
This also strengthens it, and covered the fact that it is 4 boxes stacked 2 X 2.
Think of the possibilities now!
You can make MORE drawers, or a 3 drawer stackable unit. Whatever you want!!
I think that is really cool.
You can make them for everyone. Even TEACHERS!! Beats the usual coffee mug.
They can keep it on their desk. Maybe even cut a slit in the drawer front, and fill it with ROLLS of those REWARD stickers teacher’s always give out. (OH!!! I am so going to do that for end of the year gifts-good idea)
Can you tell I have WAY too much fun creating with my templates? Seriously! Sometimes my brain just won’t stop spinning. I wish I had the TIME to execute the ideas I have sometimes. I usually have to just write it down, and save it for another day.
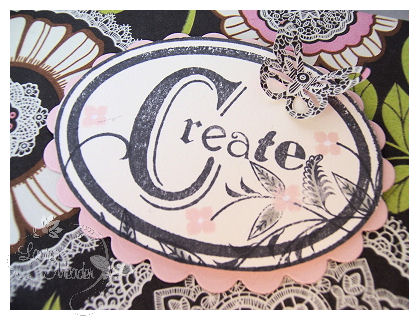
Anyway I wanted a design on the top so I used my Harmony Classic Oval II in gray ink for the “create” sentiment.
I love the way it turned out.
With Sympathy matched my paper PERFECTLY!!! So I stamped it on gray and added a soft gray to the leaves. Flowers stamped in sweet blush.
I layered it on an oval scallop for some more POP! This is on dimensionals as well.
I also punched a butterfly from the paper, to match my theme.
Then I was done.
Now this idea sparked ANOTHER idea that I will most likely share Sunday 😀 You won’t want to miss that.
Easy Peasy 😀
OK I gotta run, but some back tomorrow for my Saturday Sketch 😀
Thanks for checking in today. Have a great Friday.

My Etsy
My Time Made Easy © LLC
Who I Designed For
Blogroll
- Alicia
- Alli Miles
- Ally Blankenship
- Amber
- Andi @ crafts on a whim
- Angel R
- Angie Z
- Anne Kranitz
- Becky O
- Bee
- Beth Silaka
- Bethany Paull
- Beverly Nash
- Bobbie
- Cambria
- Cammie
- Card of the Week
- Card Positioning System (CPS)
- Cards for Cancer
- Catherine Doucette
- Charmaine
- Cheryl Sims
- Chriss Rollins
- Christina
- Christine Ewing
- Christine Wooden
- Colleen Schaan
- Craft Critique
- Craft Gossip
- Crystal
- Dawn Easton
- Emily Giovanni
- Geny
- Holly
- Igne Groot
- Inspirational Craft Blogs
- Irene
- Jami Sibley
- Jeanne Streiff
- Jen del Muro
- Jeni Bond
- JenMarie
- Jenn Balcer
- Jenn Diercks
- Jenn O
- Jennifer E
- Jennifer Mick
- Jennifer Pereda
- Jennifer-Sweet Treat
- Joanne Basile
- Jodi Collins
- Julia Stainton
- Julie Masse
- Karen
- Kathryn Berthiaume
- Katie Cotton
- Kelley Holland
- Kendra
- Kim Scholfield
- Kris’s Color Stripes! Get inspired here
- Kristen Dubosque
- Kristin Eberline
- Kristine
- Laura @ Sunshine Stamper
- Laura Turnmire
- Laurie Schmidlin
- Lesa Rapp
- Linda Duke
- Linda-LSN
- Lindsey Botkin
- Lisa (lakind scs)
- Lisa Kind
- Lori Craig
- Maggie
- Mara Campbell
- Maria
- Maria Levine
- Mary
- MaryJo
- Melanie M
- Monique Hansen
- Moxie Fab World
- Pam Imholz
- PaperCrafts Connection
- Peppers and Pollywogs Kids party site
- Rebecca Grohall
- Rita
- Robyn
- Rose Ann
- Sarah Vrolyk
- Sharon Harnist
- Sharon Johnson
- Sharon Rivera (a chemisrty with paper)
- Sherrie
- Sophia Landry
- Storage Units, Ink, & More Blog
- Sue Berker
- Susan (Rainy)
- Tangii Crane
- Tracy
- Tricia Traxler
- Trudee
- Velta
- VivLyn
- Zena
MTME Pretty Palette Color Team
MTME Pretty Patterns Sketch Team
My Time Made Easy TM LLC
Shop till you drop!
Lauren Meader
About Me
Copyrighted material
Subscribe To My Blog
Pages
- About me
- Alexa’s Story!
- My Crafty Corner!
- My Time Made Easy™ LLC
- Our Make A Wish Trip to Disney!
- Resume/Publication List
Calendar
| M | T | W | T | F | S | S |
|---|---|---|---|---|---|---|
| 1 | 2 | 3 | 4 | 5 | ||
| 6 | 7 | 8 | 9 | 10 | 11 | 12 |
| 13 | 14 | 15 | 16 | 17 | 18 | 19 |
| 20 | 21 | 22 | 23 | 24 | 25 | 26 |
| 27 | 28 | 29 | 30 | 31 | ||
Archives
- August 2013
- July 2013
- June 2013
- May 2013
- April 2013
- March 2013
- February 2013
- January 2013
- December 2012
- November 2012
- October 2012
- September 2012
- August 2012
- July 2012
- June 2012
- May 2012
- April 2012
- March 2012
- February 2012
- January 2012
- December 2011
- November 2011
- October 2011
- September 2011
- August 2011
- July 2011
- June 2011
- May 2011
- April 2011
- March 2011
- February 2011
- January 2011
- December 2010
- November 2010
- October 2010
- September 2010
- August 2010
- July 2010
- June 2010
- May 2010
- April 2010
- March 2010
- February 2010
- January 2010
- December 2009
- November 2009
- October 2009
- September 2009
- August 2009
- July 2009
- June 2009
- May 2009
- April 2009
- March 2009
- February 2009
- January 2009
- December 2008
- November 2008
- October 2008
- September 2008
- August 2008
- July 2008
- June 2008
- May 2008
- April 2008
- March 2008
- February 2008
- January 2008
- December 2007
- November 2007
- October 2007
- September 2007
- August 2007
- July 2007
- June 2007
- May 2007
- April 2007
- March 2007
- January 2007
Categories
- About Me
- All That Scraps
- blogger challenge
- camera/photo play
- Cards
- Contests
- family stuff
- FOR SALE
- Home decor/3-D items
- How to FAKE it!
- Introduction
- JUGS Challenge
- JustRite Stampers
- Lizzie Anne Designs
- My family stuff
- My Stamping Space
- My Time Made Easy
- My Time To Color Challenge
- My Time to Create Challenge
- My Timeless Template Challenge
- My Timeless Templates
- Mytime Mail
- MYTIME MOVIE/VIDEOs
- Papertrey Newsletter
- Pink Cat Studio
- Pretty Palette Challenge
- Pretty Patterns Sketch
- Product Opinions and Must haves
- Recipe's
- Saturday Sketch
- Smilebox Creations
- Stampavie
- Tutorials
- Uncategorized
- videos
Most Popular
- Create your own Onesie Card Tutorial-and important NOTE! PLEASE READ (2529)
- Saturday Sketch-Boxed bag holder (2333)
- Going GREEN! Fancy Flower Flourish-Closure Video (1478)
- Fabulous Favorite - Giveaway! (1336)
- a Prayer Request (1232)
- QUICK-Easter Baskets from Nestabilities-PTI style-and blog challenge (1063)
- Teaser Sketch (999)
- February Release Giveway! (and a little peek) (996)
- Group Post and Rambling Rose Video Tutorial (985)
- GIVEAWAY! Who wants it all?! (895)
Recent Comments (RSS)
- Daya Sons: Daya Sons, a renowned manufacturer
- 첫충사이트: 완전히 흥미로운 블로그 게시입니다. 저는
- sarah: Wow, Lauren, what a stunning
- hedie: خرید راهبند
- 야동: Love to read it,Waiting For
- 야동: This seller is in a
- 바카라사이트: 여기 처음 왔어요. 나는이 게시판을
- 야동티비: I was surfing the Internet
- 바카라사이트: 비슷한 주제에 대한 흥미로운 정보를
- 바카라사이트: "여기에 제공해 주신 귀중한 정보와
