Archive for the ‘Home decor/3-D items’ Category
Spring Fling
Apr 30, 2009 Author: mytime | Filed under: Home decor/3-D items, My Timeless Templates, Papertrey NewsletterWell its hard to believe it’s May 1st!
That mean another Papertrey Ink Design Team Challenge! I think these are so fun & challenging (DUH! That is why its called a challenge! Time for MORE coffee). I love a challenge.
This month Nichole has a fun challenge that includes all of YOU as well! You will have to pick from each design team member’s source of inspiration photo to create YOUR OWN version! (So I guess I hope you like mine :D)
The CHALLENGE: Get inspired by a Spring Themed photo or image
Well, when I got my May 2009 issue of Family Fun Magazine, I found page 77 very intriguing! (its a great magazine if you have children! Always full of kid friendly stuff to do!)
So here it is-
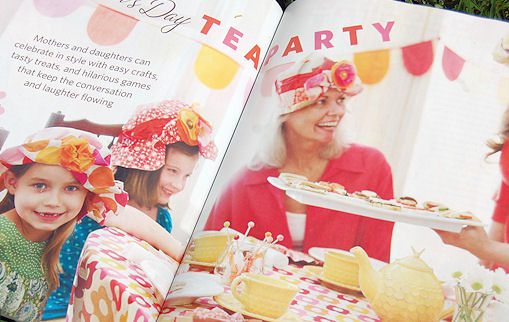
How fun (and Spring!) is a Mother’s Day Tea party? I know I am SO wanting to have one with my girls!!
Look at that FABULOUS table cloth, and the tea pot! I fell in love with the idea of everything paper-made, and the colors are just gorgeous!
So I got to work!
Using Guide Lines Grid 2 paper, and the Wishing You stamp set I tried to get fancy schmancy and made my own paper, with a similar version of the pattern on the table cloth.
I used the following ink:Pure Poppy, Hibiscus Burst, Pumpkin (SU!), and Summer Sunset
Here is my stamped patterned paper, next to the inspiration piece.

I stamped the tulips facing eachother. I think it makes a cool pattern ![]() Not exact-but that is the point-INSPIRED BY!
Not exact-but that is the point-INSPIRED BY!
OK! Paper made! Now what to make????
Well I figured if I did have a tea party with my girls it would be fun to put various yummy teas in a fun box! Nothing TOO complicated. I wanted QUICK!
So, My Timeless Template- Rounded Wrap Up to the rescue!
PS Did you see Nichole BIG ANNOUNCEMENT post about the templates?
—-> READ HERE!!! So exciting!
OK back to the FINISHED project
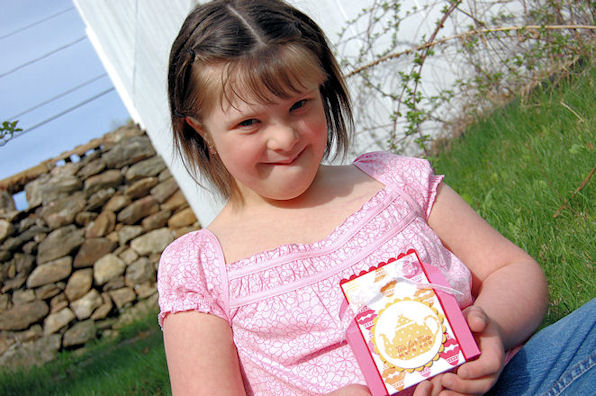
Tea For Two

Isn’t it SO cute?!
I just used my patterned paper to make a wrap for my box. I then stamped my tea pot from Tea for Two, to match the yellow tea pot in the inspiration photo.
This is Alexa Modeling it for you all!!

She did a great job!
Here is another. I am having SOOO much fun getting photos of my kids 😀 AND including my projects ( killing 2 birds with one stone-priceless!) I think they make the BEST props! LOL!
Alexa LOVED being the center of attention for this project.
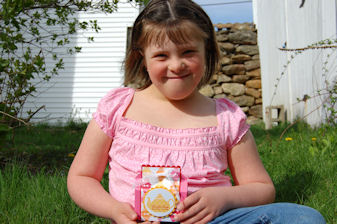
This was HER favorite photo-so I had to include it
Now I will show you how my finished project looks next to my inspiration piece:D
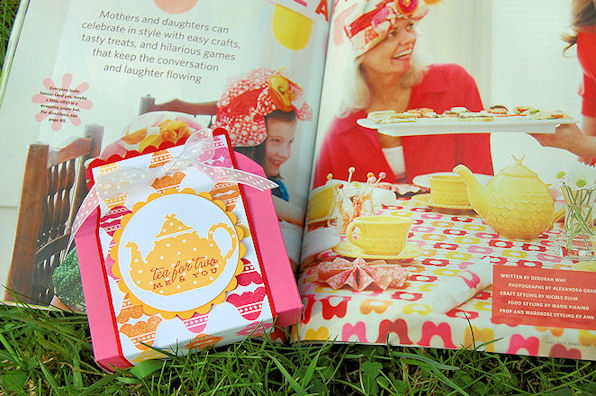
Now seriously! Doesn’t my box look like it was MEANT to be for that party in the book? I LOVE it!!!! LOVE! LOVE! LOVE!
You may be wondering what we did with the rest of the paper!
Now LOOK on the table! See the folded fan like thing?
Well the magazine were directions for a fan. Alexa wanted to make it (so I helped score it and stuff) and she decided it would be a Fan FLOWER!

The way the pattern was stamped, it does make a COOL “flower”. Good idea Alexa!
Anyway-that is what I did for my challenge.
Be sure to check out the Design Teams blogs so you can pick a inspiration piece and play along (let me know if you do try mine 😀 I want to see it!)
Now I need to finish up my first post that features all my challenge team members! Wait till you see what they did for tomorrows Sketch Challenge! WOW!
OK signing off!
Hope you get lots of inspiration today 😀
Spell it out-A is for
Apr 28, 2009 Author: mytime | Filed under: Home decor/3-D items, JustRite Stampers, StampavieSince everyone seemed to like the first frame I posted for my niece, I decided I will keep you posted when I make each one! I think GABBY is looking better and better for design purposes-rather than Gabriella!
This is the second frame for Gabriella. The first “A”in her VERY LONG name 😀
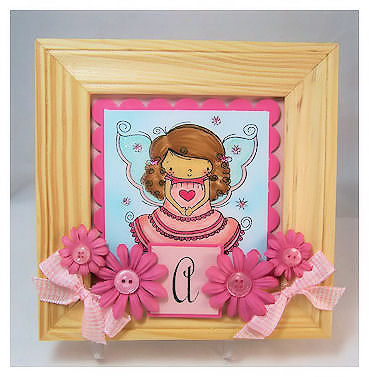
I used an Angel image from Stampavie: Lily called Angelface. You can find Lily & Milo images HERE!
I went with pinks for the second frame. I will change the letter placement, and color focus on each frame I create.
I took out the glass, so they could all be 3D!
There are little star twinkle stickers on here, and lots of glitter on the wings.
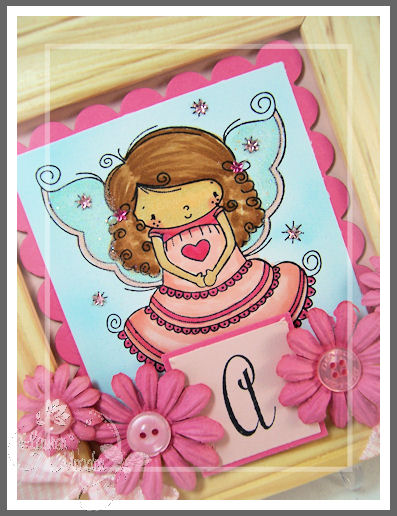
The letter “A” is also from the JustRite Stampers Trompe uppercase font set.
Added some primas and ribbon and called it a day!
Speaking of calling it a day, I have lots to do, so I’m off and running!
Thanks for stopping by!
Feel free to browse Stampavie and let me know YOUR picks for upcoming letters! There are SOOOO many cute images I don’t know which to use next 😀 Definitely the animals-just can’t decide!
Also don’t forget to check the BLOG! Lots of ideas there too 😀
Spelling it out
Apr 26, 2009 Author: mytime | Filed under: Home decor/3-D items, JustRite Stampers, StampavieBefore my niece was born, I told my SIL that I would make the baby a wall hanging with her name. I told her I would do a different frame for EACH letter.
So what does she decide to name her? One of the LONGEST names possible- Gabriella. But a promise is a promise. I wonder WHAT was I thinking?! Must have been that new baby high women get.
Now she has been here for 2 1/2 months and I ONLY have 2 letters done! (looks like one for each month! LOL!) If I keep on at this pace she will get the set when she turns ONE! LOL! She may even end up with just GABBY at this rate! LOL!
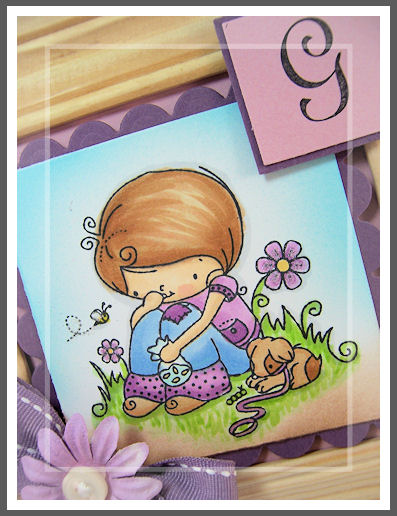
G is for G-abriella
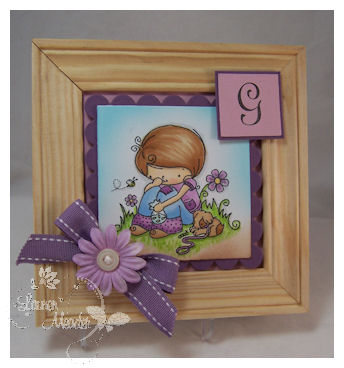
So this is the FIRST letter. I used my JustRite Stampers Trompe Script Uppercase. Its perfectly scripty yet clean.
I left the frames natural so they can be changed later if need be. Plus Im lazy! LOL! I don’t like painting 😀 I got these in sets of 3 at Target for $2.50! They are 4X4 inside the framed portion. Really sweet. Makes a great and affordable gift.
I want to use the Rachelle Anne Miller line to complete the frames. A different image, and color for each letter. This is Candy Time. I think this little girl is adorable, so had to use her for this start of the frames.
Makes me think and feel Spring just looking at it.
I have to be honest-I didn’t have the set name when I made this so I thought she was holding a bag of goldfish! LOL! Then just sitting down resting by the flowers, waiting to go home with her new friends! LOL!
I later learned it was CANDY! LOL! I wasn’t going to “tell” but I think its pretty funny!
No matter-the girl is beyond adorable, don’t you think?
I hope my SIL and Niece like the frames, if I EVER get them finished! LOL! I have 2 done, 7 to go!
Don’t forget to check the Stampavie Blog! Always lots of inspiration going on there. You can get Stampavie collections HERE!
Here is a photo my SIL sent me 2 weeks ago

Gabby is ALWAYS smiling.
Right now they are on vacation in West Virgina, to see Valeries family. I guess I have to share her :C
I miss her already 😀 She is my baby fix! Im totally content once I spend the day with her.
I cannot wait to get a hold of this little beauty with my new camera!
OK I need to go, and finalize my new design team!
Be back later!
Sunshiny Day- full of blah blah blah
Apr 23, 2009 Author: mytime | Filed under: About Me, Cards, Home decor/3-D itemsWARNING: UH! OH! Watch out!-Lauren is on a LONG WINDED kick today! Sorry!! (I added this to the top to warn you when I reviewed my post, after I was done ranting! LOL!) Althought if you visit regulary this is of NO SHOCK value to you :D)
I wish I could say it was SUPER sunny and warm here today, but its a bit CHILLY.
But this should brighten your day-rain or shine
Pink Cat Studio release of Lily at the Beach!
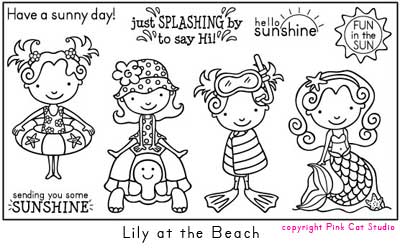
Seriously cute!! Im super happy that Melissa has been adding sentiments to the sets as well. You can NEVER have too many sentiments! EVER!
Now for my card
Sending you some sunshine!
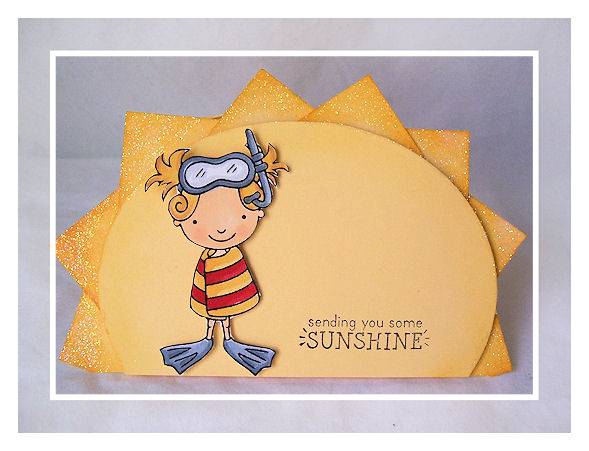
I took thos one quite literally.
Another thing I like to do, as much as making gift packaging is make shaped cards! I haven’t done one in a while, so thought this was the perfect time 😀
Lily all wrapped up with the towel-needed to warm up! So I made a SUN.
I just cut my card base in a half oval. Adhered a punch of square’s around the edge. I applies glue, and irridescent ice embossing powder-heat set, and VIOLA! A SUN! I then put another half oval over it to not only cover the squares, but make sure the front, and aback of card have a more finished look! You don’t want a MESSY side to your card!
I may do a video on it-if you need to see it, but its pretty straight forward!
I think this is super cute card!
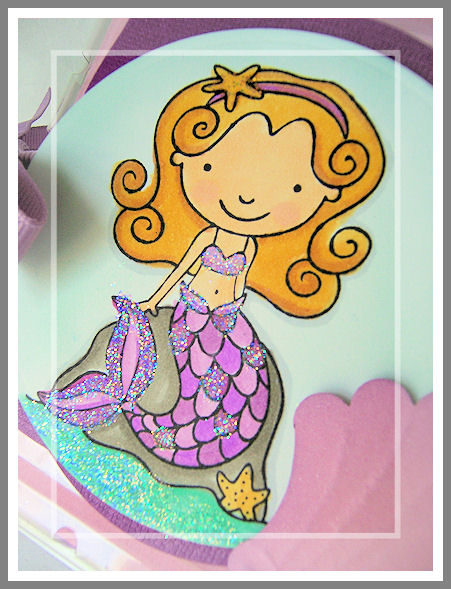
Here is the close up of my Lily

She is just adorable!
Make sure you check out the PCS Blog…HERE and the Design Team peeks
I have been practicing with my new camera-and WOW! (NOT ON THIS PROJECT OBVIOUSLY!) Did I ever get some STUNNING photos of Amber! Wait till you see. I’m having fun with it. Thank GOD she loves posing for me. Her friend was over yesterday, and I was trying to get photos. Amber was having a ball and her friend was HILARIOUS! She said “I didn’t come here to get my photo taken, I came here to play! How many pictures do you need?!” Amber was saying “This is fun! You don’t want your picture taken? and her friend was like “NO! Lets just go play” Her friend was right! LOL! I shouldn’t have picked that time to play model! LOL! Oh well. There is always TODAY!
So, I was hyperventilating when I saw the guide was 125 pages long-with LOTS of info. I just decided that since I am a VERY visual person. I need to just “figure it out” pick it apart kind of thing. Im not good at “directions”, and understanding all the blah blah blah, that I will just take my camera and practice. When I want to see HOW to do something, I look it up at that point. Its working OK.
I ALWAYS wanted to be a photographer, yet I don’t like taking photos of my cards! LOL! Maybe its the editing?? But I do love using this new camera, and maybe with better photos from the camera I will get more involved into it. That hardest part is realizing that I have to look IN the eye piece! Unlike digital cameras with the SCREEN. Too funny. I FEEL like a photographer.
I told Jason once I learn this I am going to enter some photo contests! LOL! I know, I know-I JUST got my camera! But its good to have GOALS!!
Jason often thinks Im a bit insane sometimes when I voice some of my “dreams”. Like when I began stamping. I told him-someday I’ll win a contest-and I did! Someday I’ll be published in that magazine-and I was! Numerous times 😀 (too busy to submit these days), or I want to be on a design team, and many, many other DREAMS. Now I think he realizes not to underestimate me, or think I’m CRAZY!! I’m a go getter! If I set myself out to do something it IS going to happen. I work hard towards achieving my goals and doing what I truly LOVE. I don’t sit there and think things will fall from the sky and into my lap. That isn’t how it works. The biggest thing is having faith and confidence. Always better your best. Be passionate about what you love. No matter what it is.
(That includes all of you who are on the new healthy lifestyle and exercising and or losing weight! I will tell you once you get to where you want to be-if you decide to not let yourself OUTGROW those skinny jeans-maintaining is MUCH easier!! Nip it in the bud immediately and stay fit and healthy! Im so proud of all of you out there who have joined me on this journey! Keep at it! Its not “I know I can do it!” Its “I WILL do this!” OK!- Sorry I had to add that in there-its important! I know I am proud of the 65lbs I lost (and the 9 1/2 inches from my waist, and 9 inches from my hips!! I feel amazing. More energy too)
That being said I know photos are KEY to success in this craft! You can spend HOURS making the most stunning thing the world has ever seen-take a bad photo and it was pointless! I want to get involved with using more PROPS too. Im just SOOOOO lazy when it comes to that. If its not in my stamp room Im not hunting through my house for it! LOL!
I am looking into photography classes-thanks for the links!! My problem is (after buying an expensive camera) the classes are expensive :C I would LOVE to take one. I did sign up for the email alert when Jessica Sprague has hers starting. I also found some at my Local camera shop! They have a cool website too with photo tutorials of the month! Its called Take Great Pictures. Also I was sent to another website Nikon D40 Blog. Between all that Im sure to get going in a good direction. I’ll be posting a PHOTOGRAPHY link on my sidebar soon for easy reference to places I will be checking out. If you want me to add something-shoot me a comment or email.
At this point Jay is like-JUST FIGURE IT OUT! LOL! We have to pay for part of my surgery-which was 12,000!!! Obviously we aren’t paying THAT much but HOLY MOLY! For a less than ONE HOUR-laproscopic surgery, that I only stayed 6 hours MAX in the hospital for! WOW! Glad I didn’t stay over night. Plus we have to pay like $1,000 for my 911 ambulance ride! LOL! OOPS!
I will say when Alexa was a baby, and had her open heart surgery the SURGEON bill ALONE was 52,000! Granted he literally saved Alexa’s life, so how can you put a price on that? But seriously! Maybe I should have been a doctor rather than a nurse! LOL! We won’t get into her chemo stuff. You haven’t seen medical bills till you have a kid with Cancer. It no wonder people without insurance lose everything. So tough.
Anywho…………..
Right now Im finishing up some more samples with my Templates 😀 I just designed 7 more of the BEST templates EVER!! Im so proud of myself! LOL! Wait till you finally see them 😀 I try to keep WAY ahead!
As for the Design Team-I will notify the people chosen via email Sunday night-announcement will be Monday OR Tuesday depending on the number of people to check out.
The TEAM starts the first weekend in May! You have all gotten me so excited to begin this new challenge here. I love mixing it up! Thanks for all your input and ideas! After the feedback Im really looking forward to lots of participation too 😀
SO you have till Saturday night-which means you can include the Papertrey Ink Blog Hop in your submission! This month is to use your My Timeless Templates! YEAH!! I’m going to be GLUED to the computer that night. As you can imagine, Im totally excited to see what everyone does 😀 I LOVE when you share your stuff with me. Its a dream come true 😀 I think more and more people are catching on to how fun, easy and affordable they are too 😀 Even better.
OK I did NOT plan on being THAT long winded (as usual). That would have been one expensive long distance phone call! LOL!
OK as always-thank you for stopping by. You all brighten my day 😀
Till tomorrow………………
Are you ready to screech from your computer screen?
If you have a girl you will need this set! If you have boys you will be beggin your husband for a baby girl! LOL!
I have another peek from Pink Cat Studio-Lily at the Beach!
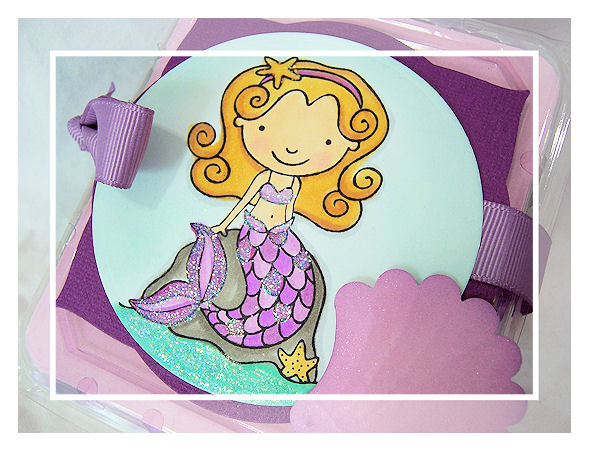
OH MY HEAVENS! Isn’t she fabulous?!
Amber-elle (Instead of Ariel-My daughter Amber called her that! LOL! She said its her name as a Mermaid. We always say Lily is a cartoon version of Amber :D)
Is this not the cutest Mermaid you ever did see?
I’m in LOVE people!
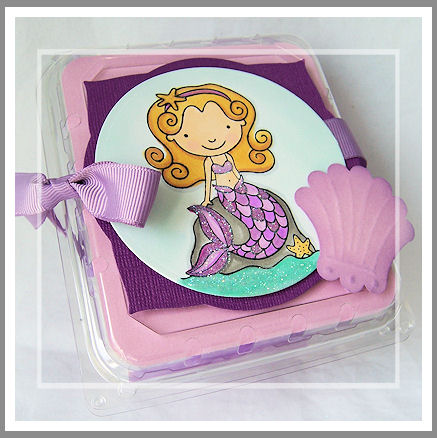
I altered this little plastic tomato container for this project. Nifty eh?
Jay was getting ready to throw it out, when Noah said “NO! Dad! WAIT! You better ask mommy first if she wants it for her stamping stuff!” What a good boy!! Great thinking Noah. HAHAHAHAHA Isn’t that hilarious! I didn’t even think to keep it till he said that! Then I praised him for his good thinking.
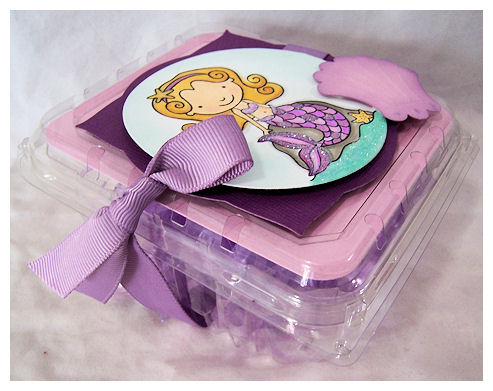
Makes a super cute gift, don’t you think? Thank goodness for purple Easter Grass!
Amber has inherited this, as we speak. She claimed it before it was even finished. She is funny- she likes to carry around LITTLE weird items. Ever since she was a baby, she would find these little (choking hazards) and hold them, or put them in her little pocketbooks and carry them around ALL day. She even hides them under her pillow. Her pediatrician would yell at me that they were choking hazards, but she NEVER, EVER put stuff in her mouth. She just loved holding them. Anyway-she is 4 now and still finds weird little things to carry in weird places. She loves little containers. Lord only knows what will end up in here!
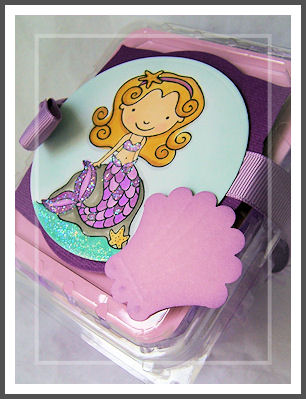
I made the sea shell myself! A total AH! HA! moment!
I used the SU! Scallop punch to cut the 2 sides at a curve, then dry embossed it for the shell! I then sponged on some shimmery pastel chalks-to finish the look! LOVED IT!
I hope you like it too 😀
Well I have TONS to do! You are all ROCKING your design team samples for my design team. SO HARD to pick. I think Im extending to 12! LOL! I don’t know-you are KILLING me with your creativity. Im still working on looking-but think Im mainly waiting till the END of the week to get it done all at once.
Thanks for the great efforts and submissions-you all blow me away!!
Don’t forget to add my NEW Blinkie to your site! I have a FAB challenge ready for Saturday! Im actually SUPER excited about it.
So, I’m off and running!
In the meantime check out the PCS Blog…HERE and the Design Team peeks
Till tomorrow…
FIRST Template Challenge! Cherry Blossom Gift Set
Apr 18, 2009 Author: mytime | Filed under: Home decor/3-D items, My Timeless Template Challenge, My Timeless Templates, Papertrey Newsletter, Product Opinions and Must havesInspiration is EVERYWHERE!!!
Its always great to start with an inspiration piece when you are creating something! So that brings me to my post tonight.
All your comments (and private emails :D) have truly inspired me to get it together!
Lots of great, fresh ideas. That is why I love you all. You totally energize me 😀
So here we go!

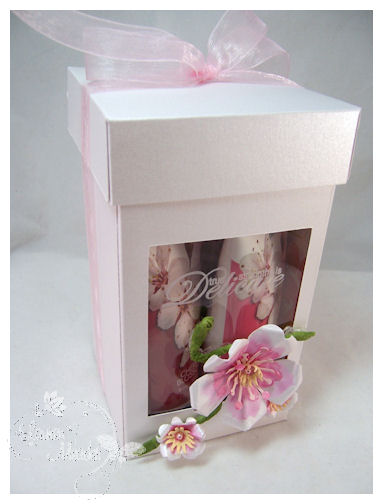
Truly Delicate Gift Set
All this talk about templates, and challenges, lead me to use one of my first My Timeless Template © releases called For Keep{Sake}!
I love the window cut out option! Lets you peek at what fabulousness is inside-awaiting you!
Cherry Blossom 2oz. body wash, body lotion, body spray, and loofah-fit in here perfectly
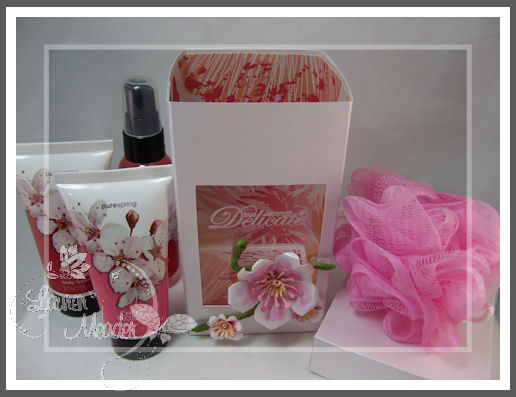
I was SO inspired by the Cherry Blossom bath set I purchased for a gift item, that I designed my packaging around it! I always say its ALL about the presentation!
Many bath and body products are just plain GORGEOUS! No need to cover them up! So let’s get inspired by them for our gift design.
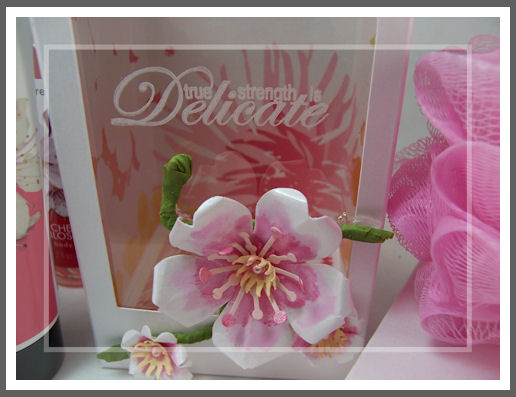
This is my handmade Cherry Blossom flower-inspired by my bath set.
Soooooo many of you said you want to see template challenges so here we go! Let’s see how many of you actually want to give this a go!
Based on the comments and MANY emails I think I figured out how to SPICE it up and keep in fresh and interesting!!
Depending on participation -I think I have decided WHAT I want to do on my blog now!
One week will be a template challenge, one week will be an inspiration challenge, another week will be a color challenge, then another week sketch challenge-not in that order! LOL! So something new each week.
Here is the first template challenge:
My Timeless Template Challenge 01 (keyword MTTC01)
Use ANY template YOU like. We have 2 FREE templates-so NO excuses!! You have a week to create something.
Like I did-Design your template/package based on the label of a bath product of your choice—> FROM HERE
(unless you have your own already)
Post the link to the inspiration piece WITH the photos of your finished template
Link your creation HERE
This should be so fun to see 😀
Now onto my package details…..
My For Keep{Sake} template was made from shimmer white cardstock.
I have long since wanted to line the INSIDE of my box, so I finally did that here today. LOVE the look.
NOTE: It is easiest to line it inside BEFORE assembling!
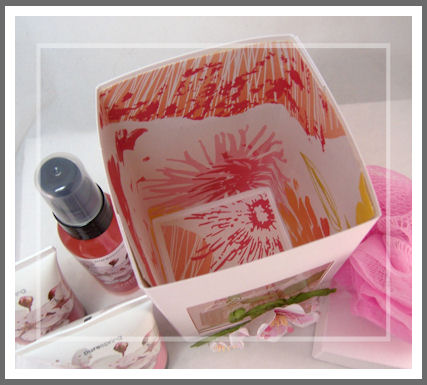
I used the Mimosa paper, which is shimmery by SEI. What a totally professional and finished look! Don’t you think? Remember its always the LITTLE details that give that WOW! factor.
You can see the little bath set in the window.
I love how the cherry blossoms came out!
My first time making them too-based on the ones on the bath bottles.

I do have a flower video planned-hopefully filming tomorrow. I just NEED a breather right now, and doing this was just plain FUN, which is definitely what I needed.
This gift set is now in my Etsy Shop!
The flowers are made by me, and painted with a Shimmerz paint! I love the look.
Think of what a FABULOUS gift JUST the BOX is, let alone the yummy smelling gift set inside!
The window is a sentiment from Remember set ” True Strength is Delicate”
Just love this.
OK! Now its YOUR turn!!
I can’t wait to see what YOU do.
Thanks for all the suggestions and emails. My head is spinning 😀
Thanks A Latte Gift set!
Apr 17, 2009 Author: mytime | Filed under: Home decor/3-D items, My Timeless Templates, TutorialsI didn’t post yesterday beause I have tons to do and needed a BLOG BREAK!
The kids begin vacation today-so that means the start of little stamp time for me, since I want to go DO STUFF with them, so we don’t ALL go insane, being in the house. Especially with nice weather coming! Lots of deadlines, so that mean PRIORITIES!! So blogging wasn’t on that list yesterday.
No worries I have gotten lots done for next week-as I have so much to share! NEW RELEASES COMING!! So brace your pocketbooks people 😀
In the meantime I have a fun project to share using the NEW! Spring Release from JustRite Stampers called Demi Phrases
A fun spin on a easy gift!
Thanks a Latte Gift set peek

I so love those 1/2 circle sentiments, and the fact that they can be put into various of the JRS blocks for various looks.
Make sure you check out these 2 posts
Getting Started-this will help you know where to begin with their products
Retirement SALE!-They are making room for NEW! stuff so if you want anything-HUGE discounts!!
OK back to the post info!
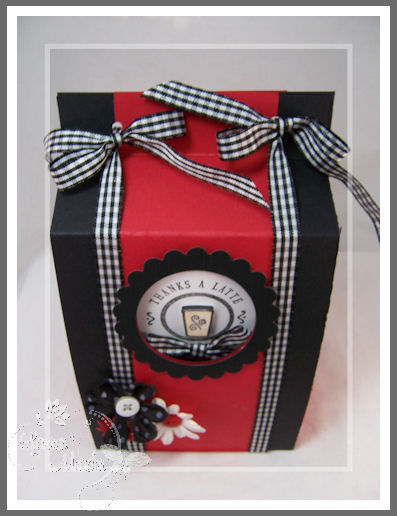
Thanks a latte-gift set
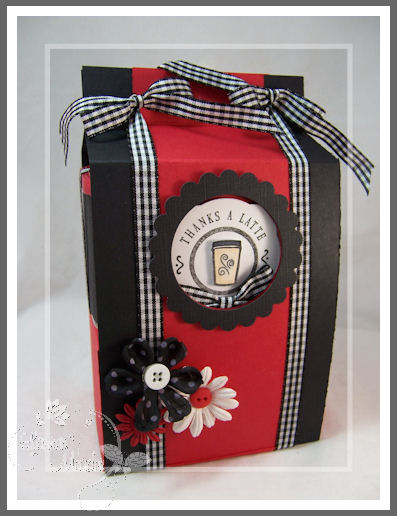
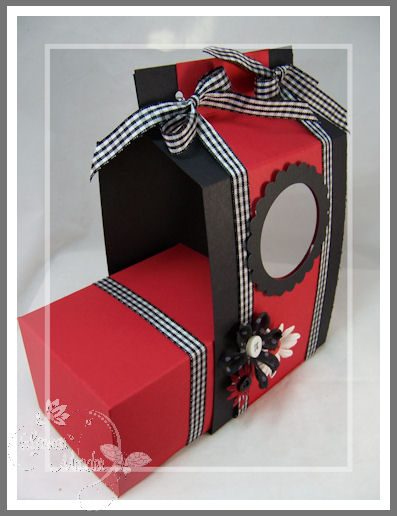
So here is my gift, packaged up all purty!
Who wouldn’t get excited by this?! I would!
Now you may wonder-WHAT is inside…….
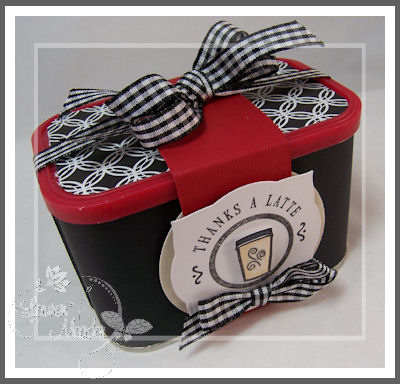
OK I have to say I LOVE my bow! LOL! It has 4 ribbon curls. Not a good photo-but again just had to point it out.
Do you have a cocoa, coffee or tea drinker in your life? Raise your hand! LOL!
(if not you can just use the tin and package up something else that tickles your fancy!)
I am a HUGE coffee person-HUGE! So I thought this would make a fun gift.
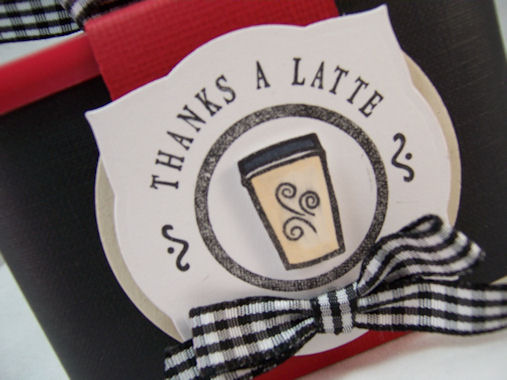
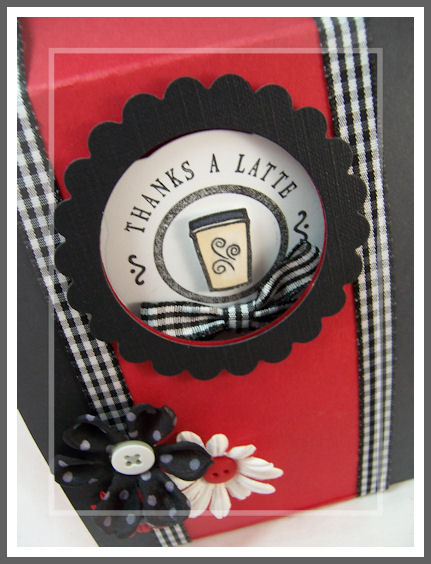
I stamped my Demi-Phrases , in black ink, on 2 pieces of white cardstock.
The coffee cup is by Gel-A-Tins(and OMW! Upon linking the site I NEED more!!! WOWZERS! Check them out!)
I found a set here Coffee Break. I stamped, colored and cut out the cup for a 3D effect.
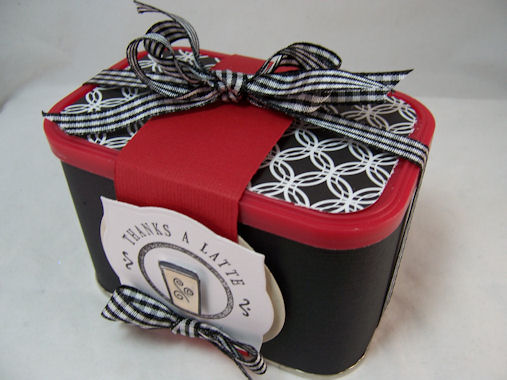
I then used the Labels 3 die to cut out 2 labels for my coffee tin. LOVE IT!!!!
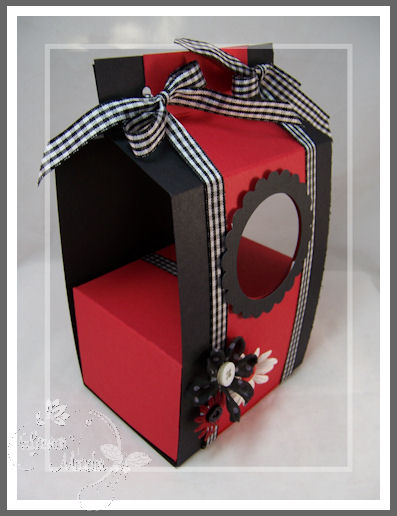
Both sides of this tin are decorated the same. I like everything to have a “finished” look. You can’t see any seams either!
I used Black & White basics for my paper, and black gingham ribbon
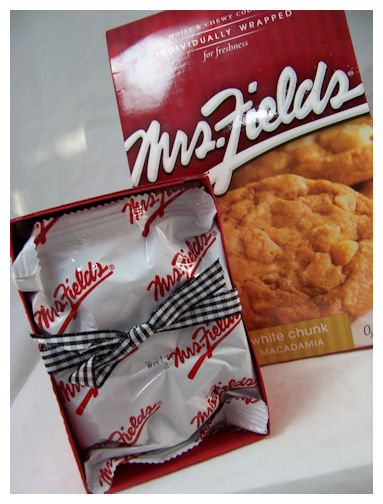
I wanted to package some French Vanilla Coffee Drink Mix from- General Foods International, since I am addicted to ADDING it to my coffee, for a nice “latte” kind of taste to it. I love the little tins too. WAY CUTE.
Now I know its a coffee drink mix-but if you try this!
I have a Keurig- s0 I put in 3 scoops of the mix in my cup, with 3 Splenda, and my fat free cream. I then brew my Dunkin Dounuts coffee into the cup, and it give a very rich, creamy awesomeness to my coffee! LOL! I like the sugar-free one-less calories 😀 But it us YUM-AZING!!! Try it!
OK off track there. Sorry!!
My colors were taken from the container colors.
I took the directions on the coffee tin, and using my computer-printed them onto a adhesive sheet , cut, and adhered it to the bottom of the can, so the recipient knows what flavor the coffee mix is, and how to mix it! Plus it looks nice too.
I wanted it to be SPECIAL though! Not just a wrapped can of coffee mix. So I went the extra step and made it a set that I LOVE!
How about coffee and a treatlet? I took some pre-wrapped (4 of them) White Chunk Macadamia Nut Cookies, and inserted them into theLolli-Pop Along base, for a yummy surprise 😀 They are wrapped so it preserves freshness! Oh and I despise cooking, so its easier than home-made, but you could add your own home-baked cookies too!
Here they are in the base. All 4 with a bit of room.
Now we slide it into the template.
NOTE: I did alter the template a bit to fit my project 😀
I made my base 3 inches deep instead of 2.
Same for insert.
SO I turned the base of cookies-which are tied in nicely, and turned it up-side-down, so my coffee tin can sit on it.
I just slid it into myLolli-Pop Along base.
Now put the coffee tin on the top of that…

Viola! Awesome gift wrap!
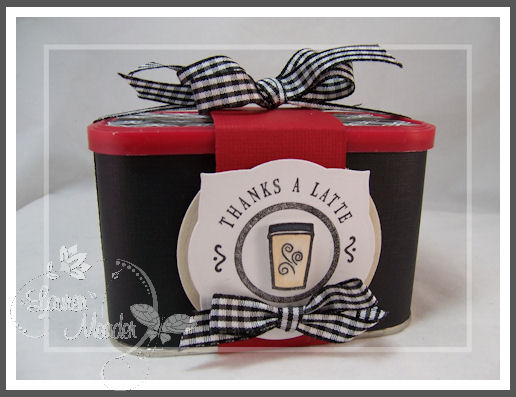
This is a peek through the window on the front of gift set . I love it
I have been wanting to use it again, for a while.It turned out to be PERFECT for this gift set.
I decorated the front to look similar to a coffee bag. Mission accomplished.
Just another photo to share. I took a bajillion!
Now isn’t that s SUPER presentation, of a SIMPLE gift, that is very inexpensive?! Seriously! I love this craft!!
Can you tell?! LOL!
Funny I love packaging stuff but I LOATHE wrapping presents! I like UNWRAPPING them though 😀 I just think its strange how I love packaging but not wrapping gifts. You should see how SLOPPY something comes out if I wrap it. You can totally tell it was a LABOR of love! LOL!
I have been creating up a storm so come back to see what else I have for you! OK!!
So that is it my friends!
Till tomorrow 😀
Cross your fingers I get my videos taped too! Lots to share with ya
Thanks for stopping by
Papertrey Ink April Release
Apr 14, 2009 Author: mytime | Filed under: Home decor/3-D items, My Timeless Templates, Product Opinions and Must havesWell it is FINALLY here———> The Papertrey Ink Release!
Its crazy how much amazing stuff has gone on with the release this month 😀
My Timeless Templates ©-Get a Handle On It © , and From the Desk Of ©-are NOW available for purchase!
I am STILL working on some MORE samples 😀
As for my release projects this month-there is only ONE you haven’t seen :C YUP! One measly sample. Don’t forget I did share LOTS of eye candy over the last few days. A SAHM to 3 can only do so much ya know.
My last peek uses Tea for Two
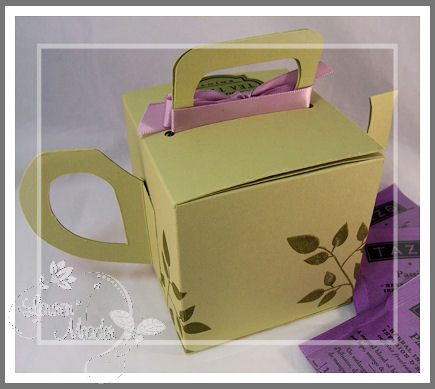
“I’m a little tea pot ” box

I seriously sang the “Im a little teapot” song while making this project, and typing this post! LOL! Its actually driving me INSANE!
This is the detail shot of my project focus. I punched and colored a mini flower, and colored in my leaves. This is my favorite tea pot image from the set. Maybe because Beautiful Blooms is my ALL TIME favorite flower set-to date! I also LOVE the layering of the nestabilities.
This is the best tea set EVER!!!! I’m beyond in love with it 😀 So many possibilities. For some reason I’m on a PURPLE kick this month! LOL! In case you didn’t notice. I think 3 of my projects used it. Maybe more. Whose counting right? As long as it all works.
OK so here is the TAH-DAH! moment…….
I used my Timeless Template- Get a Handle On It, to create a gift box that LOOKS like a tea pot.
Can you say LOVE IT?!!!!! (yes I am very excited over it)
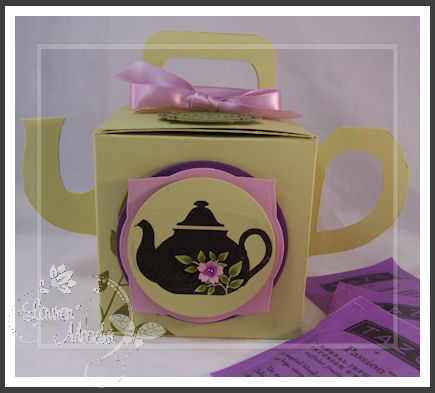
How flippin cute is that?!
It was inspired by the tea pot on the box.
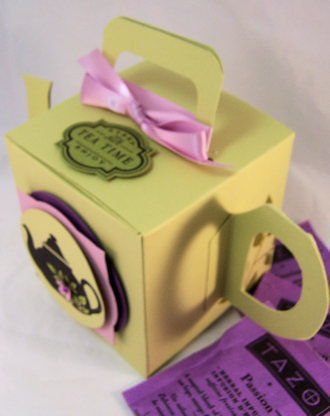
I am SOOOOOOO proud of it, because I free-handed the handle and spout template-which is double sided. I so stink at DRAWING-so I let my scissors be my guide.
Did you think this box could be a tea pot?
Tha handle and spout, adhere NEATLY to the box, which is the KEY!
EEK! Blurry photo ALERT! Sorry.
I did stamp the back too-can’t forget that.
I’m seriously IN LOVE! Thank goodness I had the right frame of mind to make another handle/spout “template” for myself BEFORE adhering it to my box, and attempting it again. These were perfect on the FIRST try! Not something that happens often-let me tell you.
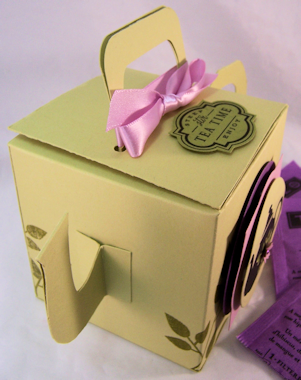
Now here is the “label” on the box top.
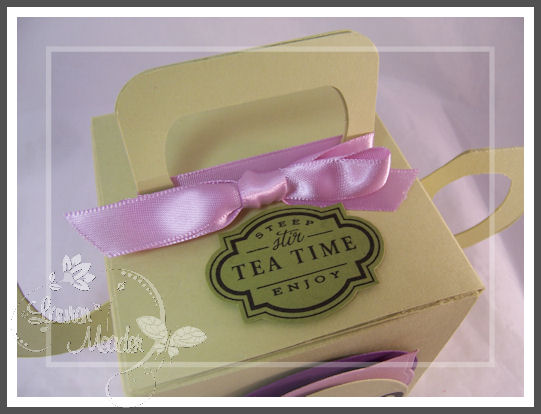
I think its just so darn purty. I used the Key Tag Punch to make my handle on the top.
Inside this Tea Pot Box-there is Passion Tea from TAZO. An entire box fits-with room on the sides.
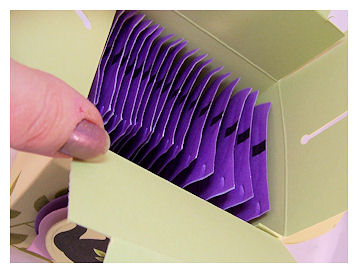
Despite the photo-it matched my project PERFECTLY!!!
Love packaging ever-day items, into special gifts 😀 I mean really. You package “tea” in wrapping paper and its *just* tea! You put it in this box, and its SO much more. Don’t you think?
For a whopping $5 this template offers so much variety! I really love it. Well I guess thats a lame statement! LOL! I wouldn’t do anything I didn’t LOVE! LOL!
Supplies all from Papertrey Ink
My Timeless Template: From the Desk Of
Stamps: Two for Tea, Beautiful Blooms
Cardstock: Spring Moss, Ripe Avocado, Lavender Moon, and eggplant
Ink: Black and copic markers
Satin ribbon in Lavender Moon
Labels 3 & circle nestability
Flower punch, adhesive pearl
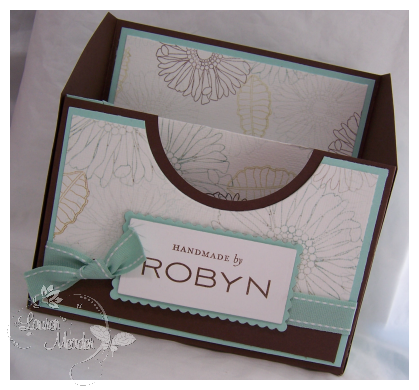
Lastly-this was the concept project for “From the Desk Of” template
For Robyn
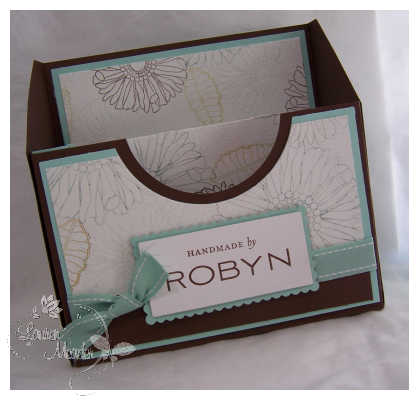
I made my own patterned paper using Friends Til the End. I also used Simply Stationery and Fresh Alpha!
We did re-enforce the “original” divider, from the original you see here, for a more STURDY box.
All the tweaking that comes after the original concept is put into production. Always lots more tweaking. Often times I just NEED to get it out onto cardstock-ASAP! Then when I know it “works” I tweak and tweak some more.
Now this box can definitely be given EMPTY and still produce a WOW!
This is a comment taken from Robyn (:D) The friend I made this for-on my blog yesterday
“Hey Lauren …. your two new creations are splendid 🙂 I hope all your ~peeps~ realize how beautiful and EASY your Templates are to print and recreate!
And I’m especially fortunate, as I am the proud owner of one of Lauren’s “From The Desk Of…” creations that she personally created for me with my name on it. I can’t tell you how many friends and family comment on it’s {{{WOW }}} factor and how stunning it is sitting on my desk :0) I’ve also have two requests to make this item already after seeing mine, from friends & family! It totally blows me away every time I see it, knowing that it’s made from paper, rubber & ink … but also because I know Lauren puts her Heart & Soul into all her creations 🙂
So make sure you download some ~*Timeless Templates*~ tonight, via PTI; you will fall in love with Lauren all over again =)”
Isn’t she sweet?! She always makes my day.
So there you have it! All my peeks are done!
I hope you enjoyed the items I shared here. I literally POUR every OUNCE of creative being I have into these projects each month-to ensure lots of creative ideas 😀 You are all so inspiring to me 😀 Your kind words and sharing YOUR creations, really keeps me going. Your my subliminal-energizer battery! LOL!
So once again-thanks for helping inspire me to better my best!
More to come tomorrow…………..
Template Duo
Apr 13, 2009 Author: mytime | Filed under: Home decor/3-D items, My Timeless Templates, Papertrey NewsletterLast peeks till the RELEASE.
JEEPERS! This week is in SLOW motion, isn’t it?! I feel like I have been creating for a month! LOL! I crammed so much into a few days, I’m not sure how time stood still.
Maybe I’m just too excited to get the show on the road! I love when we have a release. I especially love when you share YOUR creations with me 😀 Its the best mail in my IN BOX- truly!
So as you know we are releasing a TON of stuff over at Papertrey Ink. I don’t think Nichole EVER sleeps. I think she is busier than me-and trust me, I am pretty busy-everyday! LOL!
Well as you know, we are releasing two more templates this month! From the Desk Of, and Get a Handle On It! Only ONE more sleep (as my kids would say!) I really love this months release ( I guess I love every month hehehehe) but I can’t help it.
So today I thought I’d share another peek-one for each new template. I swear I could make a million things with JUST these two. I have so many ideas, my note pad page is FULL.
Lots of VIDEO ideas too. I so need to get FILMING soon 😀 My in-box was full of requests 😀 THANK YOU.
So lets move along to the eye candy shall we? I know you aren’t here for me blabbering on and on, when we have a release coming.
Little Black Bird- Jar Trio
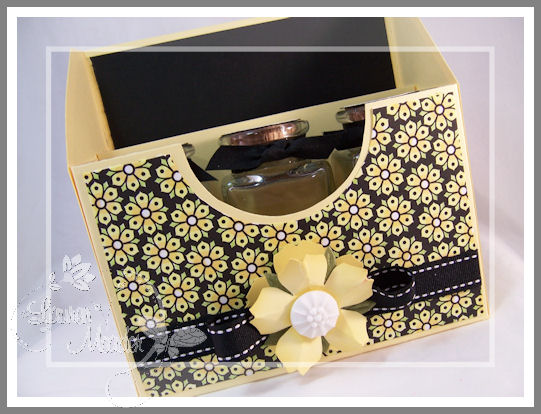
I recently got an AMAZING deal on some jars at the Dollar Plus store. I really dislike the PLUS part! LOL! These were MORE than a dollar for several, but I couldn’t resist! I see things like that, and immediately a million gift ideas and packaging options FLOOD my brain! Even my KIDS find stuff and say “OH! Mom I bet you could make something pretty out of this!” Its hilarious. I love it. I like that they TOO can see outside the box, so young 😀 I’m telling you Im totally going to be “replaced” by my own children in a few years.
I really LOVE Black and Lemon Tart together.
I saw an advertisement (not sure for what-sorry!) that used these colors, so I jotted it down for future reference.
I LOVE Black & White Basics patterned paper-the floral pattern especially, since I LOVE customizing it to whatever color I want for the project. I just whip out my Copic markers, and away I go. I have colored it numerous times, and it never gets old to me 😀 Its actually quite relaxing. granted its a LITTLE time consuming, but well worth the look.
For this project I made my side panels, and front panels with the colored paper.
If you PRINT the designer panels on COPY paper, then use the copy paper as a guide you get just the right amount of colored paper for the decorative panels 😀

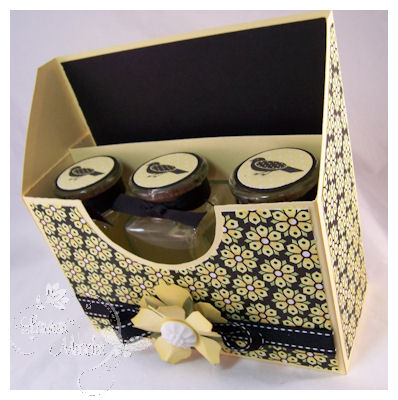
I wanted to make a gift that the receiver could personalize by putting whatever THEY wanted in the jars! Hence them being EMPTY!
These have a wide mouth, with a cork stopper.
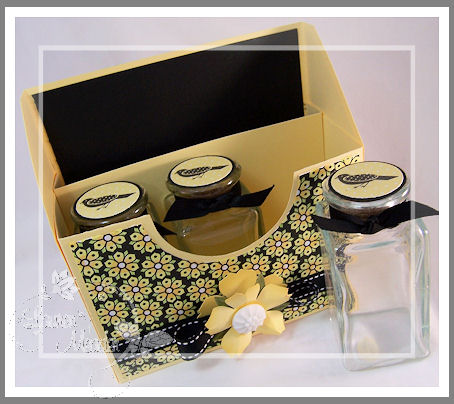
They are great for office items like tacs, paperclips, staples……..or maybe for a sewer! Buttons, thimbles, little mini thread rolls, How about the stamper? Buttons, Brads, Eyelets or Prima’s! The list goes on and on. You could even fill it with little bath products like bath wash, lotion and bath salts! Maybe a gardener! Put various seeds in each bottle?!
Anywho-I love the WOW! factor these colors offer.
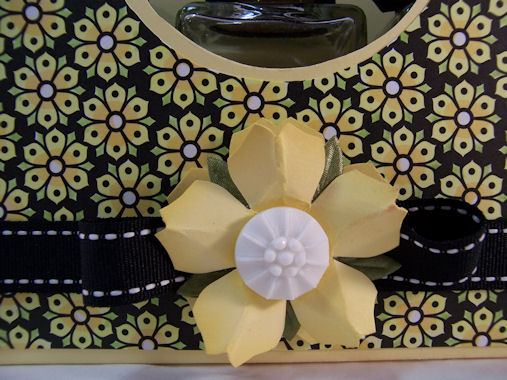
Isn’t the flower detail gorgeous??
There is a pocket in the back. That is empty. Again I wanted to let the receiver fill it with their choice of items0like a journal, address book, photo album, gardening journal, face spa packets……………..whatever ends up being their “theme”.
Who wouldn’t LOVE this?
Supplies:
My Timeless Template: From the Desk Of
Stamps: Everyday Classics
Cardstock: Lemon Tart, True Black
Patterned paper: Black & White basics-colored with copics to match, 2008 Bitty Dots collection
Ink: True Black, and Copic markers
Vintage buttons in white
Various punches
Ribbon : Stitched black grosgrain, black twill
glass jars-Dollar Plus
OK next up!
This funky box design was inspired by some fabric I saw used on a purse while shopping Etsy!
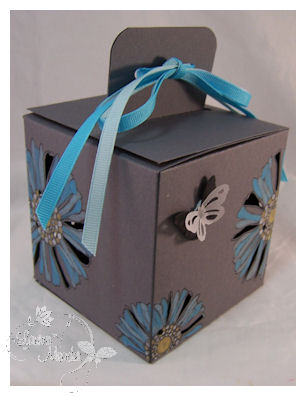
I’ll be darned if I can find it now! I knew I should have saved it to my faves 😀 I wanted to buy it 😀
If you haven’t noticed Friends Til the End is a top favorite set of mine 😀 What I really love the cutting out part of the petals! Im not sure how well it shows but various petals are cut out of the box! I LOVE the look it gives to the box.
This one will be hard to part with too.
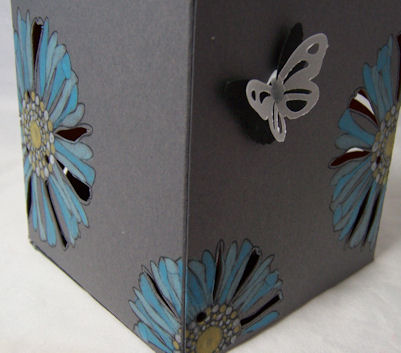
I stamped my petals on the gray cardstock box in black. I then took my hobby blade and sliced some out.
For a NICE POP of color I used my Prismacolor Pencils-they give a FAB pop of color when working on DARK cardstock bases. I’m LOVING this look.
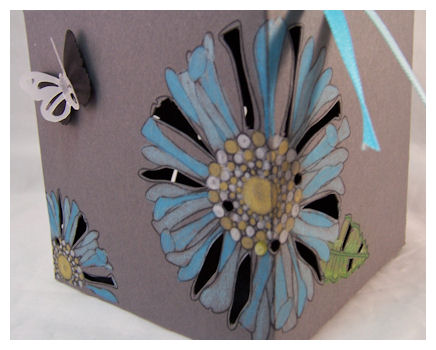
The box is decorated on all sides 😀 You always want to remember the BACK!!
Instead of punching a handle I punched two holes, and strung through some grosgrain ribbon instead.
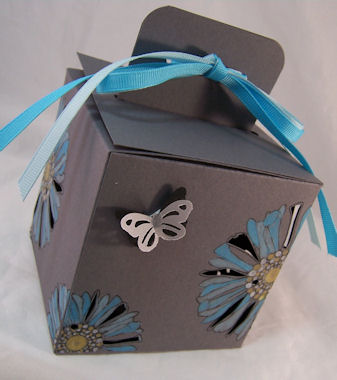
You know I HAD to add a butterfly!
I’m selling this on my Etsy shop so I left it BLANK! That way someone can use it for whatever they choose.
Supplies:
My Timeless Template-Get a Handle On It
Stamps:Friends Til the End
Cardstock: Dark Gray, vellum, true black
Ink: Black Pallette
Prismacolor pencils
Hobby blade
Martha Stewart butterfly punch
ribbon
OK so TONIGHT is the BIG release! I can’t wait. I hope you are as excited as I am! I can’t tell you how much I enjoy sharing all my ideas every month with you all. Your sweet comments make the ENDLESS hours of designing, altering and creating so worth it to me 😀
I know I say this stuff ALL the time, but I really do mean every word. I feel like you all take the time to stop by, and or comment, the LEAST I can do is tell you how much it means to me 😀 I read every single word-always!
So thank you! I hope to see you tonight on the PTI forums 😀
In the meantime……………….check in on Nichole, Becky, Dawn , Heather and Lisa,as they are all sharing samples too!
Sooooo I’ll chat with you later or see you back here tomorrow!
PS did you all notice my SUPER awesome new signature?! Don’t you love it?! Im over the moon with it. My blog girl Sara is THE BEST! I swear she feels like my sister I never had! She rocks!! She even did my Etsy Store Banner 😀 and the listing on my sdiebar. Amongst a million other things. Im shocked I’m not on her SPAM list yet! LOL!
Sara you know I LOVE YOU!!!! You are the BESTEST!
OK Im going now 😀
Doubling up on the template!
Apr 12, 2009 Author: mytime | Filed under: Home decor/3-D items, My Timeless Templates, Papertrey NewsletterWell we are still sharing sneak peeks this week for the Papertrey Ink Release!
I KNOW you are waiting for a video-but I just can’t swing it rigth today. I will have one this week though. I still need to post my Saturday Sketch stuff. The last 3/4 weeks of missing my own sketch should indicate Im not able to get everything done :C I always have SO MUCH I want to do, but can’t. KILLS ME!
As you may know, the release will take place on the 15th! Im just so beyond excited, and exhausted at the same time.
Today I am sharing a sample with the From the Desk of template.
I think this one is REALLY cool!!
I took the template, and made 2 of the boxes. I then adhered them together, back to back, and added a bottom panel-for a finished look. Now talk about making a UBER cool-MEGA gift/Organizer 😀 WAHOO!!! Plus it looks rockin together.
NOW for a REALLY cool- My Timeless TIP!!!!!!!!!!
For the decorative side panels: when you ADHERE the TWO finished templates together (as you will see in my project)-
You cut out your decorative panels out-but LEAVE them together in the center!
See photo-this is the print out of the decoartive panels-which would be cut into 2-writing side adhered to template.

Don’t cut the panels separately. Leave them together!
That gives you the PERFECT-solid – one piece- decorative panel cover!!
Come look at what I mean
I decided it would be a Counter-top Recipe Cart! A great looking box, that fits mini recipe books, recipe cards to give to friends, a file system for your own recipe’s and a note book so that you can write down meal plans, recipes, things to buy or other ideas!!
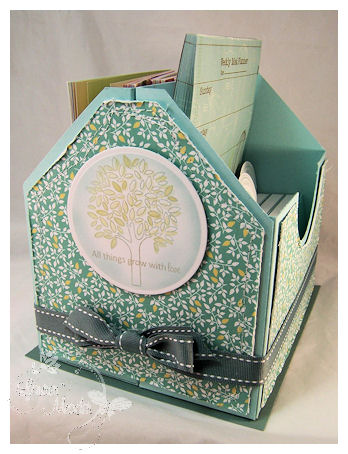
This is the side of the Recipe Box I created.
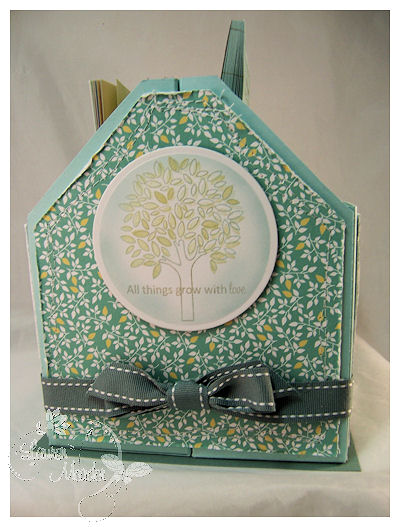
Both sides are the same. I designed this so that the sides of this box would face out.
Now here is the detail of the stitching I did around all the designer paper layers.

Its a squiggle stitch to mimic the pattern of the leaves. I then distressed the edges a bit.
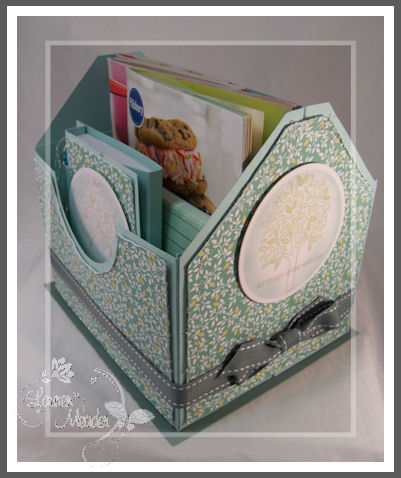
View of the left side of the Counter-top Recipe Cart
Now with the book out
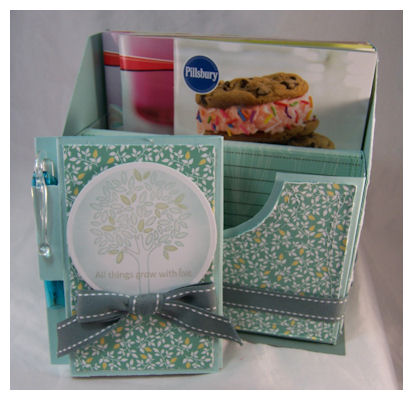
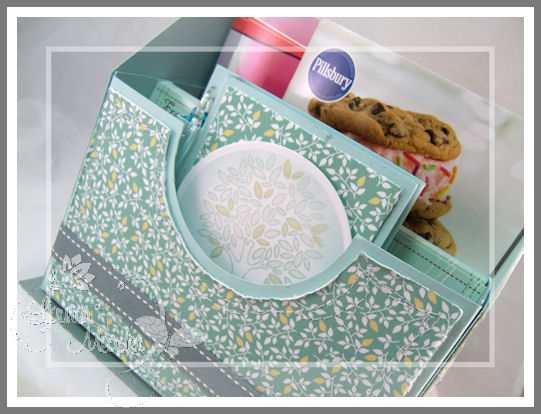
Now in one side of the box we have the covered notebook, a set of “From the Kitchen of” recipe cards that I purchased, and 3 mini cook books!
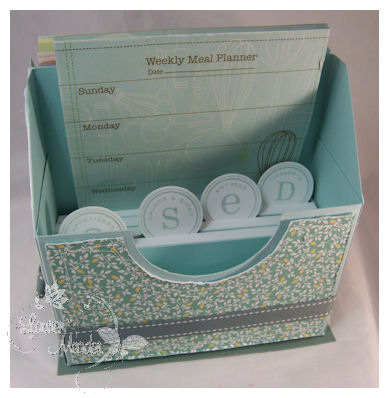
A weekly meal planner notebook that I purchased (and is magnetic)
a full set of PTI recipe cards-already tabbed off with the following categories: Appetizers, Salads & Soups, Entrees, and Desserts
They fit PERFECTLY in here 😀 LOVE IT!
Isn’t that a GREAT gift idea? Weather or not you know someone well, this is a fabulous gift.
Think of new home, new apartment, maybe a cook/baker in your life?
Even if you don’t take the idea to use recipes, its great gift box for anything wlse you may want to put in there too.
Supplies:
From the Desk of template
Stamps: Father Knows Best, Recipe Box, Garden of Life
Cardstock-White, Aqua Mist, Ocean Tides
Patterned Paper-Green Tea Leaves
Ink-Ocean Tides, Sping Moss
Ribbon-Ocean tides stitched grosgrain
Sewing machine, circle punches, circle nestabilities, notebook, PTI recipe cards, other recipe cards and mini recipe books X3
OK so while that is all for me today, check in on Nichole, Dawn , Heather and Lisa,as they are all sharing samples too!
Till tomorrow.
My Etsy

Who I Designed For
Blogroll
- Alicia
- Alli Miles
- Ally Blankenship
- Amber
- Andi @ crafts on a whim
- Angel R
- Angie Z
- Anne Kranitz
- Becky O
- Bee
- Beth Silaka
- Bethany Paull
- Beverly Nash
- Bobbie
- Cambria
- Cammie
- Card of the Week
- Card Positioning System (CPS)
- Cards for Cancer
- Catherine Doucette
- Charmaine
- Cheryl Sims
- Chriss Rollins
- Christina
- Christine Ewing
- Christine Wooden
- Colleen Schaan
- Craft Critique
- Craft Gossip
- Crystal
- Dawn Easton
- Emily Giovanni
- Geny
- Holly
- Igne Groot
- Inspirational Craft Blogs
- Irene
- Jami Sibley
- Jeanne Streiff
- Jen del Muro
- Jeni Bond
- JenMarie
- Jenn Balcer
- Jenn Diercks
- Jenn O
- Jennifer E
- Jennifer Mick
- Jennifer Pereda
- Jennifer-Sweet Treat
- Joanne Basile
- Jodi Collins
- Julia Stainton
- Julie Masse
- Karen
- Kathryn Berthiaume
- Katie Cotton
- Kelley Holland
- Kendra
- Kim Scholfield
- Kris’s Color Stripes! Get inspired here
- Kristen Dubosque
- Kristin Eberline
- Kristine
- Laura @ Sunshine Stamper
- Laura Turnmire
- Laurie Schmidlin
- Lesa Rapp
- Linda Duke
- Linda-LSN
- Lindsey Botkin
- Lisa (lakind scs)
- Lisa Kind
- Lori Craig
- Maggie
- Mara Campbell
- Maria
- Maria Levine
- Mary
- MaryJo
- Melanie M
- Monique Hansen
- Moxie Fab World
- Pam Imholz
- PaperCrafts Connection
- Peppers and Pollywogs Kids party site
- Rebecca Grohall
- Rita
- Robyn
- Rose Ann
- Sarah Vrolyk
- Sharon Harnist
- Sharon Johnson
- Sharon Rivera (a chemisrty with paper)
- Sherrie
- Sophia Landry
- Storage Units, Ink, & More Blog
- Sue Berker
- Susan (Rainy)
- Tangii Crane
- Tracy
- Tricia Traxler
- Trudee
- Velta
- VivLyn
- Zena
MTME Pretty Palette Color Team
MTME Pretty Patterns Sketch Team
My Time Made Easy TM LLC
Shop till you drop!
Lauren Meader
About Me
Copyrighted material
Subscribe To My Blog
Pages
- About me
- Alexa’s Story!
- My Crafty Corner!
- My Time Made Easy™ LLC
- Our Make A Wish Trip to Disney!
- Resume/Publication List
Calendar
| M | T | W | T | F | S | S |
|---|---|---|---|---|---|---|
| 1 | 2 | 3 | 4 | 5 | ||
| 6 | 7 | 8 | 9 | 10 | 11 | 12 |
| 13 | 14 | 15 | 16 | 17 | 18 | 19 |
| 20 | 21 | 22 | 23 | 24 | 25 | 26 |
| 27 | 28 | 29 | 30 | 31 | ||
Archives
- August 2013
- July 2013
- June 2013
- May 2013
- April 2013
- March 2013
- February 2013
- January 2013
- December 2012
- November 2012
- October 2012
- September 2012
- August 2012
- July 2012
- June 2012
- May 2012
- April 2012
- March 2012
- February 2012
- January 2012
- December 2011
- November 2011
- October 2011
- September 2011
- August 2011
- July 2011
- June 2011
- May 2011
- April 2011
- March 2011
- February 2011
- January 2011
- December 2010
- November 2010
- October 2010
- September 2010
- August 2010
- July 2010
- June 2010
- May 2010
- April 2010
- March 2010
- February 2010
- January 2010
- December 2009
- November 2009
- October 2009
- September 2009
- August 2009
- July 2009
- June 2009
- May 2009
- April 2009
- March 2009
- February 2009
- January 2009
- December 2008
- November 2008
- October 2008
- September 2008
- August 2008
- July 2008
- June 2008
- May 2008
- April 2008
- March 2008
- February 2008
- January 2008
- December 2007
- November 2007
- October 2007
- September 2007
- August 2007
- July 2007
- June 2007
- May 2007
- April 2007
- March 2007
- January 2007
Categories
- About Me
- All That Scraps
- blogger challenge
- camera/photo play
- Cards
- Contests
- family stuff
- FOR SALE
- Home decor/3-D items
- How to FAKE it!
- Introduction
- JUGS Challenge
- JustRite Stampers
- Lizzie Anne Designs
- My family stuff
- My Stamping Space
- My Time Made Easy
- My Time To Color Challenge
- My Time to Create Challenge
- My Timeless Template Challenge
- My Timeless Templates
- Mytime Mail
- MYTIME MOVIE/VIDEOs
- Papertrey Newsletter
- Pink Cat Studio
- Pretty Palette Challenge
- Pretty Patterns Sketch
- Product Opinions and Must haves
- Recipe's
- Saturday Sketch
- Smilebox Creations
- Stampavie
- Tutorials
- Uncategorized
- videos
Most Popular
- Create your own Onesie Card Tutorial-and important NOTE! PLEASE READ (2529)
- Saturday Sketch-Boxed bag holder (2333)
- Going GREEN! Fancy Flower Flourish-Closure Video (1478)
- Fabulous Favorite - Giveaway! (1336)
- a Prayer Request (1232)
- QUICK-Easter Baskets from Nestabilities-PTI style-and blog challenge (1063)
- Teaser Sketch (999)
- February Release Giveway! (and a little peek) (996)
- Group Post and Rambling Rose Video Tutorial (985)
- GIVEAWAY! Who wants it all?! (895)
Recent Comments (RSS)
- 첫충사이트: 완전히 흥미로운 블로그 게시입니다. 저는
- sarah: Wow, Lauren, what a stunning
- hedie: خرید راهبند
- 야동: Love to read it,Waiting For
- 야동: This seller is in a
- 바카라사이트: 여기 처음 왔어요. 나는이 게시판을
- 야동티비: I was surfing the Internet
- 바카라사이트: 비슷한 주제에 대한 흥미로운 정보를
- 바카라사이트: "여기에 제공해 주신 귀중한 정보와
- 온라인홀덤: 유익한 웹 사이트를 게시하는 데
Copyright © 2007 - My Time, My Creations, My Stampendence - is proudly powered by WordPress
This blog has been Tweaked and Designed by Sara Williams