Archive for the ‘Cards’ Category
Challenge Catch Up
May 3, 2011 Author: mytime | Filed under: Cards, family stuff, Home decor/3-D items, My Time Made Easy, Pretty Palette Challenge, Pretty Patterns SketchI’m back again today and the team and I have some more eye candy for you!
So today I have some challenges to post that I needed to catch up on.
My mom’s sugery which was Monday(she is doing well), the May release and kids vacation, as well as a vet emergency put me behind!
Daisy, our 3 year old cockapoo, had the “pleasure” of diving into Alexa’s Easter Basket (which Alexa had left on her bed). Daisy began vomitting in the morning, and the first time I thought she ate too fast. Then I found 2 more “episodes”, and realized that it looked like chocolate. I began to panic a little, and asked the kids if they left anything out. Amber informed me of Alexa’s mishap (thankfully) and upon inspection of the evidence I realized Daisy had eaten an entire (large) box of Junior Mints (which are dark chocolate), 2 Reese Peanut Butter Easter Eggs, 2 (at least) Cadbury Chocolate creme eggs, and that is what I could tell.
I called the vet immediately and he told me to give her 2 teaspoons of hydrogen peroxide to further induce vomitting. While I didn’t think that would be neccessary(or that I could even do that) as she already seemed to get rid of a ton on her own, one look at her and you could actually tell she felt ill :C I had Noah help me as we took her outside. He helped me hold her down, so I could give her the peroxide. I used a child medicine spoon dispenser. It allowed me to get into the side of her mouth and pour it in through her teeth. She was clenched and I couldn’t force her jaw open, so I poured it into the side of her mouth. She drank it.Within 2 minutes, the amount to chocolate that came up was INSANE!
We then had to rush her to the vet as it was determined she had eaten a leathal amount of dark chocolate. Daisy is only 12 lbs, so it only take an ounce, and she ate well ove that. There they induced more vomitting and gave her charcoal, as well as a few other things needed to be done. $564.80 cents later Daisy was OK.
As we were leaving the vet, they offered to give each of the kids those Lindt Chocolate bunnies. I had to ask “Are you kidding me? I appreciate the offer, but no thank you. We’ve had our fill of chocolate for one year!”
That was quite the expierience. Thank goodness we were home when it all happened. If something bad happened to Daisy I know Alexa would have felt awful, as she was very upset by the incident. Poor kid.
Anyway….I have a few challenges to catch up on before we wrap up our last day of release projects, so let me share those with you now.
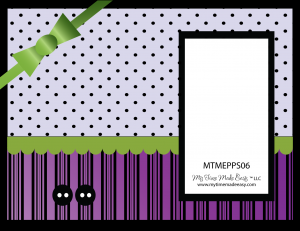
Pretty Pattern 07

CLICK HERE for details and to enter your creation!
Here is my take on the sketch!
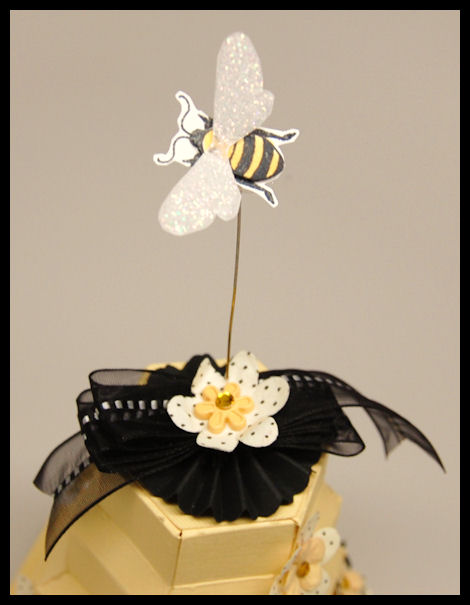
Bright Day

I used the NEW! Bee-Loved © set for my card!
I colored the daisies with my Copic Markers, and added stickles to them. I cut the bee out using the My Bee Loved © cut file.

I also used the spotlight technique by stamped the flower in white, onto my black base, and matching it up to the colored flower panel! Too fun.
Next upis the Palette Challenge
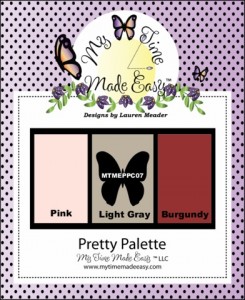
CLICK HERE for details and to enter your creation!
Celebrating you!
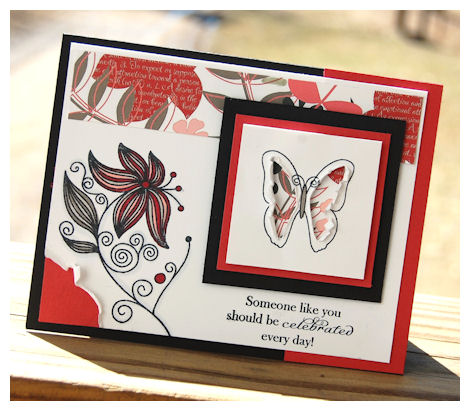
I had a vision for this card some time ago, where I cut out the center of the All A Flutter © butterfly, and you can see the Fresh Cut Expressions © Collection 2 patterned paper underneath! I altered the colors to suit the challenge!
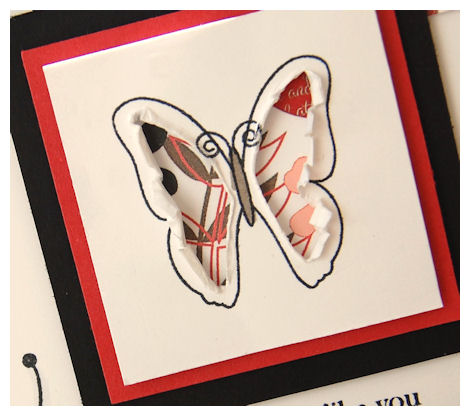
Doesn’t that look so amazing? Too fun. I just scaled down the pattern and there you have it!

I added the flower from the Bold Botanicals © set, colored to match my paper.
The sentiment is from the Just For You © set.
I actually made this for the Birthday Blog Hop for our team member Lisa, but failed to get it photographed and uploaded in time :C SORRY Lisa!!
Well that is all for today.
I’ll return tomorrow for our Group Post: A Year In Review!
Happy Birthday to me!
May 2, 2011 Author: mytime | Filed under: Cards, family stuff, My family stuff, My Time Made EasyYes, it’s true, today is my birthday!
Is it lame that I still get excited about my birthday? Each year I view it as a new milestone, and hope and pray for the health, love and happiness of my family. I feel so blessed each year as I know first hand how precious it really is. Granted I don’t like the getting older part. I would swear I was still 23 not turning 33!! I have so much to be grateful for.
The love and health of my children, husband and myself (and our sweet dog Daisy).
Alexa goes into her 4th year of remission from Leukemia.
My mom has come through her surgery well, and is fighting that big fight against her Cancer.
My niece Gabby with have a brother or sister in October-we find out tomorrow 😀
We have our dream home, complete with craft room.
I have a “job” I love.
What more could a girl want?
OK Enough about me.
How exciting has the May Release been?
You can see more projects today from:
Since it’s my birthday I decided that I would share my favorite project to date!
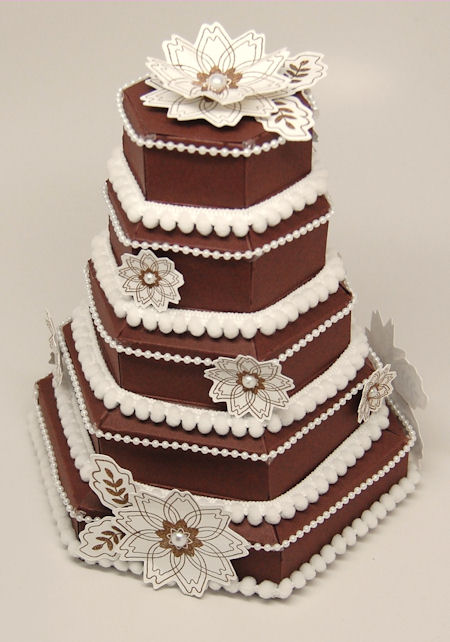
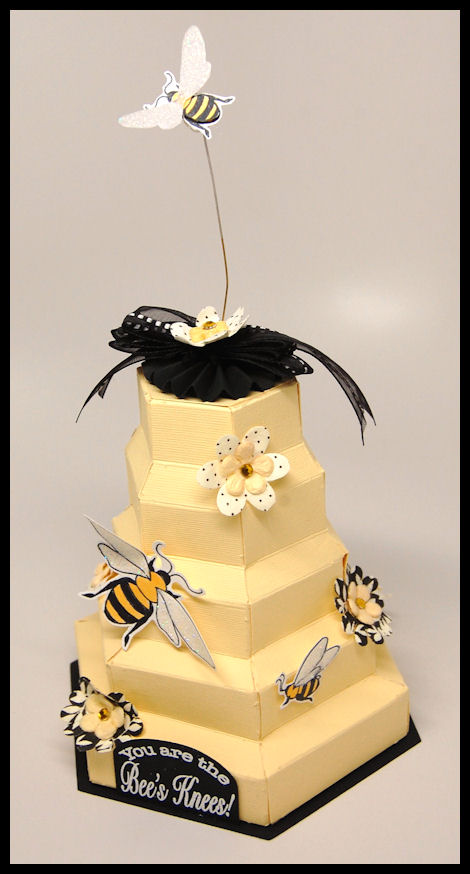
I know I have had so much fun creating with all the goodies this month, but this one takes the cake-literally!
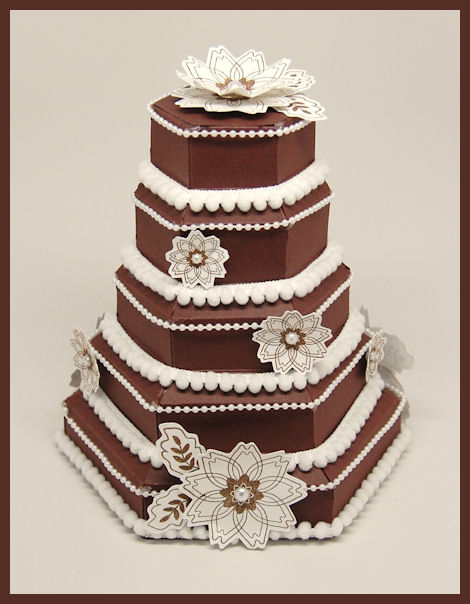
Is this not delicious?
This was designed using the Oh-Bee Hive template!
From hive to cake.
Amazing.
While the Oh-Bee Hive template was designed to be a bee hive, I actually made this sample FIRST! LOL! I was so inspired by the tiered layers, that I had to go where the inspiration first took me.

I did resize the file by 20% to make my creation a little larger, so it could accomodate my design.
I knew I wanted a monochromatice cake, with cascading flowers, so this (to me) was the perfect color combination-chocolate!
What girl doesn’t love chocolate?
It came out better than I envisioned it to.
You can create your own version to suit any color combination. We have many cut files that could add the the beauty of this easily.
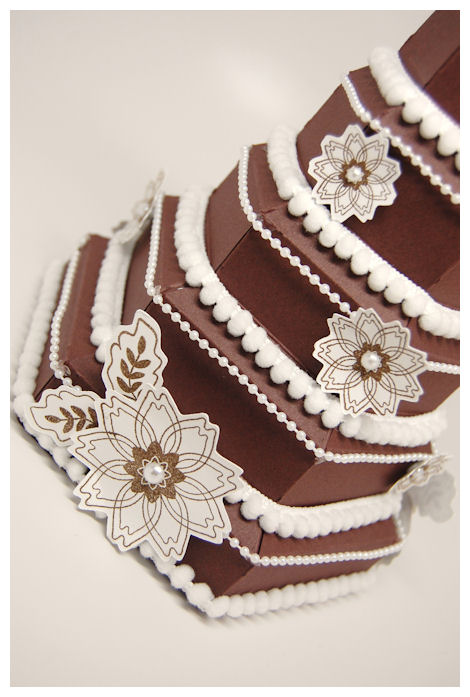
I used the stunning flowers from the Petal Perfection © set, cut out using the Petal Perfections © Cut File!!
It made creating the cascading flowers on the cake, quick and easy.
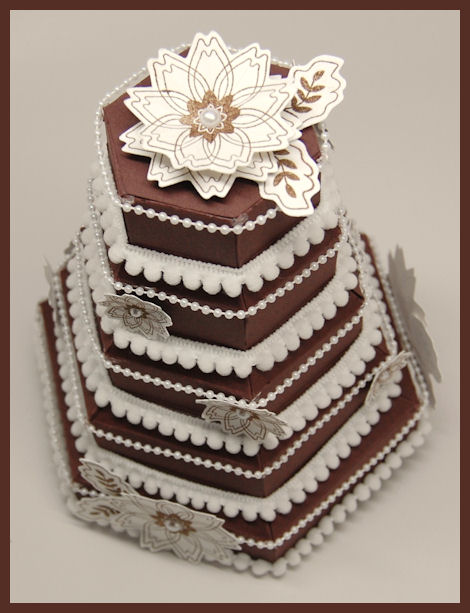
I just stamped the flowers in chocolate ink, then added an adhesive pearl to the flower cetners.

I added a string of pearls, and pop pom ribbon to the tiered layers for the added details you would see on an actual cake.
I think we can agree it all really completes the WOW! factor of this cake.
It only took about 40 minutes to make this. Can you envision gifting this to someone filled with chocolate truffles? Or these as centerpieces at a birthday party, bridal shower, or wedding. OH! These would be stunning wedding favors! You can re-size them to suit your needs!
Many wondered if there was ROOM in here to fit gifts.
YES!
The directions tell you how you can package up your gifts, while completing your design. Honestly the completed version is a gift in itself, don’t you think.
That being said I made a card to match!
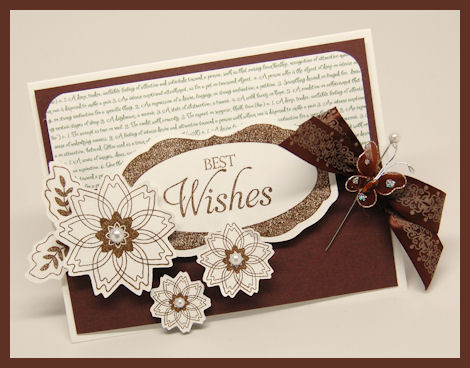
Best Wishes
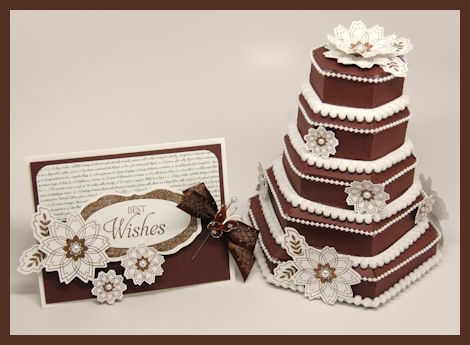
I felt that would cover ANY event I wanted to gift this for, if I can ever muster the strenght to actuallly give it away! LOL!

I love versatility in sentiments when creating a gift set that I’m not sure what occasion I want to use it for. It is handy to have some general gifts/cards on hand for last minute occasions, or if you don’t have the mojo or time when the occasion hits.
I chose the text pattern paper from Fluttering-by © to add to my design.
I used the same stunning flowers from the Petal Perfection © set, cut out using the Petal Perfections © Cut File.
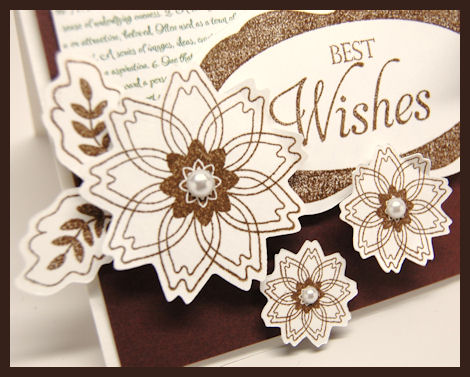
I also used the Occasional Labels © (cut with the Occasional Label ©) and the Best Wishes was stamped using the Sentimental Occasions © set.
 Well that is all for me.
I hope to enjoy my birthday today. I am going on a field trip with my son Noah.
Should be fun 😀
See you back here tomorrow, for more idea!
Bee-Loved Barrow of Treats
May 1, 2011 Author: mytime | Filed under: Cards, Home decor/3-D items, My Time Made EasyThe May Release is certainly BUZZING with all the excitement it promised 😀
The ideas aren’t done yet!
Today you will definitely want to visit:
Today I want to share another project idea using the NEW! Barrow of Blooms template.
I cannot tell you the ideas I have spinning in my head for this one. I wish there was time to share them all. Let me just say the items you can package in this are truly endless!
I decided to pair the NEW! Barrow of Blooms with the NEW! Bee-Loved Set.
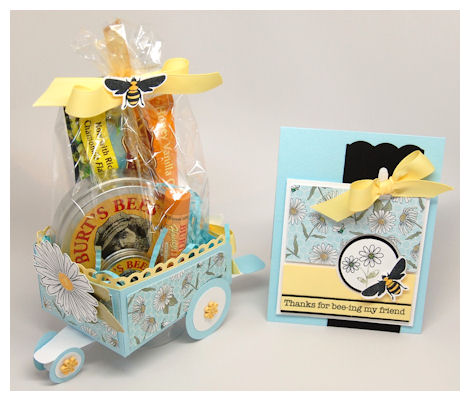
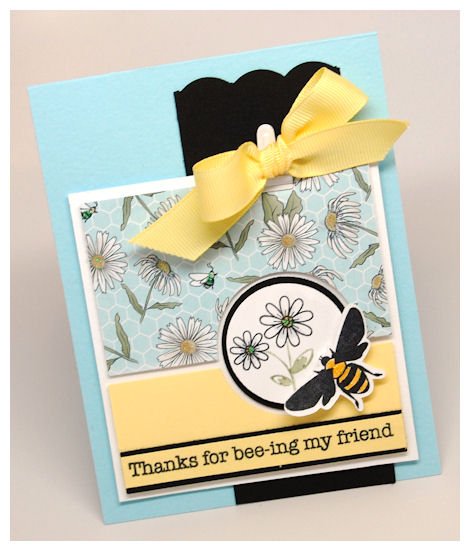
Thanks for bee-ing my friend
What a great way to say thank you to someone special!
I used the new pattern called Daisy Days digital paper as my focus of this project, and it also inspired the fresh Spring colors!
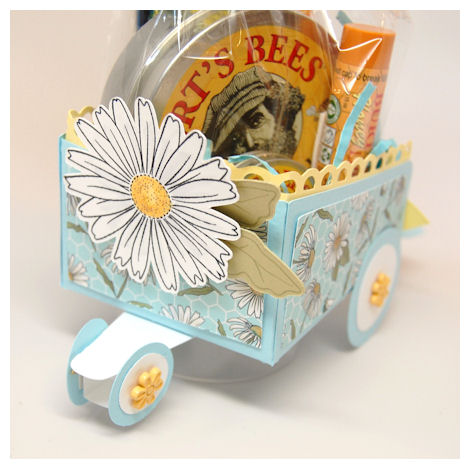
So going with the theme, my first choice to adorn the front of my NEW! Barrow of Blooms was to use the Daisy and leaf images from NEW! Bee-Loved Set, which was easily cut out using the My Bee-Loved Cut File. I kept the coloring of then simple, as to coordinate with my paper.
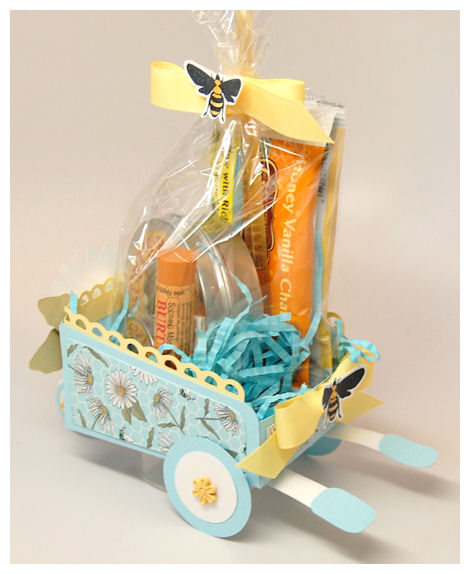
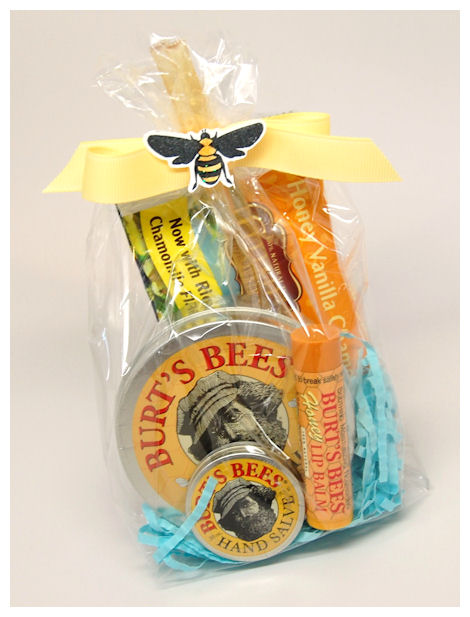 I knew I wanted to create a bee-themed set so I could package up some Burt’s Bees products. I also added some Chamomile Team and Honey Vanilla Tea with 2 Honey Sticks!!
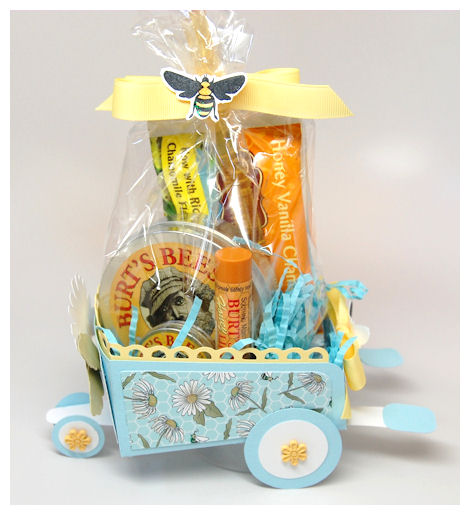
I created my Barrow of Blooms in a sky blue cardstock. I used the pattern paper for my decorative layers. All sides of this use patterned paper, so it looks beautiful from all angles!
As you can see I used the Border Builders Open Scallop © in a pale yellow to line around the top (inside) of my barrow. It added a nice, soft detail to the design.
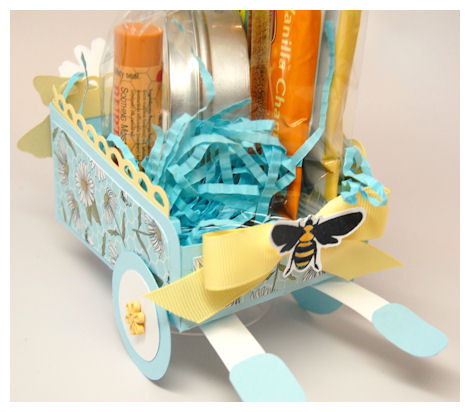
In the back I added my bow with my honey bee in the center, much like on my bag of treatlets!
Now of course I needed a card to match 😀
I wanted to keep it simple, so I think this achieved my goal.
I added stickels to all the yellow on the paper, for a little bling. I always love patterned paper in the store that has some bling, and I found I could achieve that same look all on my own with one quick step!
You can see some of it reflecting in the light:

I used the same paper, and this time made my own daisies using the daisies from the Fancy a Cuppa? © set, and the stem and leaves from the Sensational Stems ©
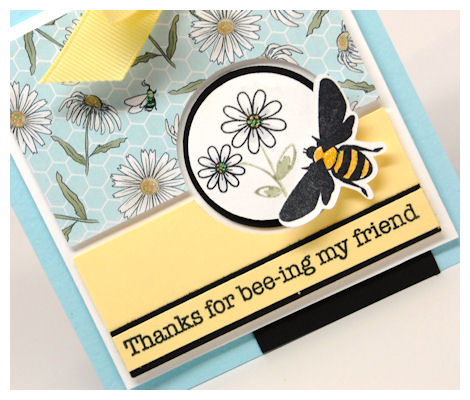
That sentiment comes from the NEW! Bee-Loved Sentiment Set.
The honey bee is from the NEW! Bee-Loved Set, which was easily cut out using the My Bee-Loved Cut File.
I definitely have many sweet
Well that does it for me today.
You won’t want to miss tomorrow post!
See you then.
Welcome back everyone!
Today’s project peeks are sure to have you jumping out of your seat with excitement! Once I saw Catherine’s set the idea for this next template was a given!
Today be sure you visit:
Today we are all sharing peeks at our 2nd template being released May 1st called Oh-Bee Hive!

That’s right! You are looking at an amazing ONE PIECE template, shaped like a 3 D hive! No more creating and stacking a bunch of boxes 😀
Oh-Bee Hive! Pretty Packaging Template $5
Available in PDF, SVG, GSD, DXF, WPC
Completed Project Size
5 Inches Wide Bottom
2 Inches Wide Top
5 Inches Tall

This template is sure to create a big “buzz”, as it takes themed gift packaging to a whole new level!
Now you have everything you need to create your own 3 dimensional “bee-hive”!! This can make a fabulous centerpiece, or party favor for any wedding, shower, or garden party!
Use this to package a plethora of sweet treats such as:
handmade soaps
bee’s wax candles
honey jars
honey sticks
honey cough drops
lip balms
lotions
cookies
candies
lollipops
floral scented items
or whatever else you can dream up!
Don’t let the creativity stop at the “hive” this can easily become a tiered cake, a 3 dimensional Santa, Snowman, Penguin, Bunny…..or other fun character of your choosing.
This template was designed to coordinate with the Bee-Loved and Bee-Loved Sentiment Pretty Impressions Stamp Sets.
Now how about some details on the images I used to decorate my Oh-Bee Hive! template

I used the My Bee-Loved Cut File with the Bee-Loved Stamp Set to decorate my Oh-Bee Hive! template.
Bee-Loved Stamp Set of 16 images $20
*also available in digital download*
By Catherine Doucette
This is a sweet and whimsical set of bee themed images and sentiments, that is sure to become a “bee-loved” set for years to come!
There is a Bee-Loved Sentiment set that was designed to coordinate with the Bee-Loved Set.
Your card, tag or pretty packaging is sure to create a buzz, when you use this set, no matter who you create.
The images in this set are not just whimsical but have a realistic flair to them. You will really enjoy the possibilities this set has to offer.
Be sure you check out the My Bee-Loved Cut File, which cuts out the images of this set!
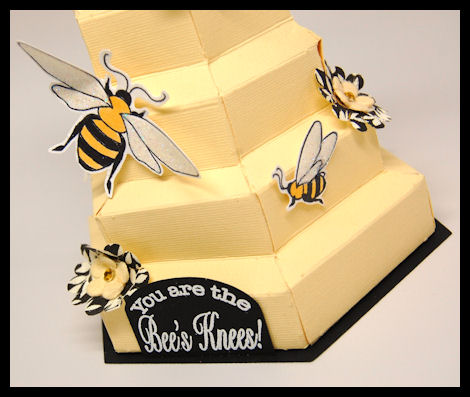
Image sizes:
Large Bee: 2 3/4 inches wide X 1 3/4 inch tall
Medium Bee: 1 1/2 inches wide X 1 inch tall
Side View Bee: 1 inch wide X 1 inch tall
Bee Hive: 2 1/2 inches wide X 1 3/4 inches tall
Tulip: 4 1/4 inch tall X 2 inches wide
Daisy Bloom: 2 1/2 inches around
Daisy with Stem: 2 inches tall X 2 inches wide
Leaf: 1 1/2 inches long X 3/4 inch wide
Buzzing Trail: 3 inches long
Note: On my Bee Hive top I used the Rosey Posey Rosettes ©!!
Sentiments include:
The latest buzz
Missing my honey
You are the bee’s knees!
Just buzzing by to brighten your day
Thinking of you
As you can see this set will bee-come an amazing addition to your stamp collection.
Stamp set was designed to coordinate with the Oh-Bee Hive! Pretty Packaging Template.
This next set is the coordinating sentiments set!
Bee-Loved Sentiments Set of 19 Images $12
*also available in digital download*
By Catherine Doucette
This set was designed to coordinate with the the Bee-Loved Set.
This is a sweet and whimsical set of general and bee themed sentiments, that is sure to become a “bee-loved” set for years to come!
Your card, tag or pretty packaging is sure to create a buzz, when you use this set, no matter who you create. You will really enjoy the possibilities this set has to offer to your projects.
Sentiments include:
Bee-loved
Just because
Hi
Sweet as can bee
Hello my friend
Happy Birthday
You will be missed
honey
Will you bee mine?
Where flowers bloom, so does hope-Lady Bird Johnson
Thanks for bee-ing my friend
Thanks for being there for me
baby bee
meant to bee
busy little bee
buzz on over
As you can see this will definitely bee-come an amazing addition to your collection of sentiments!
Stamp set was designed to coordinate with the Oh-Bee Hive! Pretty Packaging Template
Supplies from My Time Made Easy ™ LLC
Pretty Packaging Templates: Oh-Bee Hive!
Pretty Impressions Stamp Set: Bee-Loved
Pretty Pieces Cut File: My Bee-Loved. Rosey Posey Rosettes ©
Well what do you think?
I think there are so many ideas for the unique uses of both this template and the stamp sets, that your head will BUZZ with gift giving possibilities 😀
Come back tomorrow for our group post, as we celebrate our May release!!
See you then.
Challenge Yourself!
Apr 25, 2011 Author: mytime | Filed under: Cards, My Time Made Easy, Pretty Palette Challenge, Pretty Patterns SketchHi everyone
Checking in quick here.
I hope you all had a fabulous Easter. I know my family did.
I’ve been a bit more busy than usual with some family stuff, so wanted to pop by quickly.
My mom’s surgery was rescheduled last minute to May 2nd, so everything in life has gotten shuffled around. I’ve been running around a lot, and the kids are on vacation. That being said this vacation will be packed with appointments, and a couple of fun trips to the Zoo, and Aquarium (or Museum of Science-whichever they choose). Then preparing for the next release, and my mom’s stuff to name a few things going on.
That being said thought I’d share the next round of challenges here. Sadly I’ve not had time to partake, but the Sketch and Palette Team have really outdone themselves 😀

OK I’ll be back with some fabulous new peeks at the May Release items on Friday!!
Kids wear!
Apr 18, 2011 Author: mytime | Filed under: Cards, family stuff, Home decor/3-D items, My Time Made Easy, TutorialsHi everyone!
Today I’m back to share with you some more project ideas!
I love getting as much use out of my crafty products as possible. Any time I can involve my children and save some $$ it is even more of a bonus for me (and my hubby is happier too!)
Did you realize you can utilize the Pretty Impressions Digital Stamps to create you own customized items?
Let me further explain exactly what I mean 😀
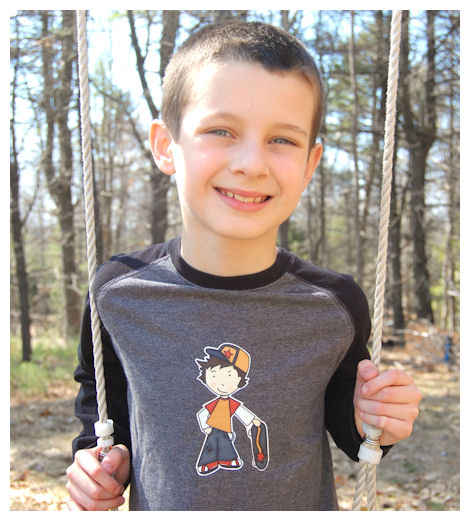
For example, my son Noah is 8, and he is a tough critic when it comes to his clothing. It has to have some sort of picture on it that he likes. That usually means the shirts are ore pricey and once he is over that character, he won’t wear it anymore.
Since the release of the SK8R Boy © Digital Stamp Set Noah has been after me to make something just for him.
So with that being said, I used the SK8R Boy © Digital Stamp Set along with some iron on transfers (which you can buy at any craft store, Staples, and even Target!) to create some cheap customized shirts!
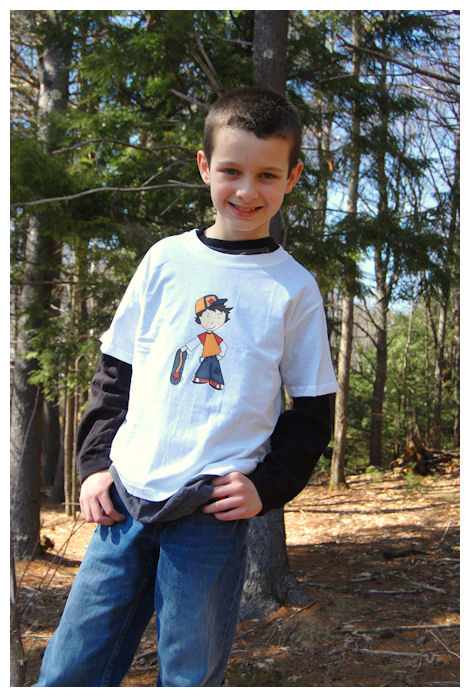
Isn’t this so cute?
He LOVES his new shirt!!
I was able to digitally color my image (see our video here!) and then I was ready to go. Once you get to using the digital stamps you will find so many fun uses, they really maximize your $ worth!
I purchased a 5 pack of cotton tee’s for real cheap 😀 You can get shirts of all types of quality for much less when they are PLAIN. Plus you hit a SALE and BINGO! Awesome start to something fabulous.
Just read the directions on your iron on transers before you print. Some call for you to mirror the image (keep in mind if you use WORDS) and others don’t. Some are for light fabric, and others for dark!
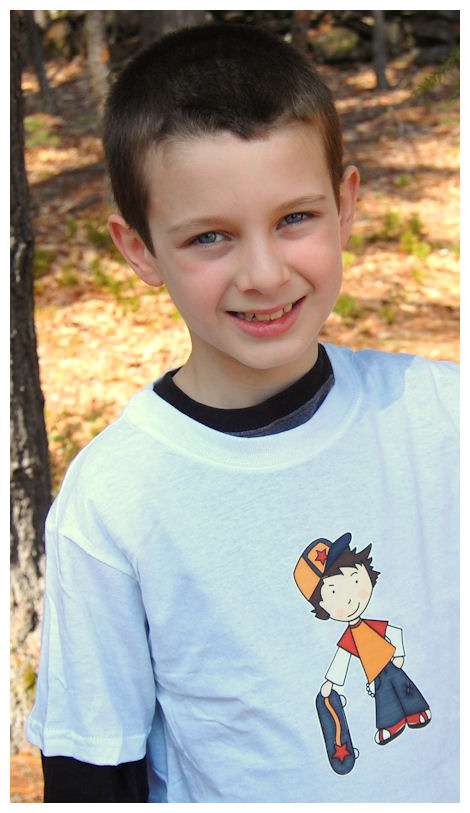
I personally think you can get more use fromthe dark color transfers because you can put them any dark color, but also use them on white and light colors too, they feel more sturdy, and print more vibrantly than the light color transfers. That is just my opinion of course.
Here is the same image layered onto a black shirt Noah owned but would never wear!
This time I flipped the direction of the image.
He didn’t want any wording, so that was easy!
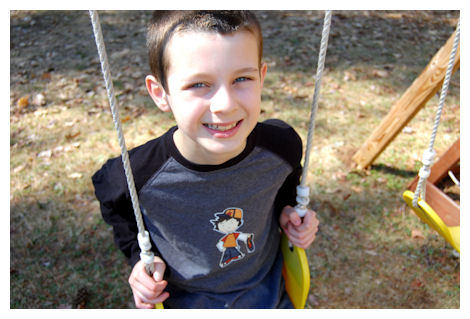
Seriously can it get any easier?
It doesn’t have to end at just SHIRTS!
You can use the images as coloring pages, put them on tote bags, shirts, onesies, diaper bags, lunch bags, hats, backpacks, fabric covered frames or photo albums, comforters, curtains, pillows, jackets, canvases…you get the idea!
These projects make inexpensive and amazing personalized gifts for everyone!
This would make a AWESOME party project or favor.
This is just another way you can use your Pretty Impressions Digital Stamps to create you own customized items.
Well that does it for me. I’ll be back with more tomorrow 😀
April 15th Release!
Apr 14, 2011 Author: mytime | Filed under: Cards, Home decor/3-D items, My Time Made Easy, Product Opinions and Must havesGuess what today is?
It’s the Pretty Impressions Digital Release!

Click here to view what’s new!
Now how about some samples with the new goodies?
This month we catered to the boy’s and girls in our lives by having something for both. I even added a fun new template 😀 YIPPEE!!
So first up, my card.
UR2 COOL

Is he not adorable? (said in the best “boy” way possible)
I have longed for such a cute boy set. I have lacked in that department, and myself having an 8 year old boy, trust me when I tell you, will be adding more of these images to our growing collection.
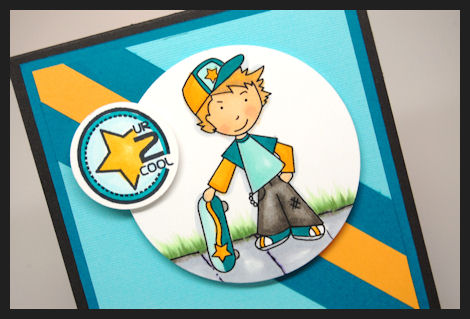
I hand drew in my sidewalk, and colored in the grass with my markers.
I printed, and cut out my UR2 COOL sentiment. I think this came out “cool”. It got my son’s approval so I know it must be OK!!
Here I added the sentiment to the bottom. I love the play on words.
I had created the sentiment in 2 colors. Using my selection tool I cut and layered the sentiment over eachother. Because I cut off part of the words I was able to get the dual colors 😀 Pretty fun.
Now some details about the set
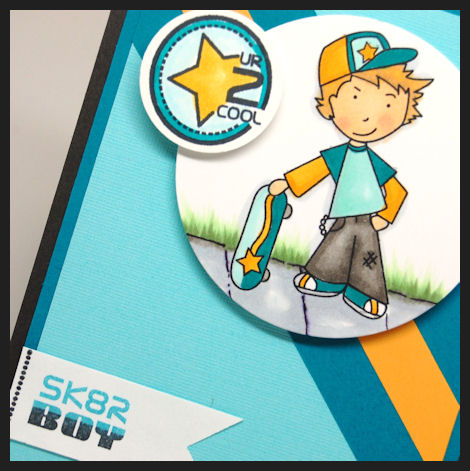
SK8R Boy Set of 7 Digital Images $8
Noah is one cool kid, who lives to SK8!
Sentiments Include:
SK8R (fits on boy’s shirt!)
SK8R BOY
Play Hard
Happy Birthday Dude!
UR2Cool Circular Symbol
Get Air Circular Symbol
This image is so fun to color, and can be used as a coloring page, used with iron on sheets to create t-shirt, hats or other fun craft projects for all ages!
We also have the SK8R Boy available as a Single for only $2!
Be sure you check out the SK8 Board Box Pretty Packaging Template, designed to coordinate with this image!
As you read, I simply couldn’t resist adding a coordinating template to one this month’s images 😀

It is called the SK8 Board Box ©, but can be used on its own as a fabulous box!
(Notice the scale difference in the card vs. on the template!! Gotta love resizing!)

Available in PDF, SVG, GSD, DXF, WPC
Completed Project Size
3 1/2 Inches Wide
7 1/2 Inches Tall
1 1/2 Inches Deep
This is the perfect template for a multitude of uses! A great size for so many treats, this is the perfect box for so many special people in your life! Transform this template into a skateboard styled box, any kid would love to receive, OR use it all on its own to create a wonderfully styled gift box!

This template is the perfect companion to the SK8R Boy Digital Stamp Set.
Now to prove my point that this SK8 Board Box © isn’t *just* a skateboard, I want to show you a girly version, using our other NEW! set My Little Friend.
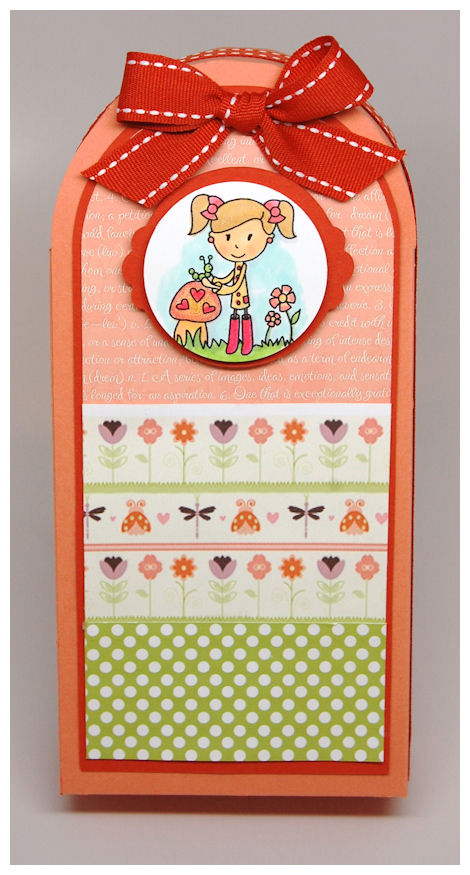
See! Isn’t this the cutest box, despite the “skateboard” name/shape?!! I have to say I love it, and think this will be one of those that I pull out often. It’s a fabulous size too 😀
I used the Flower Fusion © paper as my color inspiration 😀 I had used it on my card yesterday, pulling out the purple hues, and this time I focused on the orange hues 😀
I was able to add the green polka dot pattern from the Darling Dots © collection and the script pattern from the newest collection: Fresh Cut Expressions © Collection 2. Don’t you love mixin’ n matchin patterns? Our collections make it easy 😀

Now having the NEW! My Little Friend in a digital format is awesome because I get to resize it to suit my project needs! My card yesterday used the size it opens in, and today I shrunk it down to be the size I wanted for this project!
About the My Little Friend set
My Little Friend Set of 8 Digital Images $8
Amber has met a new little friend, who she holds dear!
This adorable image and sentiments is sure to send a message of true friendship.
She is so fun to color, and can be used as a coloring page, or craft project for all ages!
Sentiments include:
Friend (in two style fonts)
Note: Friend sentiments fit nicely above the sentiments.
For a dear
Hold a true friend with both your hands
Someone who is there for you no matter what.
Friendship isn’t a big thing-it’s a million little things.
One of the nicest things you can have and one of the best things you can be.
There is also the My Little Friend Single Image for only $2
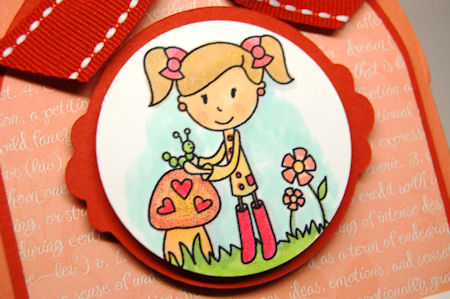
I layered this on onto the All Tied Up! © Circle
I love coloring these cuties. I know I keep saying that, but its so true.
There is SO much you can do with these digital images. I have many more ideas which I plan to share soon 😀 One will show you how to use the digital images WITH the coordinating cut files 😀 YES! I figured out how you can use them both together. I’m sure I’m not the first, but I never knew it was possible. Let me tell you that you will be hooked because you can resize BOTH the image, and the cut files to suit your needs. That is a HUGE asset and value! LOVE!
So stay tuned for that. I just need to get a memory card for my video camera, and then I’ll post some videos for you, using my ideas and techniques.
Come on back tomorrow, as I have more samples to share.
Better late…
Apr 13, 2011 Author: mytime | Filed under: Cards, Home decor/3-D items, My Time Made Easy, Pretty Palette ChallengeHI everyone!
Hope all is well with you all.
Life has been quite the whirlwind here, but I am managing to get everything done that I need to, I think! LOL!
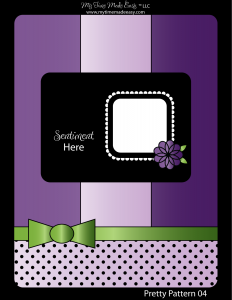
Today I want to share my contribution to the Pretty Palette Challenge 04
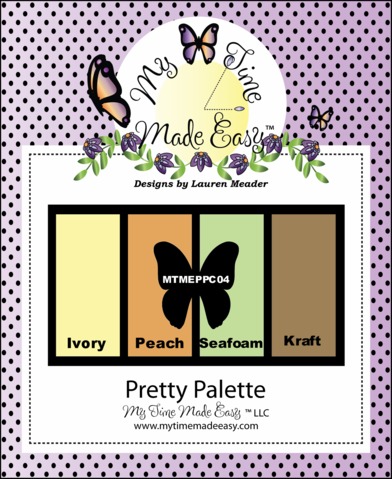
Use the KEYWORD MTMEPPC 04
Click here to view the Pretty Palette Challenge 04 details, and enter your own creation 😀
Now it’s my turn to share. Granted I’m a few days late, but better late than never right?
I have to say I had the best of intentions, but it turns out my kids and life had intentions of their own, making my ability to finally post, later than I wanted!
So without further delay…my card!
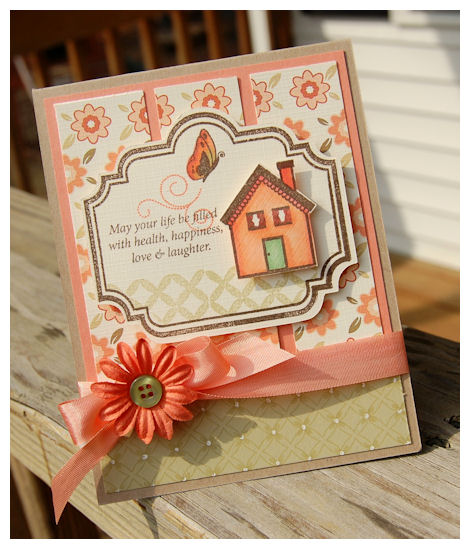
A Happy Life
Our friends are buying their first home the end of the month, and I wanted to send them a card, with a little gift card inside 😀
I loved the colors for this weeks palette, and actually had other ideas, but this is what transpired as I began creating. Funny how that happens huh?
I found that the Fresh Flowers © digital paper was the PERFECT match to the color combo 😀 So I used the flower pattern on my decorative panel layers.
I also used the Pretty Patterns Sketch 04 for this!

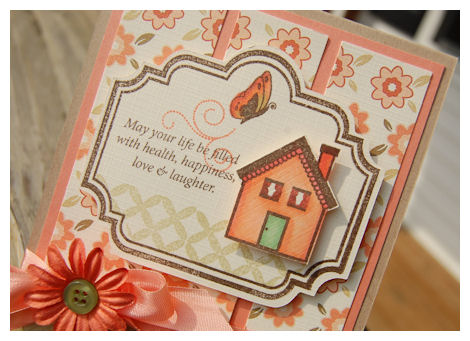
I chose to use the label from a Secret Surprise © for my layer. I cut it using the Secret Surprise Label ©.
The house image from the Just For You © set, which I stamped, colored and cut, is for the additional layer to the right.
The butterfly is from Tending The Garden © , the flutter trail is from Fanciful Flourishes © .
My sentiment is from So Sentimental © ! I love it. It is the perfect sentiment for such a happy occasion.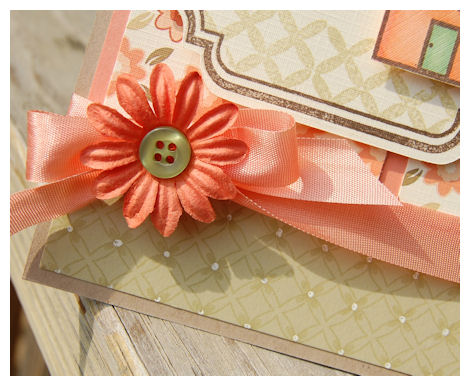
I made my “grass”, and patterned paper along the bottom of my card by using the Puckered Up Patterns © . So simple and fun. I love making my own patterns, and using unexpected stamps for regular things, like “grass”.

So there you have my well intended card.
Come back tomorrow because we have the next Pretty Palette Challenge, and the team and I will be peeking the new digital images, being released on the 15th (Friday)!
See you then 😀
Pretty Palette 04
Apr 6, 2011 Author: mytime | Filed under: Cards, family stuff, Home decor/3-D items, My Time Made Easy, Pretty Patterns SketchHi world!
How have you all been?
I’m anxiously awaiting Spring. Today is suppose to be in the 60’s! Heavenly!
I have a few updates on my family to share at the bottom of this post 😀 So those who want to know what’s up, can be in the “know”.
I’m just starting to wined down from the April Release, and am getting ready for May! LOL! It is a never ending circle or events and planning.
Have you seen the New! April Release Products <—-CLICK HERE
Be sure you check out the GALLERY<—-CLICK HERE
Our Digital Release is coming up on the 15th!!
You can see a little snippet of one of the sets HERE!
Now I’m gearing up for some fun stuff to share 😀 I’m really enjoying the extra creativity these challenges are encouraging me to create!
Today we have a NEW! Pretty Palette Challenge!!
KEYWORD MTMEPPS04
To see challenge details, and/or enter your creation go to the MTME Blog<—HERE!
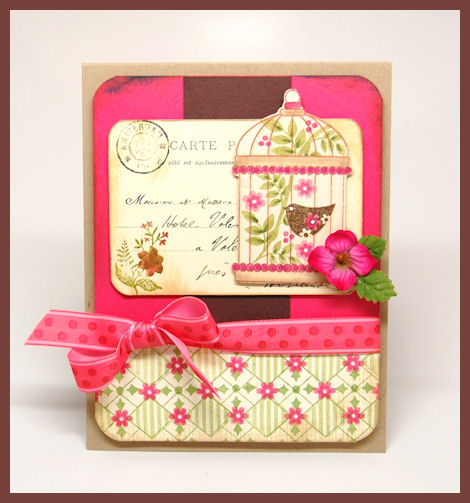
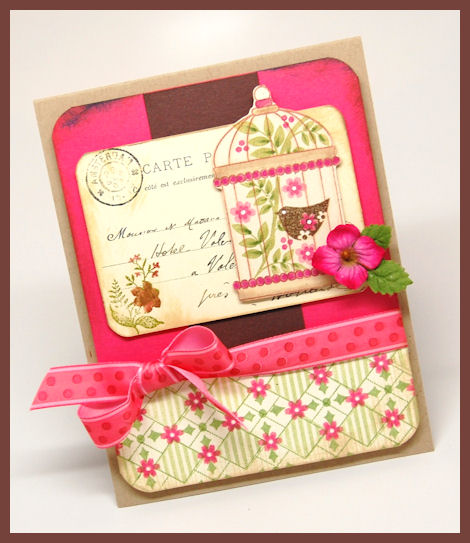
This is MY version of the Pretty Palette 04
I have to say I think this is STUNNING! I love the colors.
This will be a “possibility” of being my mom’s birthday card. She turns 54 this weekend. I generally make several and pick my favorite! LOL! Crazy huh?
So here are some details!
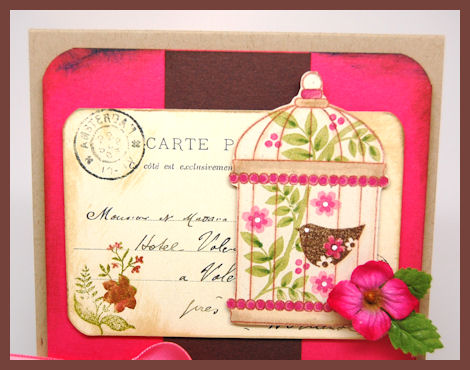
I LOVE the Singing Silhouette © set 😀 So pretty.
So I cut my Caged © cut file, to cut my cage, I then stamped my cage, with a little masking, and stamped the branch and flowers from the set, then added my bird 😀
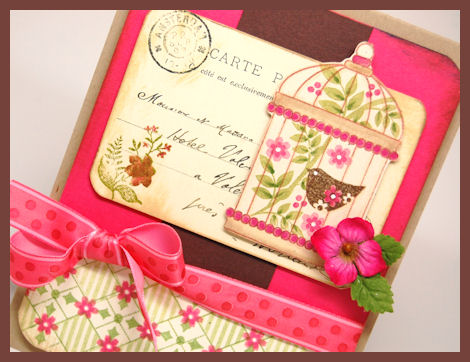
I used the postcard sheet from the Cool Romance © digital paper.
I cut it out, then added a dirtied up silhouette flower from the Occasional Labels © set in the lower left hand corner.
I used the writing from the postcard as my “sentiment” on the palette.
For the bottom “pattern” layer, I made my OWN paper 😀
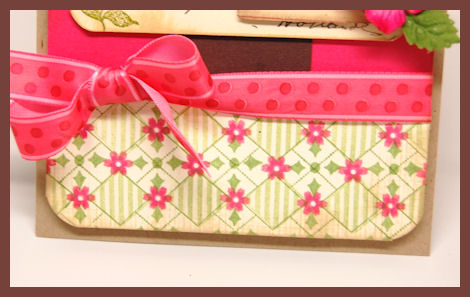
That is my favorite thing to do!
I used the Argyle Amazement © set to create my pattern. Can you say LOVE IT!!
Well what do you think? Pretty nifty eh?
Now for an update! If you don’t follow my family, no biggie, just move on to view the Pallete Challenge!
As I said my mom is turning 54 this weekend. It is a very pivotal time, as it was that weekend last year that her life forever changed.
It has been a year since her husband was arrested for her attempted murder. He is still in jail. The case is going to trial as he refused a very good plea bargain, which would have lead to deportation.
He is denying his confession, claiming he didn’t understand what he was saying (his first language is Portuguese), and requesting that the video confession, after his arrest, be thrown out. Trust me he speaks English very well.
Anyway, my mom returned to court to renew the restraining order. The judge granted her a 3 year order. They are undergoing trail very soon (we don’t have an exact date yet) and she has filed for divorce. We don’t know if he could get out so better safe than sorry (not that a piece of paper could save her from him, but it can be helpful-right?)
In the divorce he wants half of everything SHE worked for, AND get this, he wants Alimony when he gets out because SHE ruined HIS life, and he won’t be able to find work. The list of insanity goes on and on.
Hopefully we will get a judge with an 1/8th of a brain, and he will not allow any of this to take place. My mom has been paying on everything (his vehicles and other stuff she wants possession of, as she needs these items) always, and more obvious since his incarceration.
So a long way to go with that.
Now we go on to her Cancer. She will undergo surgery the 29th. She will be hospitalized for a week and then have a long recovery. She will undergo 2 more rounds of chemo after healing, then to hopefully be cured 😀 She has been amazingly strong through all this. She had many weak moments, but in the end she found the strength she needed to move forward with her life!
Her life isn’t ready to be over. She has much left to do in this world 😀 I’m not ready to not have my mom around yet. I have 2 girls of my own to raise (and a son) and need someone to guide me on what I’m doing, and how to get through the tough stuff.
Speaking of girls, many have asked for updates on Alexa.
I will post some photos of her soon.
Tonight she is partaking in a school event, where she will be doing African drums, and dancing! I hope to catch it on video (hoping for good quality so I can post it here for you all to see her! She has grown and matured so much in this last year).
As May approaches she reaches her 4th year in remission!!
She is by far the strongest person I know. She is my little hero. I am in a constant state of awe of her. She is in the ‘pre-teen” attitude stages, and I have to remind myself this is a good thing! The attitude is insane! Everything is an argument. She wants it her way or no way. Sounds like me when I was her age.
That being said, I am ever grateful for these daily struggles of will, as she has always been strong willed. It is far easier than the struggles with her life. I’ve been told that it is her strong will that pulls her through. It is why she does so well. Well that and God’s hand guiding her through. Alexa has a great purpose in this life, I am certain of that. She keeps me in constant check, of what is important in life, and how fragile and precious each moment is.
I recently had a meltdown over the fact that the 2 years she was ill I took barely any video or photos. I didn’t want to remember anything about that time, now I sort of wish I had. Especially when we went to Disney. I SHOULD have video tapped at least that! That was a a happy time. After some severe mommy guilt, I promised to record more, and take more photos.
Well that about wraps up the family review, for now anyway. I’ll let you know how the dance goes 😀
Thanks for following our story.
Until next time!
Re-purposing
Apr 2, 2011 Author: mytime | Filed under: Cards, Home decor/3-D items, My Time Made Easy, Pretty Palette Challenge, UncategorizedHow are you all enjoying the projects so far?
Be sure to visit the MTME Blog for our latest Pretty Palette Challenge!
I know I had a blast with everything this month 😀
It’s funny how excited I feel every release. I always think THIS ONE is the best. Each new template has me head over heels and each month I get a new favorite! LOL! I think the best part is, each month when I go to link the product and I view MY STORE I think WOW! How did I ever come this far? It’s amazing really. Now I have an amazing library of gift packaging to use anytime I want to give a gift, and look amazing 😀 Seriously most people I gift these completed packages to never even care what is inside! LOL!
Today we have a lot more to share with you so pay a visit to:
Well let’s start today off with some “repurposing”!
I like to try to make everything as versatile as possible, and while not every single one CAN be, I have to say every element of the Keep It Template is useful 😀
This particular template comes with 3 “templates” which are used to create the finished product Keep It. Each one as useful as the other. So,today I thought I would share a new use for one of the three templates that come in the Keep It Template!
A Stack of Drawers
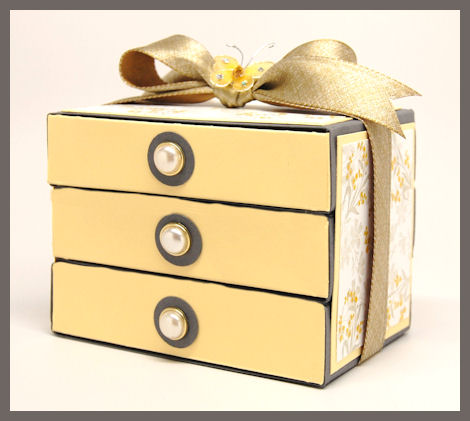
This is the drawer file, that is to be used on the bottom of the template!
A very sweet 3 drawer gift set, complete with hand stamped patterned paper, pearl drawer pulls!
Now think about the fun things you can package or sort/store in this beauty!
Mini note cards
Ghirardelli chocolate squares
A photo box 😀
Hair accessories
Jewelry (especially handmade)
craft supplies
endless possibilities!

I cut the 3 drawer bases in a gray cardstock, and the actual drawers in a lemon cardstock.
I stacked the files (adhering them together) then made my decorative panels.
I love the color combination of this, and the elegance of the finished product.
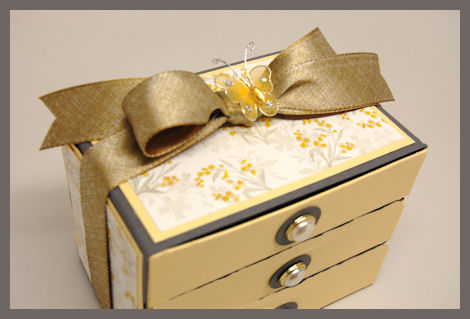
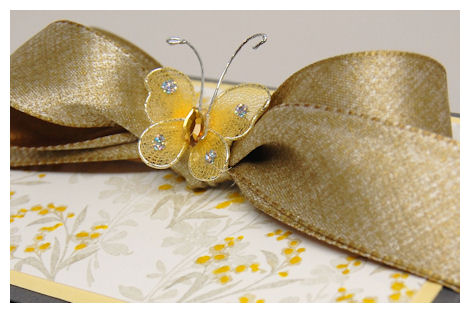
This ribbon is actually quite stunning in person.
It matches perfectly because it has the hues to yellow/gold as well as the hues of the gray/silver in there.
My wire butterfly was the perfect little addition to this but you can add a charm, monogram tag, mini bird, flower, or whatever else you want to dream up.
Now the paper!
I made it myself, by repeatedly stamping one of the flower silhouette from the Occasional Labels © set in a pale gray ink, then using my markers to color the flowers. I added a little more yellow to each bloom by using a dimensional gel pen!
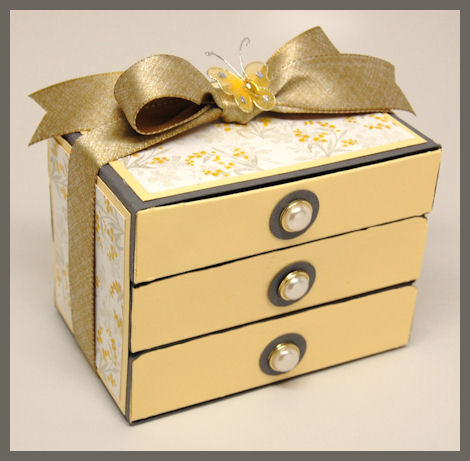
I also used a larger silhouette flower from the Framed Elegance © set. That was stamped in the same gray ink, but stamped off once, then restamped for a very subtle, but stunning “filler” in a larger scal, to take up some of the white space.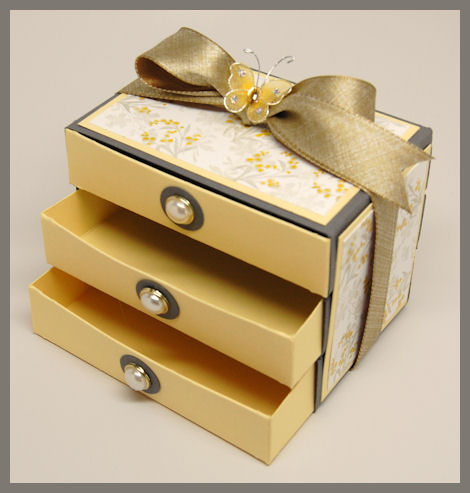
Supplies from My Time Made Easy ™ LLC
Pretty Packaging Templates: Keep It
Pretty Impressions Stamp Set: Framed Elegance, Occasional Labels
So I hope you liked my take on this template.
I have another great idea to share tomorrow, so I hope to see you then!
My Etsy

Who I Designed For
Blogroll
- Alicia
- Alli Miles
- Ally Blankenship
- Amber
- Andi @ crafts on a whim
- Angel R
- Angie Z
- Anne Kranitz
- Becky O
- Bee
- Beth Silaka
- Bethany Paull
- Beverly Nash
- Bobbie
- Cambria
- Cammie
- Card of the Week
- Card Positioning System (CPS)
- Cards for Cancer
- Catherine Doucette
- Charmaine
- Cheryl Sims
- Chriss Rollins
- Christina
- Christine Ewing
- Christine Wooden
- Colleen Schaan
- Craft Critique
- Craft Gossip
- Crystal
- Dawn Easton
- Emily Giovanni
- Geny
- Holly
- Igne Groot
- Inspirational Craft Blogs
- Irene
- Jami Sibley
- Jeanne Streiff
- Jen del Muro
- Jeni Bond
- JenMarie
- Jenn Balcer
- Jenn Diercks
- Jenn O
- Jennifer E
- Jennifer Mick
- Jennifer Pereda
- Jennifer-Sweet Treat
- Joanne Basile
- Jodi Collins
- Julia Stainton
- Julie Masse
- Karen
- Kathryn Berthiaume
- Katie Cotton
- Kelley Holland
- Kendra
- Kim Scholfield
- Kris’s Color Stripes! Get inspired here
- Kristen Dubosque
- Kristin Eberline
- Kristine
- Laura @ Sunshine Stamper
- Laura Turnmire
- Laurie Schmidlin
- Lesa Rapp
- Linda Duke
- Linda-LSN
- Lindsey Botkin
- Lisa (lakind scs)
- Lisa Kind
- Lori Craig
- Maggie
- Mara Campbell
- Maria
- Maria Levine
- Mary
- MaryJo
- Melanie M
- Monique Hansen
- Moxie Fab World
- Pam Imholz
- PaperCrafts Connection
- Peppers and Pollywogs Kids party site
- Rebecca Grohall
- Rita
- Robyn
- Rose Ann
- Sarah Vrolyk
- Sharon Harnist
- Sharon Johnson
- Sharon Rivera (a chemisrty with paper)
- Sherrie
- Sophia Landry
- Storage Units, Ink, & More Blog
- Sue Berker
- Susan (Rainy)
- Tangii Crane
- Tracy
- Tricia Traxler
- Trudee
- Velta
- VivLyn
- Zena
MTME Pretty Palette Color Team
MTME Pretty Patterns Sketch Team
My Time Made Easy TM LLC
Shop till you drop!
Lauren Meader
About Me
Copyrighted material
Subscribe To My Blog
Pages
- About me
- Alexa’s Story!
- My Crafty Corner!
- My Time Made Easy™ LLC
- Our Make A Wish Trip to Disney!
- Resume/Publication List
Calendar
| M | T | W | T | F | S | S |
|---|---|---|---|---|---|---|
| 1 | 2 | 3 | 4 | 5 | 6 | 7 |
| 8 | 9 | 10 | 11 | 12 | 13 | 14 |
| 15 | 16 | 17 | 18 | 19 | 20 | 21 |
| 22 | 23 | 24 | 25 | 26 | 27 | 28 |
| 29 | 30 | |||||
Archives
- August 2013
- July 2013
- June 2013
- May 2013
- April 2013
- March 2013
- February 2013
- January 2013
- December 2012
- November 2012
- October 2012
- September 2012
- August 2012
- July 2012
- June 2012
- May 2012
- April 2012
- March 2012
- February 2012
- January 2012
- December 2011
- November 2011
- October 2011
- September 2011
- August 2011
- July 2011
- June 2011
- May 2011
- April 2011
- March 2011
- February 2011
- January 2011
- December 2010
- November 2010
- October 2010
- September 2010
- August 2010
- July 2010
- June 2010
- May 2010
- April 2010
- March 2010
- February 2010
- January 2010
- December 2009
- November 2009
- October 2009
- September 2009
- August 2009
- July 2009
- June 2009
- May 2009
- April 2009
- March 2009
- February 2009
- January 2009
- December 2008
- November 2008
- October 2008
- September 2008
- August 2008
- July 2008
- June 2008
- May 2008
- April 2008
- March 2008
- February 2008
- January 2008
- December 2007
- November 2007
- October 2007
- September 2007
- August 2007
- July 2007
- June 2007
- May 2007
- April 2007
- March 2007
- January 2007
Categories
- About Me
- All That Scraps
- blogger challenge
- camera/photo play
- Cards
- Contests
- family stuff
- FOR SALE
- Home decor/3-D items
- How to FAKE it!
- Introduction
- JUGS Challenge
- JustRite Stampers
- Lizzie Anne Designs
- My family stuff
- My Stamping Space
- My Time Made Easy
- My Time To Color Challenge
- My Time to Create Challenge
- My Timeless Template Challenge
- My Timeless Templates
- Mytime Mail
- MYTIME MOVIE/VIDEOs
- Papertrey Newsletter
- Pink Cat Studio
- Pretty Palette Challenge
- Pretty Patterns Sketch
- Product Opinions and Must haves
- Recipe's
- Saturday Sketch
- Smilebox Creations
- Stampavie
- Tutorials
- Uncategorized
- videos
Most Popular
- Create your own Onesie Card Tutorial-and important NOTE! PLEASE READ (2529)
- Saturday Sketch-Boxed bag holder (2333)
- Going GREEN! Fancy Flower Flourish-Closure Video (1478)
- Fabulous Favorite - Giveaway! (1336)
- a Prayer Request (1232)
- QUICK-Easter Baskets from Nestabilities-PTI style-and blog challenge (1063)
- Teaser Sketch (999)
- February Release Giveway! (and a little peek) (996)
- Group Post and Rambling Rose Video Tutorial (985)
- GIVEAWAY! Who wants it all?! (895)
Recent Comments (RSS)
- 첫충사이트: 완전히 흥미로운 블로그 게시입니다. 저는
- sarah: Wow, Lauren, what a stunning
- hedie: خرید راهبند
- 야동: Love to read it,Waiting For
- 야동: This seller is in a
- 바카라사이트: 여기 처음 왔어요. 나는이 게시판을
- 야동티비: I was surfing the Internet
- 바카라사이트: 비슷한 주제에 대한 흥미로운 정보를
- 바카라사이트: "여기에 제공해 주신 귀중한 정보와
- 온라인홀덤: 유익한 웹 사이트를 게시하는 데
Copyright © 2007 - My Time, My Creations, My Stampendence - is proudly powered by WordPress
This blog has been Tweaked and Designed by Sara Williams