Video: Copic Air Brush Start To Finish
Apr 30, 2009I got a video done! Actually I got 6 done 😀 I changed my Mondays with Mytime Video category to Mytime Movies/Videos! The Monday must do is too much pressure! Just know I plan on doing a WEEKLY video-at minimum. I am enjoying it alot. I hope you are too.
SO, the video that I am sharing today is one that I have gotten hundreds of emails asking for! LOL! So I hope it doesn’t disappoint!
Today’s video is a Start to Finish approach to using the Copic Airbrush System.
Many of you wanted to see it in action, to help YOU decide if its a must have. SO I hope this helps you. (and yes-you need it! LOL!)
I also share how you can use the Ciaos in it too! YES! You can! No buying new markers!! So no worries there. See I LOVE saving my peeps money 😀
Keep in mind Im NOT a copic professional! Im just like YOU-a stamper who learns my PLAYING! This is a video on how I use it, and it seems to work for me 😀
Enjoy-and I would LOVE to hear your feedback as this video took FOREVER-as I made a finished card sample from each portion of the video that I shared.
OOPS! One of my segments (doing the orange dots on the card-no worries same thing as the pink dots) goes black!!!!!!!! Please either fast forward, or continue on because the rest comes in OK
I can’t edit the video once saved, and ahve NO IDEA why this happened :C) SORRY!
[veoh v18355593yJjBpRkQ]
If you want to safely view ALL the videos I published on Veoh, please CLICK HERE!
NOTE: DO NOT CLICK ON THE THUMBNAILS !If you click ON the thumbnails AFTER the video it takes you to the Veoh site. Some of the content there I am told is “R” and “X”rated and you may not want to do that around young children. So if you just watch the video here on my blog, and avoid the thumbnails you should be OK. Not sure WHY they don’t have ONLY stamp related videos pop up, but I guess some aren’t.
Bottom line: Click at your own risk!
I am not responsible for content that links to the videos from the Veoh site.
Thank you ![]()
WARNING! There are some extreme close-ups of my face when showing you stuff on the video! I apologize! Im a dork!
Now I will share the view of the cards that I feature in the video. Sadly they were taken at dusk :C Bad idea!
NOTE: All my cardstock/patterned paper, and most ribbon (not first card) is from Papertrey Ink
Here is the first card I share
Let your light shine
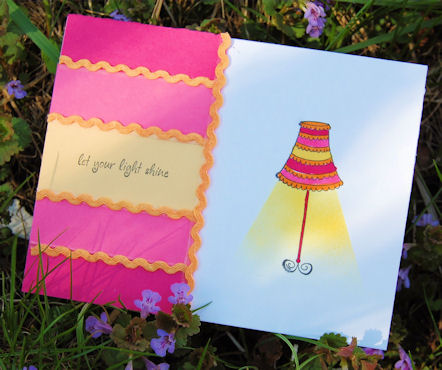
Stamp/Sentiment-In the Parlor from Lizzie Anne Designs NEW! Spring Release
This used a masking technique with the Copic Air Gun & Eclipse Tape. It looks so cool doesn’t it?
I was inspired by my lampshade for the side panel design on my card! Simply, fun & funky!
Now the next card-same great colors-same stamp set too!!
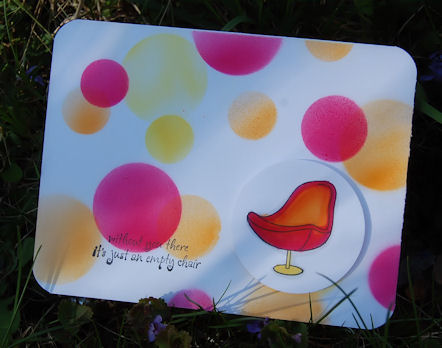
Without you there its just an empty chair
I have to say I LOVE my colored chair!
Now making this background with my Airbrush system was WAY fun!!! Simple card with lots of WOW! factor. I love the RETRO modern feel this has. SO HAPPY!
Now you know me and butterflies! I use a masked punched butterfly image, and created a 3D scene with punched butterflies! (Punch is by Martha Stewart)
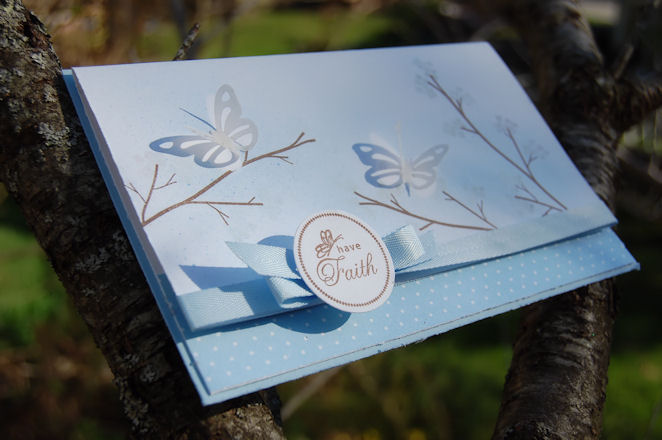
By layering on another punched butterfly (also Martha Stewart) from vellum cardstock, they appear to be fluttering off the card!
I used Out on a Limb for my branches-an lightly stamped floral blooms.
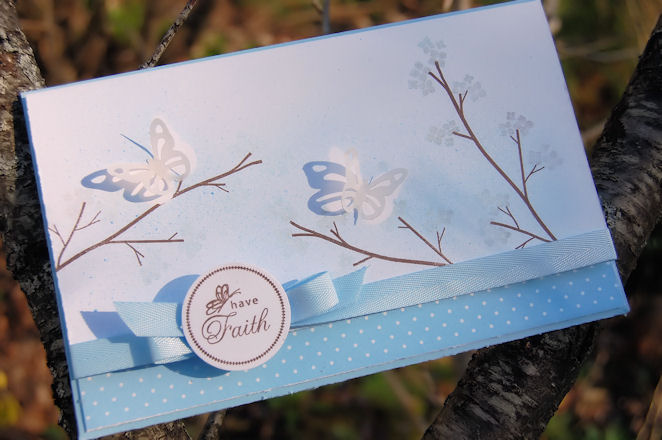
I absolutely fell in LOVE with the NEW! Tiny Words & Borders set by JustRite Stampers. It fits PERFECTLY in the SU! 1 1/4 inch circle punch! LOVE THAT! I’d been hoping for more smaller sentiments and images like these 😀 These are coming soon! I got a preview 😀 Im a lucky a girl 😀 Check out what is next—HERE! WOWZERS!
AND they are having a GIVEAWAY TODAY!
Check this out
Today on the blog they are celebrating 300,000 hits with a JustRite Make a Wish Blog Candy Giveaway. Blog candy ends Friday Night at midnight.
Here is the link to the giveaway.
https://justritestampers.blogspot.com/2009/04/blog-candy-celebration-make-justrite.html
You know I had to help you WIN something right?!
OK moving on……..
This card uses the nestabilites as a frame-so easy, and a stunning look!
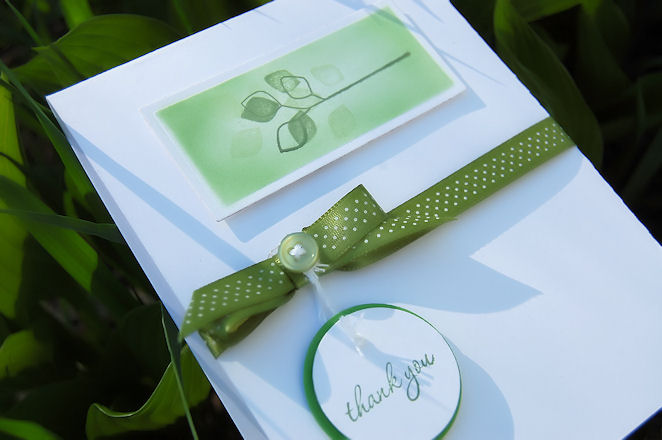
Here is the full card.
Just clean-simple and elegant. You don’t always need a million layers and embellishments for a great look!
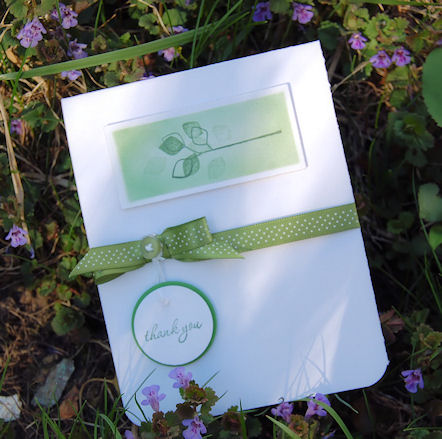
This set is Garden Inspirations from Lizzie Anne Designs NEW! Spring Release
It also uses a sentiment from that release-Everyday Sayings (on the tag)
I love it
OK I have ANOTHER post to share, so I need to run! I also have to wrap up my PTI Design Team challenge, more template stuff, and my first My Time To Create Challenge stuff with my team. I am going to try to get out and COMMENT on your submissions as well. Im sorry I have been AWFUL about that :C I know that everyone who reads and checks them out gains so much inspiration form you when they peek at the collective enteries 😀 So thank you!
Thanks for reading, and watching!
I’d love to hear what you thought of the video, and if you plan on trying or buying!
Also what is your favorite project?

My Etsy

Who I Designed For
Blogroll
- Alicia
- Alli Miles
- Ally Blankenship
- Amber
- Andi @ crafts on a whim
- Angel R
- Angie Z
- Anne Kranitz
- Becky O
- Bee
- Beth Silaka
- Bethany Paull
- Beverly Nash
- Bobbie
- Cambria
- Cammie
- Card of the Week
- Card Positioning System (CPS)
- Cards for Cancer
- Catherine Doucette
- Charmaine
- Cheryl Sims
- Chriss Rollins
- Christina
- Christine Ewing
- Christine Wooden
- Colleen Schaan
- Craft Critique
- Craft Gossip
- Crystal
- Dawn Easton
- Emily Giovanni
- Geny
- Holly
- Igne Groot
- Inspirational Craft Blogs
- Irene
- Jami Sibley
- Jeanne Streiff
- Jen del Muro
- Jeni Bond
- JenMarie
- Jenn Balcer
- Jenn Diercks
- Jenn O
- Jennifer E
- Jennifer Mick
- Jennifer Pereda
- Jennifer-Sweet Treat
- Joanne Basile
- Jodi Collins
- Julia Stainton
- Julie Masse
- Karen
- Kathryn Berthiaume
- Katie Cotton
- Kelley Holland
- Kendra
- Kim Scholfield
- Kris’s Color Stripes! Get inspired here
- Kristen Dubosque
- Kristin Eberline
- Kristine
- Laura @ Sunshine Stamper
- Laura Turnmire
- Laurie Schmidlin
- Lesa Rapp
- Linda Duke
- Linda-LSN
- Lindsey Botkin
- Lisa (lakind scs)
- Lisa Kind
- Lori Craig
- Maggie
- Mara Campbell
- Maria
- Maria Levine
- Mary
- MaryJo
- Melanie M
- Monique Hansen
- Moxie Fab World
- Pam Imholz
- PaperCrafts Connection
- Peppers and Pollywogs Kids party site
- Rebecca Grohall
- Rita
- Robyn
- Rose Ann
- Sarah Vrolyk
- Sharon Harnist
- Sharon Johnson
- Sharon Rivera (a chemisrty with paper)
- Sherrie
- Sophia Landry
- Storage Units, Ink, & More Blog
- Sue Berker
- Susan (Rainy)
- Tangii Crane
- Tracy
- Tricia Traxler
- Trudee
- Velta
- VivLyn
- Zena
MTME Pretty Palette Color Team
MTME Pretty Patterns Sketch Team
My Time Made Easy TM LLC
Shop till you drop!
Lauren Meader
About Me
Copyrighted material
Subscribe To My Blog
Pages
- About me
- Alexa’s Story!
- My Crafty Corner!
- My Time Made Easy™ LLC
- Our Make A Wish Trip to Disney!
- Resume/Publication List
Calendar
Archives
- August 2013
- July 2013
- June 2013
- May 2013
- April 2013
- March 2013
- February 2013
- January 2013
- December 2012
- November 2012
- October 2012
- September 2012
- August 2012
- July 2012
- June 2012
- May 2012
- April 2012
- March 2012
- February 2012
- January 2012
- December 2011
- November 2011
- October 2011
- September 2011
- August 2011
- July 2011
- June 2011
- May 2011
- April 2011
- March 2011
- February 2011
- January 2011
- December 2010
- November 2010
- October 2010
- September 2010
- August 2010
- July 2010
- June 2010
- May 2010
- April 2010
- March 2010
- February 2010
- January 2010
- December 2009
- November 2009
- October 2009
- September 2009
- August 2009
- July 2009
- June 2009
- May 2009
- April 2009
- March 2009
- February 2009
- January 2009
- December 2008
- November 2008
- October 2008
- September 2008
- August 2008
- July 2008
- June 2008
- May 2008
- April 2008
- March 2008
- February 2008
- January 2008
- December 2007
- November 2007
- October 2007
- September 2007
- August 2007
- July 2007
- June 2007
- May 2007
- April 2007
- March 2007
- January 2007
Categories
- About Me
- All That Scraps
- blogger challenge
- camera/photo play
- Cards
- Contests
- family stuff
- FOR SALE
- Home decor/3-D items
- How to FAKE it!
- Introduction
- JUGS Challenge
- JustRite Stampers
- Lizzie Anne Designs
- My family stuff
- My Stamping Space
- My Time Made Easy
- My Time To Color Challenge
- My Time to Create Challenge
- My Timeless Template Challenge
- My Timeless Templates
- Mytime Mail
- MYTIME MOVIE/VIDEOs
- Papertrey Newsletter
- Pink Cat Studio
- Pretty Palette Challenge
- Pretty Patterns Sketch
- Product Opinions and Must haves
- Recipe's
- Saturday Sketch
- Smilebox Creations
- Stampavie
- Tutorials
- Uncategorized
- videos
Most Popular
- Create your own Onesie Card Tutorial-and important NOTE! PLEASE READ (2529)
- Saturday Sketch-Boxed bag holder (2333)
- Going GREEN! Fancy Flower Flourish-Closure Video (1478)
- Fabulous Favorite - Giveaway! (1336)
- a Prayer Request (1232)
- QUICK-Easter Baskets from Nestabilities-PTI style-and blog challenge (1063)
- Teaser Sketch (999)
- February Release Giveway! (and a little peek) (996)
- Group Post and Rambling Rose Video Tutorial (985)
- GIVEAWAY! Who wants it all?! (895)
Recent Comments (RSS)
- 첫충사이트: 완전히 흥미로운 블로그 게시입니다. 저는
- sarah: Wow, Lauren, what a stunning
- hedie: خرید راهبند
- 야동: Love to read it,Waiting For
- 야동: This seller is in a
- 바카라사이트: 여기 처음 왔어요. 나는이 게시판을
- 야동티비: I was surfing the Internet
- 바카라사이트: 비슷한 주제에 대한 흥미로운 정보를
- 바카라사이트: "여기에 제공해 주신 귀중한 정보와
- 온라인홀덤: 유익한 웹 사이트를 게시하는 데
Copyright © 2007 - My Time, My Creations, My Stampendence - is proudly powered by WordPress
This blog has been Tweaked and Designed by Sara Williams
26 Responses for "Video: Copic Air Brush Start To Finish"
Awesome video Lauren! thanks for the tips and techniques. Love the background effect you can achieve with the air bush and the copics. I can not wait for the release of the other videos, and try new techniques and tips. God bless…
Terrific job on your video!! I enjoyed it 🙂
An f.y.i. – I don’t know what the cause is but right after you did the airbrushing of the pink dots the video goes black. I can hear you, all the rest of the website page is in view but I cannot see anything on the video until you show the completed card with various color dots and a chair.
ALL of these cards are gorgeous!!!
I love your new photo-spots, outside! Awesome!
Great job on your videos. They are so informative and a great help. Thank you for doing them.
The video is great Lauren – I’ve had the airbrush package sitting on my work table for over a month – you’ve given me the courage to finally set it up and use it!!! I’ll be practicing this weekend – thanks so much!!
i believe the tip of the marker (the chisel) is supposed to go the other way… otherwise you’re making the air work too hard.
see debbie olson’s video here:
http://www.youtube.com/watch?v=OtYUncwJSeA
I like your last comment on the video! Too funny! It really made me laugh! Great information, btw! I have been resisting this tool as well, but may have to cave! 🙂
Wow, Lauren! Again, you’ve made my blogging buddy, Gwen, & me very happy, as we’d both purchased our very first Ciao markers just a couple weeks ago @ CKC. I was then disappointed to learn I couldn’t use them with the airbrush system – until NOW!!! Thank you SO MUCH for that fabulous tidbit!!! Now I NEED an air brush system. . . !!! 😉
Goodness, gracious! Your cards are AMAZING! I’m trying SO hard to resist Copic markers!!! Doh! After seeing your ADORABLE lamp card, I’m just a puddle! That is just the cutest thing – EVER! Great stuff! Thanks for sharing!
Wow…!! They’re BEAUTIFUL!
This was a great tutorial! I thought you couldn’t use any can other than the D-60 with the ABS-2. It’s great to know the 180 works! I’m going to replace mine with that one now!!!!
Lauren this was a wonderful refresher for me on how to use the airbrush system! Thank you so much for taking the time to create your tutorial!!!
Hi, Loved your video. Which gun part are you using with the 180 can? Is it from one of the kits or just an individual one?
A bit late, but a great tutorial Lauren. I just snapped up a bargain airbrush kit on ebay and can’t wait to start experimenting with everything you showed here. Thanks for making it look so easy!
Lauren-
I found your website by doing a google search on Copic airbrush tutorial.
Great Tutorial on the air brushing system. I love the close ups of the marker and air gun segment. I am happy to learn of your “fix” so I can use my Ciao markers.
Heidi
Very beautiful!Just like cheap cosplay costumes in cosplay costumes store!They are cheap but good quality!I just like these!Very good!
I like the video. Those tips you just shared on your video is really helpful and very easy to follow.
top online stores
link directory
Corum Watches
D&G Watches
What a fine day! Let’s go to park,”It was really a good day, So my mother, my classmate and I went to the park. We took some foods in my schoolbag. On the way to the park. I saw coach purses the blue sky with snow-white clouds. I saw pear trees and some apple trees and so on. Below the trees, there are several kinds of flowers. It’s colorful, blue, red, yellow, pink, purple, orange and white.I saw some coach colette collection balloons and butterflies in the sky. I ate popcorn, cornflakes, banana and lollipop. They were wonderful. In the afternoon, we went to coach alexandra collection the zoo. I visited the birds, mice, cats, dogs, budgies, hamsters, rabbits and so on.
Modern Warfare 3…
I saw this really great post today so I had to repost……………….
Very first factor , A large thank you for you to open my eyes.
That is definately one of the best blogs I’ve sen in ages online. Maintain up the excellent posts.
Positive glad that I navigated in your web page by accident. I’ll be subscribing to your feed in order that I can get the latest updates. Appreciate all of the details right here AUTO
If you accept anytime been aching in an auto wreck, again you apperceive how aching and austere your issues can be. It will of advance depend on the could
could cause of the bones and how bad it was, but if you were not at fault, again you allegation to accept amends for the situation. If you accept abundant
medical bills, again they allegation to be paid for by the allowance company, not you. You allegation the advice of a car blow advocate in adjustment to get
the money you deserve.@link-xy
I am glad to see that people are actually writing about this issue in such a smart way, showing us all different sides to it. Please keep it up. I cant wait to read whats next.
Leave a reply