Archive for 2010
Let me just say that while a little crazy, this release has been amazing so far. Again we have SOLD OUT of Fanciful Flourishes © (it will be back in stock the end of next week), and are whipping through the latest and greatest! I cannot wait to see everyones projects!
After all the Hoop-ala from the release I am wiped. Ironic that the main theme is “Pamper Yourself”! SO that being said….
Mona Pendleton has a super project today, so don’t miss it.
Mona says: Take Time To Relax…
I took my own advice and soaked in a SMOKIN HOT bath for almost an hour to de-stress from all the events and excitement. Then I remembered I had a project to share! LOL!
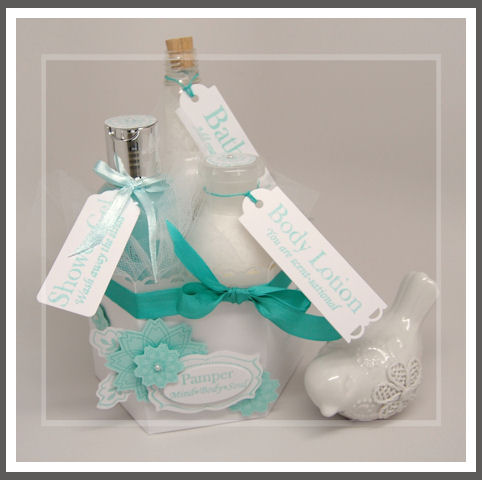
Pamper Mind * Body * Soul
I decided I better post one that is suitable to relaxation!
Is this not jaw dropping? I mean so soft, peaceful & serene. Reminds me of a beach.
As I said in a previous post, the base to Pick of the Petals © can be used on it’s own! That makes it super versatile!!

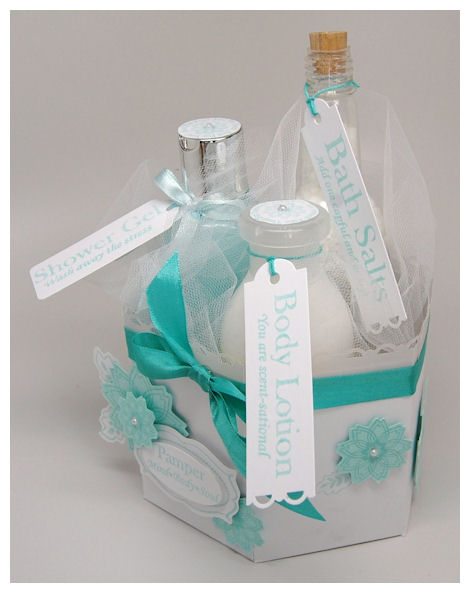
The flowers go all the way around this gift! Using the Petal Perfections © cut file, made that SUPER EASY! I just cut my flowers, then stamped the Petal Perfection © images in an aqua ink! Easy Peasy
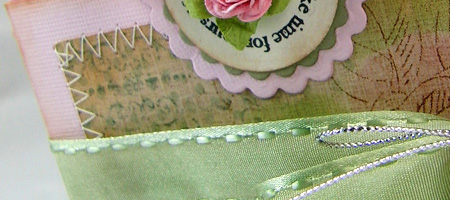
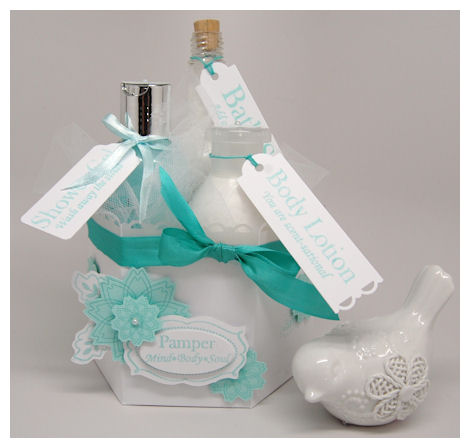
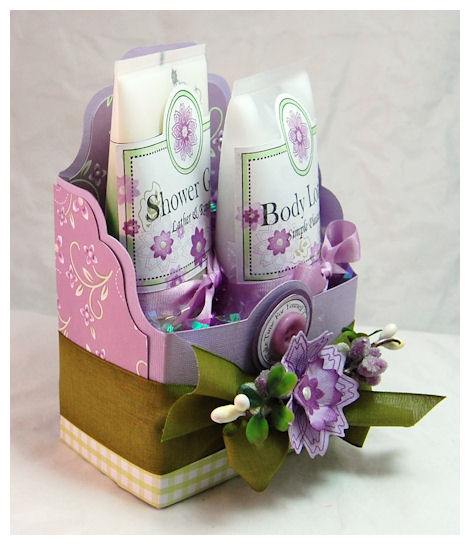
It also makes another great holder for all those bath & body essentials! On this one created the base in the STUNNING lineal white cardstock. It is elegant, sturdy, fresh and crisp. I used the Border Builders: Scallop Dot © to cut my vellum cardstock for a subtle elegant trim!
Here is the top view of the goodies I have packaged
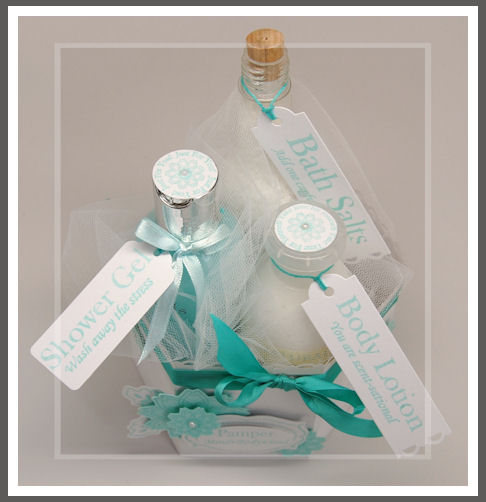
I just put them in the Pick of the Petalsbase, and tucked in some tulle! I could have added labels to the bottles, but wanted to share another idea of simply tying them on.
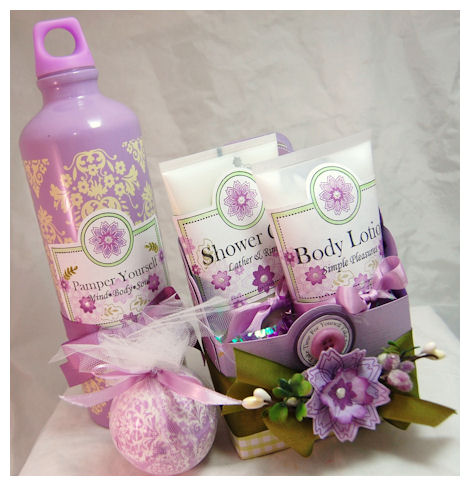
We have Bath Salts
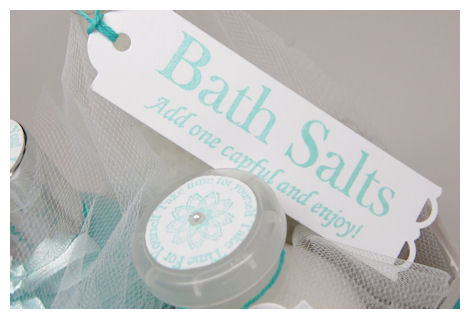
(see I stamped my labels on the bottle toppers!)
I actually have a bag of homemade bath salts and scented oils. I found a “message in a bottle” clear plastic bottle set so I could make this! So easy and fun.
Then Shower Gel

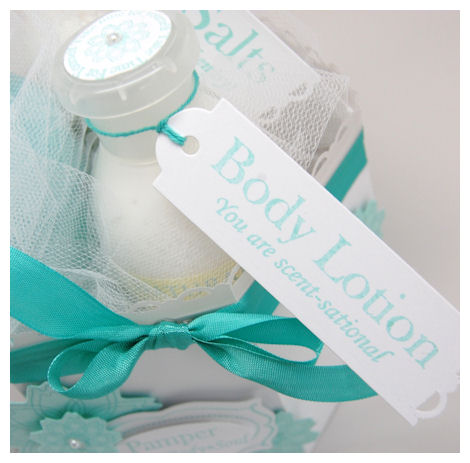
and some Body Lotion
These are all in my favorite scent: Clean Cotton! I love the fresh clean smell!! AHH!!!
I love that there is a variety of sentiments that coordinate with each type of pampering present! You can totally mix and match or just pick and choose the larger or smaller sentiments to be used alone!

I used the So Sentimental Frame © for my sentiments. They fit nicely! You can never have too many options. As I said above I used the Petal Perfections © cut file, so making a bunch of 3D cut/layered flowers was SUPER EASY! I just stamped the Petal Perfection © images in an aqua ink!
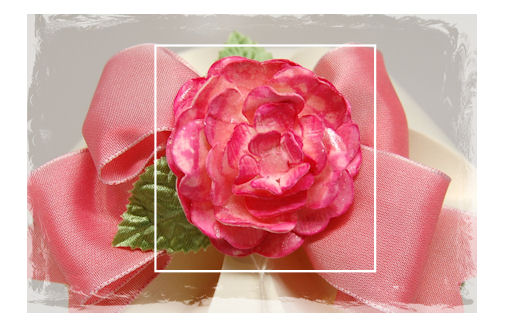
This flower is just amazing.
Supplies:
Pretty Packaging © template: Pick of the Petals ©
Pretty Impressions © stamps: Petal Perfection ©, Take Time ©, So Sentimental
Cardstock from Couture Cardstock: Lineal White, Day at Sea
other: vellum, adhesive label sheets
Pretty Pieces © Cut File: Border Builders: Scallop Dot, So Sentimental, Petal Perfections
Ink: Versamagic
Ribbon: May Arts
Other: Adhesive Pearls
Thank you all for stopping by for a visit! I am just giddy thinking about what all you will create with this latest release! Tomorrow is Easter, but we will still have some samples!!
See you then!
Update on SCAL Issue!
Apr 2, 2010 Author: mytime | Filed under: UncategorizedOK so I am still working with the support team at Craft Edge to get everything all straightened out.
Those of you experiencing the SCAL issue, we have a fix!
One of my best Web Guy’s Scott has troubleshooted a quick fix 😀 He is one of the best! Thank you Scott for making lots of women happy!
Right now the *only* templates/files that have been affected by the SCAL update are the SVG version of the So Sentimental Frame © and the NEW! Pick of the Petals ©. If you noticed another, please let me know.
Now if your file is working fine, then don’t worry about it!!
If you are having an issue then you will want to re-download those files. Those of you with the So Sentimental frame- your download may have expired. Simply let me know and I will refresh it for you, if you are amongst the affected.
Now I have received numerous emails from SCAL owners. Many confused and upset about the issues. Now rest assure your templates are all fine, and we are working with Craft Edge to tweak any issues. If you have SCAL you do NOT have to PAY for a new one, or PAY when they upgrade! They do this regularly and it a FREE! SO please do not think you need to get new firmware!! Lastly just about everything is working, like most software, there are some kinks with the newest version.
Thank you ALL for your patiecne. Please know I am doing everything within my abitlites (and have lots of other people helping too – along with my entire team, who have really jumped in to help me in some way :D) to make sure this is all straightened out.
I’ll be back later with another sample!!
Urgent Update for SCAL customers
Apr 2, 2010 Author: mytime | Filed under: UncategorizedThis message ONLY affects Sure Cuts A Lot users. If you do not use this firmware then please disreguard.
With this latest release we have found that anyone with the latest upgrade of Sure Cuts A Lot 2.011 is having some issues cutting some of the files. Only certain parts will not be read by the SCAL program, posting a note “Failed to load the SVG file”.
I personally have 2 computers, one with the older SCAL version, and my laptop, which has the newest version. I downloaded the template files from our site. The store files using the newest version had elements that didn’t work, and those same store files loaded to the older version did!
All of the files within the store are fine. They are not corrupt. I know this because they do load, and cut in the earlier version of the Sure Cuts A Lot software. Conclusion: It isn’t a template issue.
I have contacted the Craft Edge support to help fix this.
Some of my customers have uninstalled the newest version, and went back to the older one, and the files work no problem! (I personally do not know how to do that yet, but if I find out I’ll let you know!)
I will keep everyone posted soon! In the meantime if you have SCAL 2.010 you should be FINE!
Thank you.
Well as you all know the My Time Made Easy ™ LLC Release way yesterday!
That doesn’t mean the samples end! We still have a WEEK of daily inspiration 😀
Today you will want to visit Katie Cotton for a YUMMY treat!
Here is a peek

Here is what Katie has to say:
At first when i was going to put together the Pick a Petal template, i was PETRIFIED. The top while stunning, looked complicated, and here I am supposed to be showing people what it’s supposed to look like! Well let me tell you, it is NOT hard! It came together easy peasy into this ADORABLE little box that would be great for SO many things! I decided to make into a cute little cupcake holder! And i will teach you how i did it!Now, day one after the release…….Pick of the Petals © template & Rambling Rose ©
I have received MANY emails about our Rambling Rose © Cut file! I have to tell you that YES! I will be showing just HOW EASY it is to utilize the cut file to create your own roses!! There will be a video done to show you exactly how fun, quick , and EASY it really is. I swear!
It was THIS cut file that made my friend Paulette FINALLY cave in and get a Cricut! She was at my house shorty after the store sample was created. Once she saw it she said THAT IS IT! I’m getting one! 😀

The Rambling Rose © sample, featured above, was created to be a bit bolder than one of the other samples in the store. The store sample is to be made to look realistic.I painted this with a Shimmerz ink for another look. It actually ends up making it be like a lacquered flower. I made it this way because I wanted my packaging to be that similar to a ceramic canister, that holds tea! The leaf is store bought (unlike the store version-handmade! I’ll share that too!) is from the bridal section of Michael’s.
Time for Tea
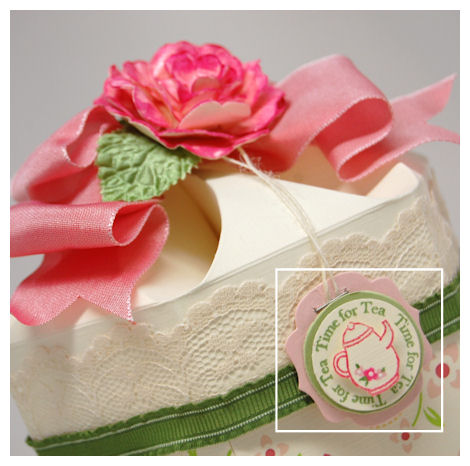
OH! Yet another item I love to gift others with! TEA!!! Hence my NEED for a teapot image! Funny how such a small image can stand out on a project huh? Its just eye catching.
So SIMPLE, yet stunning.
I used my lil tea pot image from Just For You © to create what appears to be a “tea tag”. Even stapled the twine! I just dotted my flowers and leaves.
Kristin Bueter and I had brainstormed over that file for sometime. Myself having made innumerable paper roses over the years, from scratch! Many taking close to an hour to perfect! I KNEW they type of file we needed to make this process TIMELESS!! Kristin is a good listener, and she “gets me”. I often can’t always explain things the way I should but she knows what I mean. After me describing the type of file I wanted to create, one that is UNIQUE and like no other……she went to work and was able to get my vision into tangible form. The MINUTE I saw it I knew it was perfect!
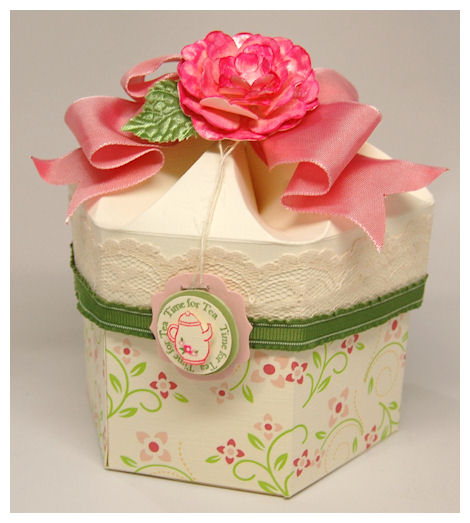
The top was created using Santa’s Beard cardstock. Its a textured medium weight off white color. Using a medium, or even light weight paper for the lid of this template is really beneficial because it allows you to get PERFECT petals! Honestly you will have a harder time with heavier weight cardstock. The top serves NO specific “function” so you don’t need to use a HEAVY duty cardstock. You can use that on the bottom if you wish 😀 I used the same Santas’s Beard, and printed my flourish pattern from A Loving Heart.
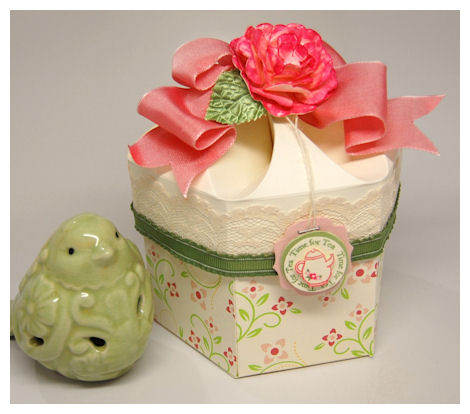
This template holds quite a bit, as you will soon see from me later this week. There is no argument that this is a STUNNING box! (I know I keep saying that word”! Guess I’m bad at adjectives!) This will match my mom’s home perfectly! She collects Tea Pots with roses on them 😀 I hope she likes this unconventional addition I am giving to her this weekend with her birthday Easter basket of goodies 😀
Supplies:
Pretty Packaging © template: Pick of the Petals ©
Pretty Impressions © stamps: Just For You ©
Pretty Printables Digital Paper: A Loving Heart
Cardstock from Couture Cardstock: Santas Beard, Thistle Stalk, Blushing
Pretty Pieces © Cut File: Rambling Rose ©
Ink: Pallette & Copic Markers
Ribbon: May Arts
Other: Shimmerz, Leaf from wedding section, stapler, Twine
Well once again thank you for stopping by! I hope to get that video set to go for Monday! A great way to start the week! For now I hope you all have a WONDERFUL weekend, and if you get a sec, stop by for a peek at all the ideas we will all be sharing as the week progresses.
If you want to see all the products we rleased this month go to the NEW PRODUCTS PAGE!
Today is our big Group Post!! In honor of the My Time Made Easy ™ LLC release day we always have the team feature some projects for you to get the wheels spinning.
Get a pen handy so you can start writing down all the ideas these creations spark for you!
All of you cardmakers out there will be bouncing for joy over this assignment! I challenged each of the design team members to create 4 cards! I thought it would be so fun and cool for you to see such a wide variety of ideas, using this months release, in one day!
As I said before, all our products are designed to coordinate! That means they are perfect for cards, tags, templates or any other project you have in mind. I really hope you enjoy what each of us has put together.
You will definitely want to visit each one of the following members:
Now for my 4 cards I decided that it would be REALLY fun to show you how awesome it can be to have BOTH the Acrylic version of the images and mix it up with the Digital version! You may be confused by what I mean, so I will show you.
I chose to use the Just For You © set to share just HOW versatile it is, and so fun to use. If there was ever a set to get in the digital version, this one is IT! This set was designed with all sorts of gifting giving and occasions in mind. I also used a similar “element” in each. That being 2 circles to the left of the main object! Each layout is different, but the ideas the same!!
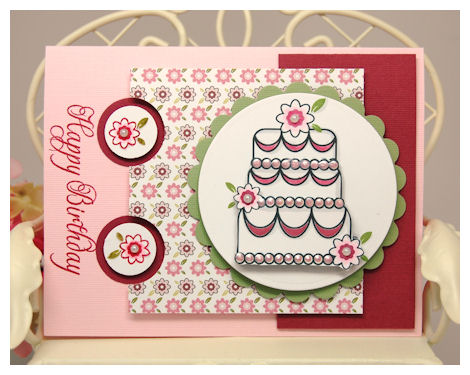
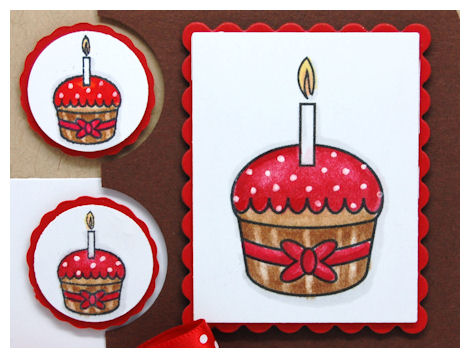
1) Happy Birthday Cake
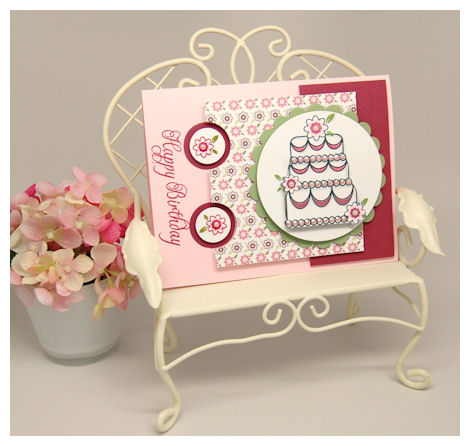
On this card I used the Digital version of the cake from the Just For You © set.
Note: ALL our digital sets come with complete step by step photo instructions on HOW to use digital stamps!
I used the acrylic version of the set for my Happy Birthday sentiment, and the little flowers in the circle. Perfect example of how fun it can be to have BOTH!
I adore the cake image in the Just For You © set! I designed it to fit within the circular sentiments that are in the set. Upon designing it I WANTED to add the flowers (that are also in the set) to it. Having it be a smaller image, I chose NOT to. I knew the details would get lost. Plus I designed it knowing that I would offer the digital version, so the options would be open! I also wanted to keep the design open to being colored for boys/men, or allow YOU to add whatever YOU want! Not everyone WANTS flowers on a cake. (shocking I know!)
SO……using my photo editing software, I resized my cake. I then added the flowers from the set to my cake image, layering them where I want! I used the paint to color the leaves, and could have computer colored my cake, but opted for copic coloring instead! I LOVE my markers, and coloring is so therapeutic to me 😀 Reminds me of being a kid again, only I’m doing a “grown up” activity. Now if I were in a swap, or were using this image for invitations/favors I certainly would go for the computer colored version (makes mass production a BREEZE!).
OK once I have everything where I wanted it, I printed the image 3 times.
Why?
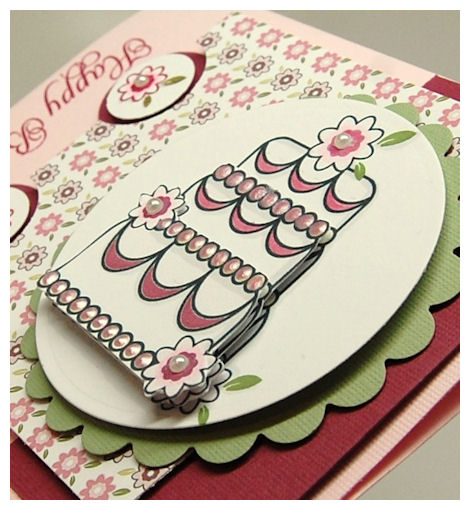
Because I knew I wanted the look of a TRULY tiered cake!

Look at that dimension! AMAZING!
I also added some liquid pearls to the border. I love the elegance this has. My mom’s birthday is next week so I made this just for her. As you may notice the flowers in the Fresh Flowers © digital paper coordinate with the images in the Just For You © set too!
Now this card doesn’t count as my set of 4! I want to share a card using the paper and colors, even the SAME image, only using the ACRYLIC version of the Just For You © set.
Mr. & Mrs.

(First let me say I SWEAR the ribbon matches my paper! LOL! Something with the lighting reflected a hue…so it looks off but I swear its not!)
Isn’t this a stunning Wedding card?
OK! Now here is the acrylic version of the set! The cake image, dashed circle, and sentiment, all stamps.
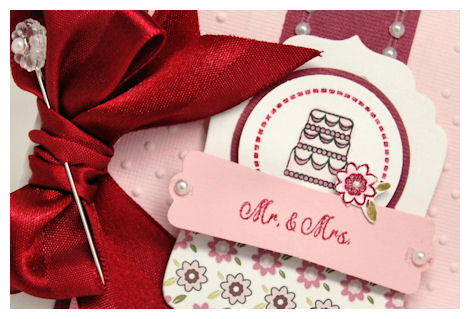
I colored my cake with my copic markers. I used the dashed circle in the set around the cake for an elegant look. I then punched it out of a circle. I used the same Fresh Flowers © digital paper, and cut a tag. My Mr. & Mrs. were stamped on a punched tag, then added to the layered label. I them stamped, colored and cut a flower for the perfect lil touch!
OK back to the 2nd of the 4 cards…….
2) Celebrate You
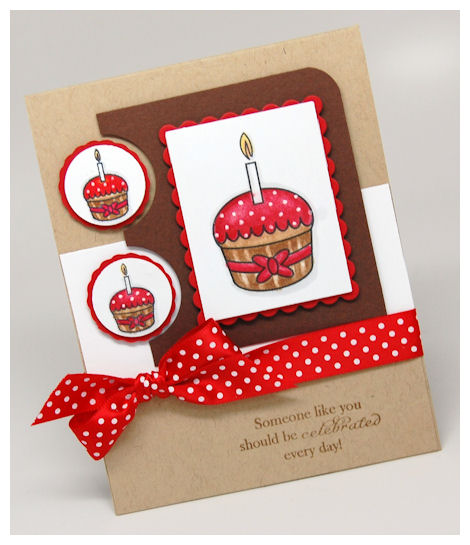
Another great example of the acrylic version of the set, combined with the stamp version.This also uses the same principal of having 2 circle images to the left of the main image.
I adore the sentiment. That is stamped on the bottom of the card. You can never have too many sentiments! When a set combines both it is a WIN! WIN! for me.
I love the little cupcakes in this set. ( we also have paper to match them in the Just Perfect © digital paper collection). Sometimes you want a BIGGER cupcake. Heck, you could make this HUGE and cut it out as a party invite or add it to a gift bag, or template! (OH! Giving myself ideas as I type :D) It was so fun to combine these too.
I colored them all the same and used my Copic markers. Easy peasy. I don’t know who will get this but I know I love red & brown together. What do you think? Cute having the same image in a various sizes right?
OK now we go on to card #3
3) A little something
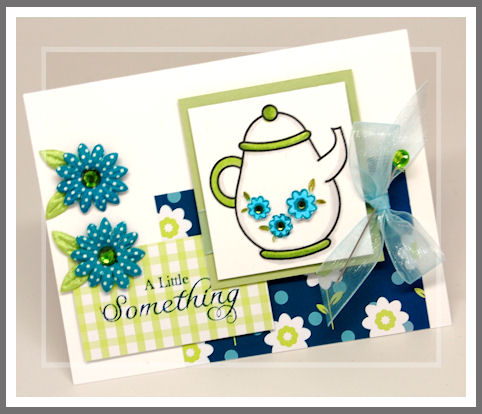
I LOVE the teapot from the Just For You © set. I knew I’d want to make it larger (yesterday I used it in actual size on a gift/tag). So, I did just that using the digital version!
I used another one of the paper collections called Fun Flowers ©, and an older set GaGa for Gingham © (I use that one a LOT!). It helped me with my colors and gave a fresh look!
I stamped my sentiment to match.
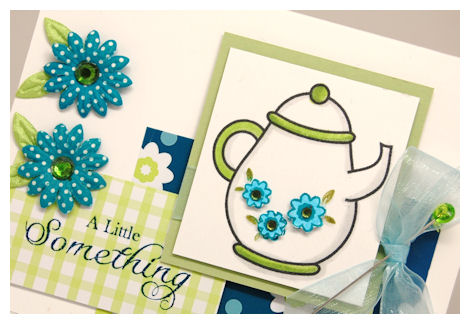
I found that the flower images from the acrylic version of the set fit perfectly into my digitally enlarged tea pot! Now I also could have used the digital flowers, like in my cake but I decided to go for stamps instead. I stamped them twice, and popped them up on dimensionals. They match my flowers too 😀
Now we have card 4
4) You mean the world to me
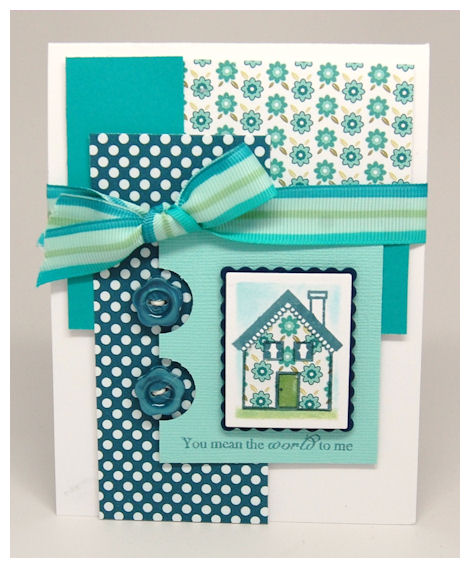
A sentiment I have LONG loved, and never had!
When I see a house image I think “home” and home to me is love, and where everything I hold dear is in reach.
OK so this one doesn’t combine ANY digital images with acrylic, but it does fit my layout of the 2 circles to the left of the main image idea, so bear with me. Would you believe me if I told you that the concept of that all happened purely by accident? I guess I was somehow mentally in that mindset, and until I edited all my photos saw this pattern! A very cool accident!
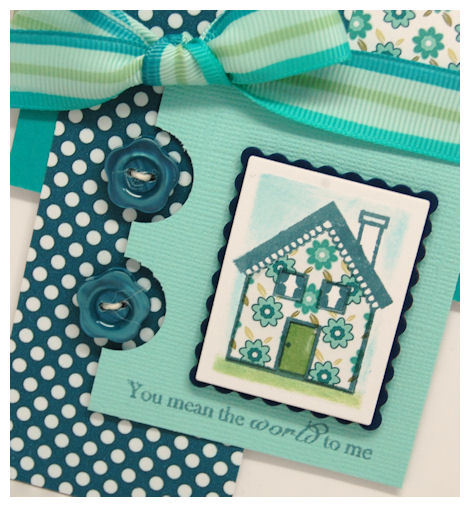
I love this quirky lil house. Its the perfect size. I stamped this onto white cardstock in a not quite navy ink. Used a nestablitly label, and sponged my grass & sky.
Now for this one I took some scrap left over from the Fresh Flowers © digital paper, stamped my house, and paper pieced it over my main image (cutting out the windows and door in the pattern so the base image pops through!). I felt the the Darling Dots © patterned matched my scallop house trim 😀
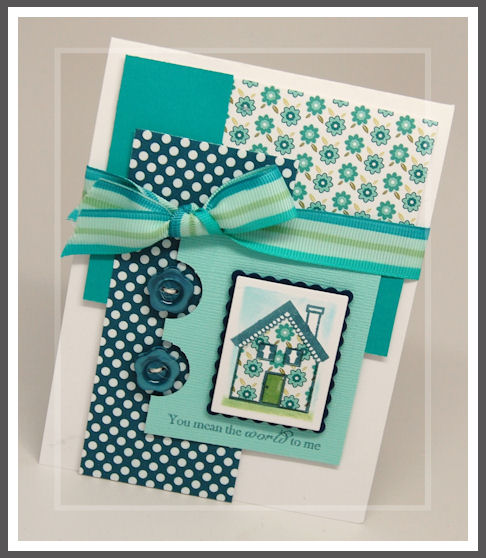
My ribbon…..well I took some white grosgrain ribbon, then colored it with my Copic markers to match! Sometimes we have to improvise!
Well there you have it! Now I do have some more card I made too, that I will share as the days pass on, so keep checking in. I hope this team post will be helpful to you all in some way.
We still have over a WEEK of daily inspiration and samples to share, so come back tomorrow!
Supplies: Happy Birthday Cake
Pretty Impressions © stamps: Just for You digital & acrylic
Pretty Printables Digital Paper: Fresh Flowers
Cardstock from Couture Cardstock: Blushing, Tuber, OSW white, Thistle Stalk
Ink: Versamagic, Copic Markers
Other: Liquid Pearls
Supplies: Mr & Mrs.
Pretty Impressions © stamps: Just for You acrylic
Pretty Printables Digital Paper: Fresh Flowers,
Cardstock from Couture Cardstock: Blushing, Tuber, OSW white
Ink: Versamagic, Momento, Copic Markers
Ribbon: May Arts
Other: adhesive pearls, Nestability label, SU! Punch
Supplies: Celebrate You
Pretty Impressions © stamps: Just for You acrylic & digital
Cardstock from Couture Cardstock: OSW white, Oat, Gancahe, Macintosh
Ink: Momento, Copic Markers
Ribbon: May Arts
Other: singlo gel pen
Supplies: A Little Something
Pretty Impressions © stamps: Just for You acrylic & digital
Pretty Printables Digital Paper: Fun Flowers, GaGa for Gingham
Cardstock from Couture Cardstock: OSW white, Cricket
Ink: Versamagic, Momento, Copic Markers
Ribbon: May Arts
Other: Prima Flowers, adhesive rhinestones
Supplies: You mean the world to me
Pretty Impressions © stamps: Just for You acrylic
Pretty Printables Digital Paper: Fresh Flowers, Darling Dots
Cardstock from Couture Cardstock: OSW white, Sprinkle, Lagoon
Ink: Versamagic, Momento, Copic Markers
Ribbon: May Arts
Other: Buttons
Well thank you for stopping by! I hope you enjoyed what you’ve seen so far, and what is to come!
See you back here tomorrow.
My Time Made Easy ™ LLC NEW! April Release
Mar 31, 2010 Author: mytime | Filed under: My Time Made Easy, UncategorizedToday is the day of the My Time Made Easy ™ LLC April Release!
We have released: (click the highlighted link to be directed to that area of the store)
3 NEW! Pretty Impressions © stamp sets
In our large sets you receive two 4 X 6 sheets of acrylic stamps
In our smaller sets you receive one 4 X 6 sheet of acrylic stamps
*Each set this month is also available in a digital format!*
Take Time © Set of 21 images – $20
Petal Perfection © Set of 8 image-$12
Just For You © Set of 38 images- $20
3 NEW! Pretty Packaging © Templates
Pick of the Petals ©
Slip Cover ©
Take Time Pocket ©
7 NEW! Pretty Pieces © Cut Files
5 of the Border Builders ©: Elegance, Open Scallop, Scallop Dot, Scallop Hole, Zig Zag
Rambling Rose ©
Petal Pefection (matches Petal Perfection stamp set)
7 NEW! Pretty Printables © Digital Paper Packages
Just Perfect
Perfect Petals
Fun Flowers
Fresh Flowers
Fresh Fabric Collection 1
Fresh Fabric Collection 2
Fresh Fabric Collection 3
1 FREE! Pretty Printables © Digital Paper Packages
Free Style Florals
1 New! Perfect Package © Collection
Take Time Package
So happy shopping!!!
Hope you can join me!
Mar 31, 2010 Author: mytime | Filed under: UncategorizedOK this is post 2 for today!
I hope any of you New England stampers can join me!
CHECK THIS OUT! <—— CLICK IT!
Perfect Peek Day #3
Mar 30, 2010 Author: mytime | Filed under: UncategorizedI cannot believe we can count down the HOURS to the My Time Made Easy ™ LLC Release!
I’m really feeding off the excitement, and if you think what you’ve seen so far is great, just think we have 9 more days worth of projects to share! Now you all get an idea of why I “disappear” for some time in between releases! There is quite a LONG list for what I do!! I have to admit I THRIVE on every second. I wake up excited to start each day 😀
Its been a great set of peeks so far, and today is NO different.
Today sharing samples using our Just For You © stamp set (available in digital download as well) , and NEW! Slip Cover template are:
Now you *may* have missed the first sample created using this template, but don’t fret, you can find that —>here
This was the sample used in that post.
Now in that post I stated that both pieces to this template are able to be used on their OWN!
Let me share an example of what I mean……
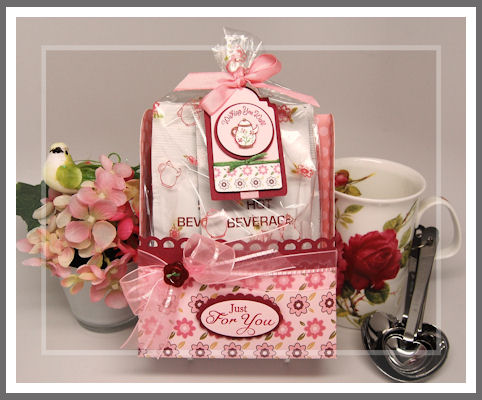
Wishing You Well

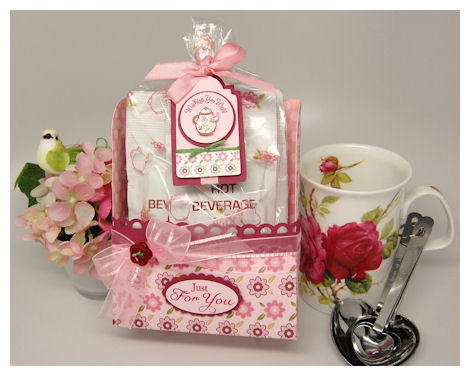
This gift package is a “get well” themed idea I had using *only* the base for the Slip Cover ©! As stated before, while this is the PERFECT card box, it really can be used for so much more (as can ALL my templates!). There are no limits to your own creative liberty!
You can put cocoa, coffee, tea, Biscotti, Cup O’Soup packets, tissues, cough drops, or whatever else you want to dream up!
I mentioned in another post that both pieces are so pretty, they can act as separate templates, so here is my example!
I simply printed the Pretty Printables © Fresh Flowers © digital paper (in the pink) onto my textured Blushing cardstock. It made for a STUNNING design. Then (before I had it cut out) I printed my Blushing dots from the Lovely Dots © collection on the other side! Now both sides of my template look amazing (inside & out). It is little details like that, that usually make a world of difference!
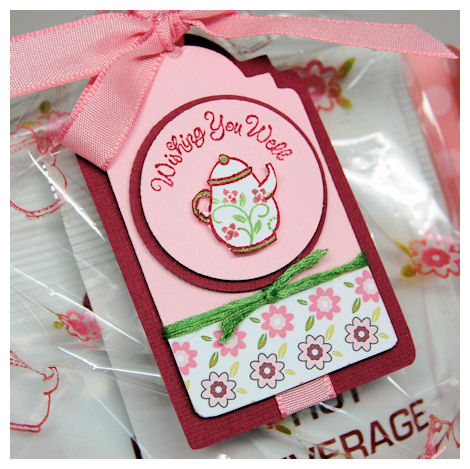
Don’t you LOVE that tea pot? OH! I so love it. I stamped it in a berry ink, and added my little flourish from the So Sentimental Set. This made a decorative tea pot in seconds!! I cut it out and layered it onto my tag. NOTE: For the handle, use a HOLE punch in there! Easy Peasy!!!
ALSO: With the option of having the Just For You © stamp set in digital format as well, you can make it larger and do all sorts of fun stuff (as you will see :D)
Now for the tag, I used the Tag You’re It © cut file (shrunken to about 1.5 inches wide). I layered that with the Blushing tag, and a scrap piece of that same Fresh Flowers © patterned paper only printed on white(from another project). I stamped the sentiment in a berry ink. Don’t worry, there is a “time for tea” sentiment too (you will see that soon enough!).
Now the bag !
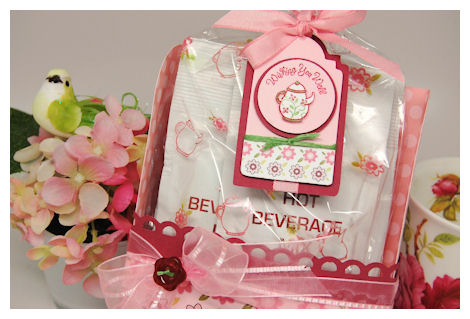
This is just a store bought gusset bad. Using White StazOn……I stamped my tea pot, and the large and small flower from the set that matched my paper, onto the bag, and used my Pebbles Inc pastels (they are shimmery) to add the pop of color!! Now you have a customized bag in minutes (to match! LOVE IT!!)
I hope you can see the details on there!
Notice that open scallop border? That is one of our NEW! Open Scallop Border Builder Cut Files!!! There are 6 various borders this month!
Now you can make these pretty strips for ANY project! Make it as long or as wide as you like, perfect every-time.
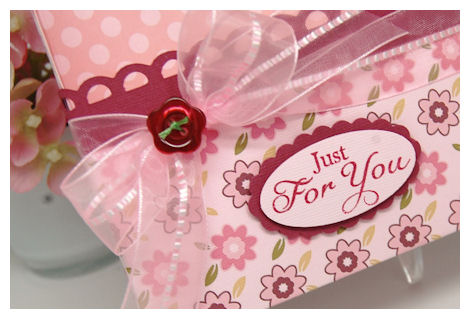
Now for the tag at the bottom….
I really wanted to add this larger sentiment to the box! So I stamped it first, onto my cardstock, then just used a Stampin Up! Oval punch.
It was PERFECTION!
Supplies:
Pretty Packaging © template: Slip Cover
Pretty Impressions © stamps: Just for You , So Sentimental
Pretty Printables Digital Paper: Fresh Flowers, Lovely Dots
Cardstock from Couture Cardstock: Blushing, Tuber, OSW white
Pretty Pieces © Cut File: Border Builder: Open Scallop, Tag You’re It
Ink: White StazOn,Versamagic, SU! Markers
Ribbon: May Arts
Other: Pebbles Inc Chalk,Button, SU! Punch (ovals)
Well thanks for hanging in with me here! Now you you have to come back tomorrow since it is our RELEASE DAY!
It is also the day of our first group post. We have a LOT to share using the NEW! stamp sets, so stay tuned!
Winner!
Mar 30, 2010 Author: mytime | Filed under: UncategorizedSORRY THIS IS A BIT LATE
I need to post the winner of the GIVEAWAY —> from here!
Random Integer Generator
Here are your random numbers:
230
Timestamp: 2010-03-31 02:31:18 UTC
So the winner was:
———————-
Melanie Milbe |
Hi Lauren, thanks as always for showing us your beautiful work and inspiring us…and the chance to win of course :0)
Congrats! Melanie!
I will be emailing you with details tomorrow.
Thanks to all who entered.
Be right back with the next peek bedfore the release!
Perfect Peeks Day #2
Mar 29, 2010 Author: mytime | Filed under: Home decor/3-D items, My Time Made EasyOK ladies (and the few men who read too) grab a cup of coffee because this post is JAM packed with goodness!
You will definitely want to check out Katie Cotton‘s blog today for her take on today’s template!! I am covering for the fact that we are one girl down (for this month only) so I’m making up for it by posting 2 full projects. I hope you take the time to read all the yummy details 😀 There is so much to share.
My obsession with gift packaging started after I made my very first 2-4-6-8 box, and a bag-a-lope! LOL!
My Stampin’ Up! demo, turned friend Paulette showed me how at one of her workshops. Once I saw how it went together I became obsessed with making them, and learning HOW I can make my own little boxes. I started buying all sorts of templates for envelopes, gable boxes, and whatever else I could find.
I began looking at the world in a whole new way. Instead of looking at PRODUCTS in the store, I started looking at their PACKAGING. Before I knew it I was able to just look at something and figure it out myself. It was exhilarating. That joy and passion has just grown and grown, and now NOTHING is off limits to be made into a 3D package of some sort! I have tons of stuff to come. Most of all is the feeling I get when others receive something they know I made with them in mind 😀
One of my most FAVORITE things to give are bath and body products. I think most of us love to feel pampered and smell good 😀 Often we don’t want to SPLURGE on those items for yourself, so giving someone something like that is so fun for me (maybe it is because I personally love that kind of stuff too). I think I have found a way to use every template I ever created with these types of products! LOL!
Well, this time I designed my packaging specifically for those types of gifts!
I wanted/needed that PERFECT presentation and fit for such items. So after purchasing, and measuring MANY varieties of the size/style/type bottles that these things are generally packaged in, and I designed the perfect fitting template.
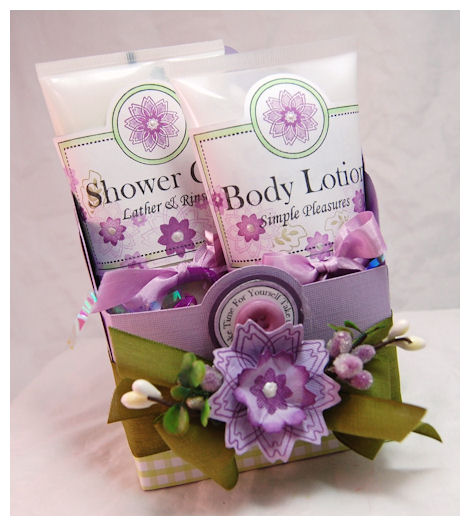
This is the Take Time Pocket ©
Take Time For Yourself
Completed Project Size
Tall: 6 1/4 Inches
Wide: 4 Inches
Deep: 2 1/2 Inches
This template was designed to coordinate with the Take Time © and Just For You © Pretty Impressions stamp set. Now you have the perfect items for packaging gifts for any occasion. Finally the perfect packaging for all types of gifts! Be it short, tall, thick or thin, store bought or homemade, it will be perfectly presented in this template! This template is the epitome of easy elegance! Goes together in a snap but looks like so much work! Not only is this a gorgeous packaging wrap but it looks amazing when used as your room decor for storing your everyday type of items! Perfect for any room in the house! Cut a hole in the top, and you have a sweet treat door hanger for a friend or neighbor.
All you have to do is take a little time and you are sure to make someone feel as special as they really are!
Now this template looks like this before you decorate it
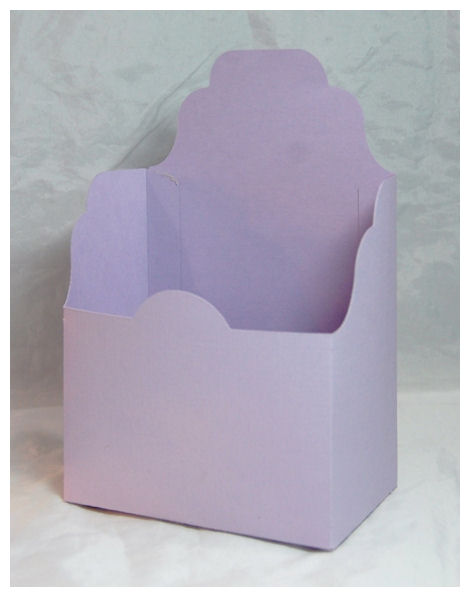
The curves this template has makes it so unique, and eye catching. It LOOKS like it would ahve taken you forever, but goes together in a SNAP! You will fall in LOVE!
Now below, here is that same box all decorated with our Take Time & Petal Perfection stamp set, as well as the GaGa for Gingham, and Carousel color of our Fanciful Flourishes Pretty Printables © digital paper, which I added some color to using my markers! The centers of all the flowers have Liqud Pearls.
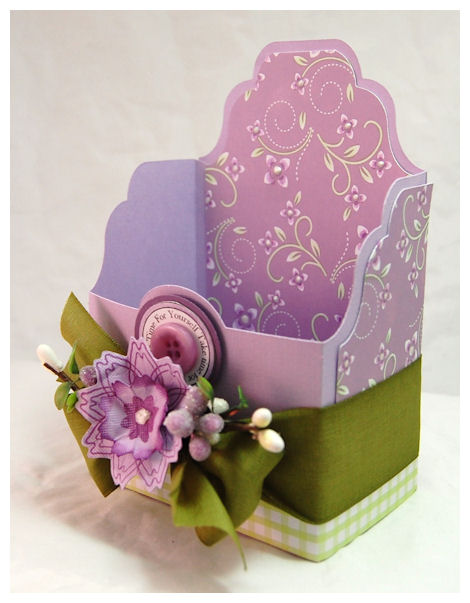
WOW! What a difference huh? I especially love adding that quick detail of color to the paper.
The template comes with the decorative layers for the inside back panel (can be used on the back of the template as well), and the side panels. It also has a label that fits PERFECTLY with the label image from our Take Time © stamp set! You can use a circular image/sentiment on the front, or the label!
I used the Petal Perfection © to stamp my large flower in a dark purple ink, and sponged the edges, and used the Petal Perfections Cut File to cut it out 😀 Now with little to no work it looks amazing. OH! And coloring this……a dream! You will more on that soon 😀
Here I used one of the circular sentiments for the front-it reads: Take Time For Yourself
Those of you with personal cutting machines can resize this too!
The Take Time & Petal Perfection stamp sets are sold in a “package” this month! You will get all 29 images for $18!
Truly stunning.
As you can see this template easily fits your standard size bath/body wash, lotions, bath salts, bubble bath….you name it. This serves not only as a way to GIFT these items but showcase and store them too! They also fit bottles from Bath & Body Works (my favorite!) as do the labels in the stamp set.
When I began designing my own stamps in August, I knew there was one set that I FOR SURE had to make! I personally felt there was a huge lack of images for giving such gifts! So I began creating the stamp set that is called Take Time ©. I chose that name because we really do need to take time for ourselves and give our-self a little but of pampering!
Take Time © Set of 21 images
This set was designed to coordinate with the Take Time Pocket template © as well as the Petal Perfection set. The label in this set coordinates nicely with the Just For You © stamp set (available in digital download as well) which is an “everyday” themed set. This is the perfect set for creating cards, gifts or tags for the items that PAMPER!I have so longed for a set that I can utilize to personalize homemade or store bought bath & beauty essentials. Now it is easy to dress up those special gifts I give most to everyone on my list! Who doesn’t love to be pampered? Well now you can take those creations and make them that much more personalized! The large sentiments are perfect for fitting in our custom designed label, while the smaller sentiments fit perfectly underneath! The flowers in the set are sure to dress this up or be used on their own.
Sentiments read:
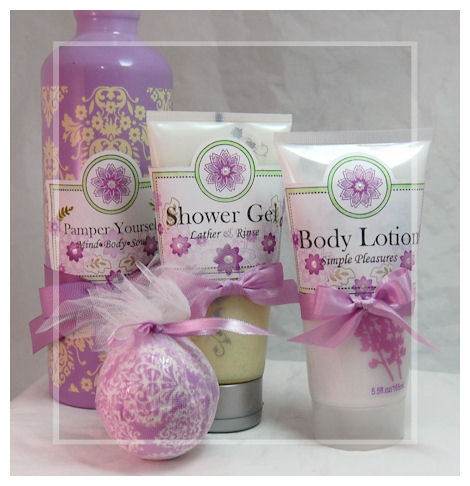
Shower Gel
Bath Lotion
Bath Salts
Bubble Bath
Pamper Yourself
Simple Pleasures
Mind* Body* Soul
Rest* Rejuvenate* Relax
Wash Away the Stress
You are scent-sational
Add one capful and enjoy!
Lather & Rinse
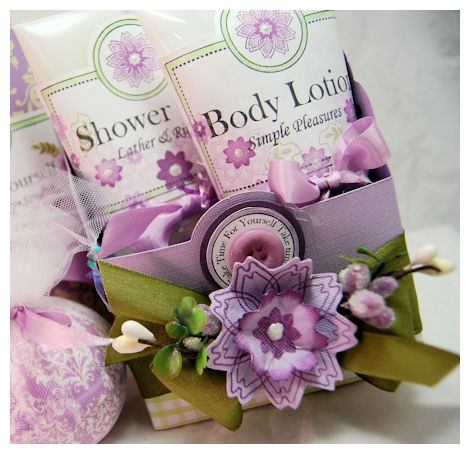
Here is a sample of the labels and sentiments used in conjunction with the flowers that are in the set!
Could it get any more AMAZING? Let’s get a closer look at it all.
I used the label cut file from the Take Time Pocket © template to cut my labels from an adhesive label sheet that I got at Staples!! I stamped my label image onto the cut label tag. I then colored my border, and added my stamped flowers. Once I was done that I stamped my large bath sentiments, and used a coordinating smaller sentiment for underneath.
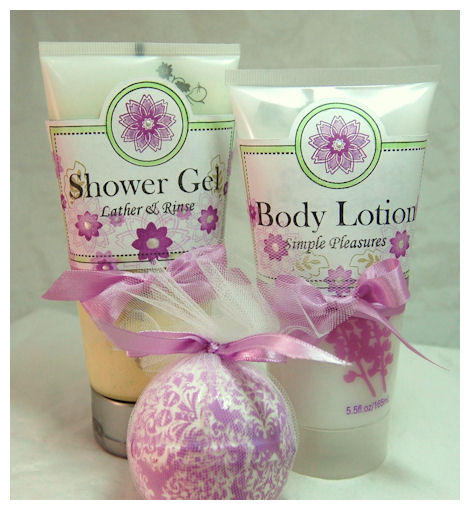
Since my images are acrylic it is easy to line up. All the sentiments are separate so you can easily mix & match!
Now these look so much more personal than leaving them PLAIN! You can easily peel the labels off too if you want.
Here is the Shower Gel
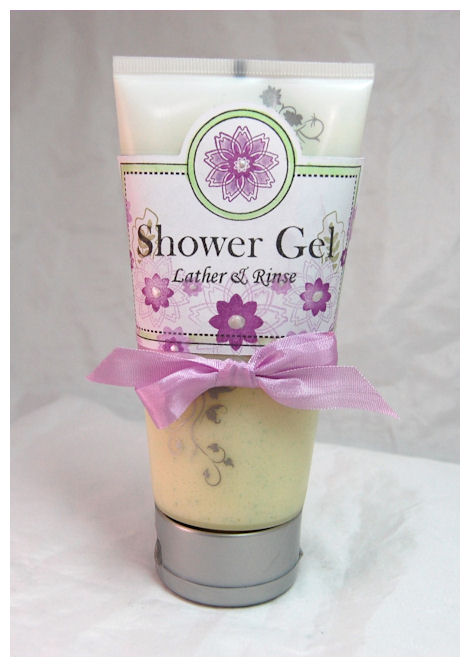
I added the Lather & Rinse. I could have chosen “wash away the stress” or some of the others.
Now we have the Body Lotion
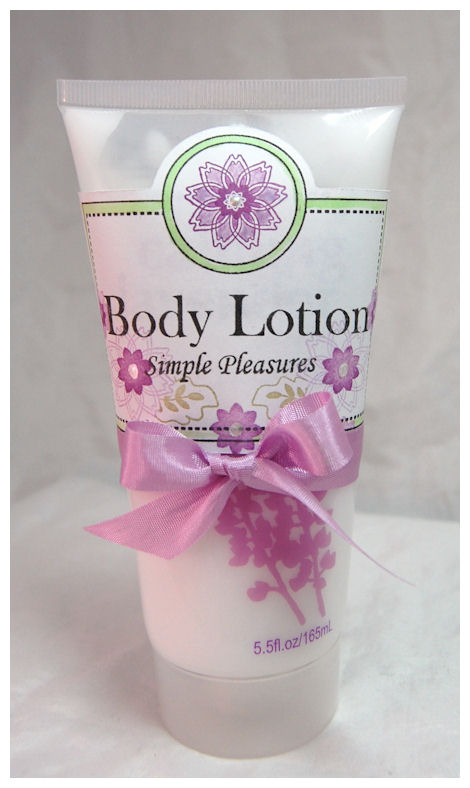
On this one I added Simple Pleasures, but again I could have chosen several of the others too!
OK! Are you STILL with me? You won’t want to miss what is next either!
Now once this stamp/template set was completed, I figured my “claim” that it is the perfect template for so many “everyday” sort of gifts, or occasions, I’d be much more well received if I designed such a set!
So I got to work making images, and sentiments that coordinate in much the same way as Take Time ©, but can also be used alone 😀
Let us see what we can do with Just For You ©
*Also Available in Digital Download*
This set was designed to coordinate with the frame image in the Take Time © set. The purpose was for it to be utilized for “everyday” gift giving in coordination with the Take Time Pocket © template
This is a set of wonderful everyday style sentiments and image that are just perfect for cards. tags and gift giving all year round! Gifts have never looked better, or been easier to give with this set!
The sentiments fit perfectly in the label that is in the Take Time © Pretty Impressions stamp set
(this used the semi-circle sentiment Hand Picked Just For You)
Sentiments include:
- From (to be used with “all of us” or “me to you”)
- all of us
- me to you
- I (to be used with “care” or Love you”)
- care
- Love you
- We (to be used with “care” or Love you”)
- Thank you
- Just for you
- For Someone Special
- Happy Birthday
- A Little Something
- With Deepest Sympathy
- Mr. & Mrs.
Circle sentiments:
- Time for Tea
- Just for you
- Home Made Just For You!
- Something Sweet
- Hand Picked Just For You!
- Happy Birthday To You And Many More
- Just A Little Something
- Wishing You Well
Verses:
- Someone like you should be celebrated every day!
- You mean the world to me
- When words just aren’t enough
- Everyone should be lucky enough to have someone like you in their life
———————————————————————————
WHEW!! Wait until you see everything that comes in this AMAZING set!!
Now about the project
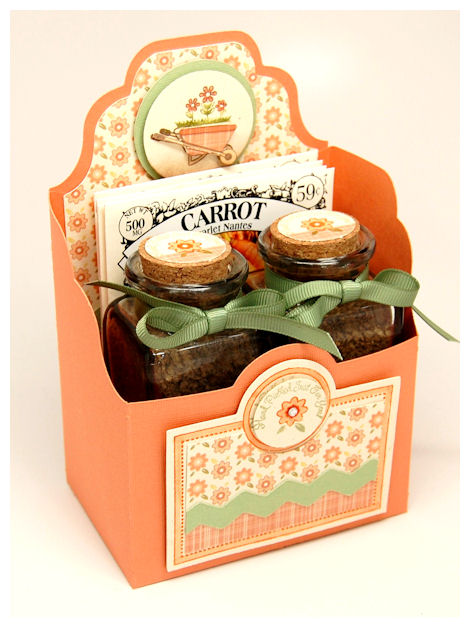
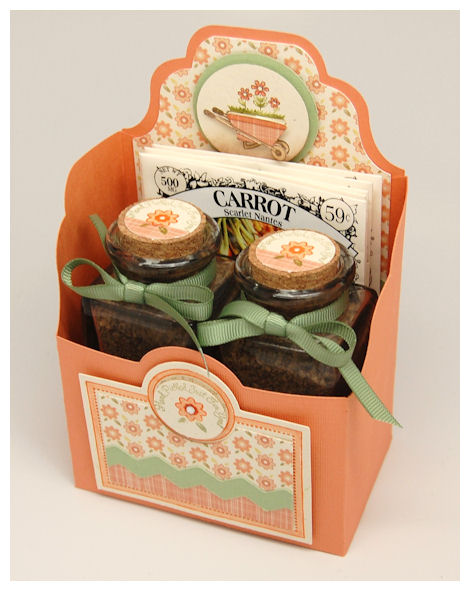
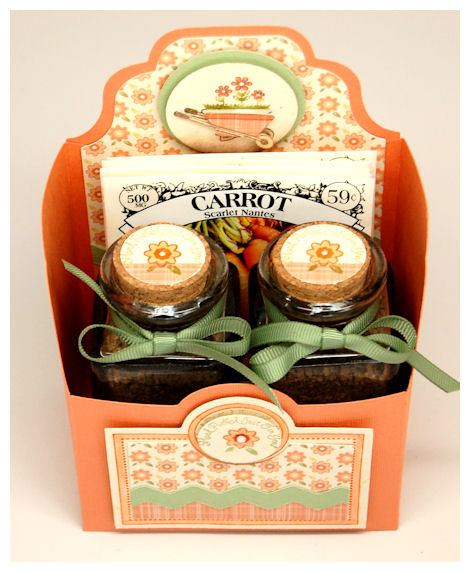
Barrow of Seedlings
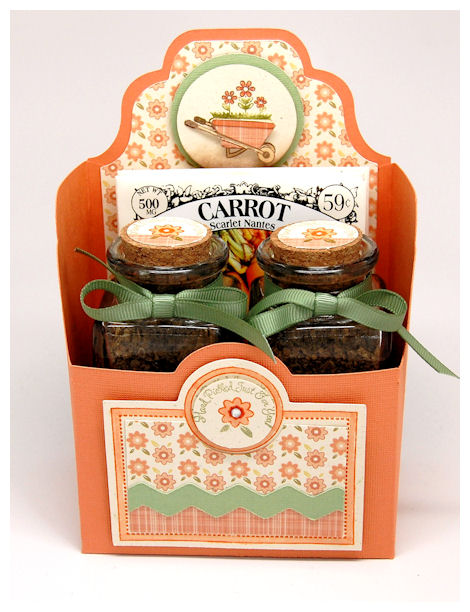
How is this for a gift set, for the gardener in your life?
This was a special gift got my own little gardeners!
I used the Take Time Pocket © to package up some seeds for my children. This has all sorts of vegetable seeds for our family garden, as well as 2 jars of wildflower mix! They loved getting this gift with their own trowels, gardening gloves, aprons, and knee cushions 😀
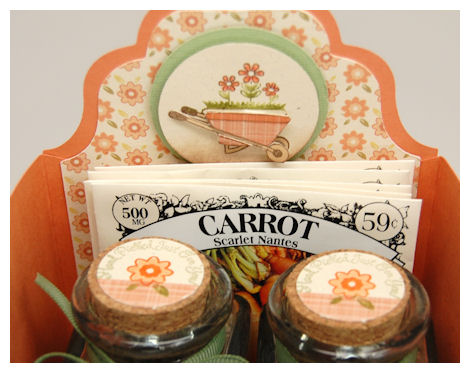
By the time you are all reading this, we now already have these seedlings planted in a large case in the house, and they are already sprouting out of the dirt! We planted Carrots, Snap Peas, Watermelon, Strawberries, Cucumbers, and Tomatoes. We will spread the wild flowers an a separate part of the garden once Spring comes and we can transplant the seeds! (I’ll get a photo of the kids with thier seedlings this week)
Amber is the main one caring for them and checks on their growth process daily. We read that letting kids tend for thier own garden builds self confidence, caring, and a sense of responsibility. It helps them learn about the earth and how to nurture it, so they are less likely to pollute it.
Moving on……
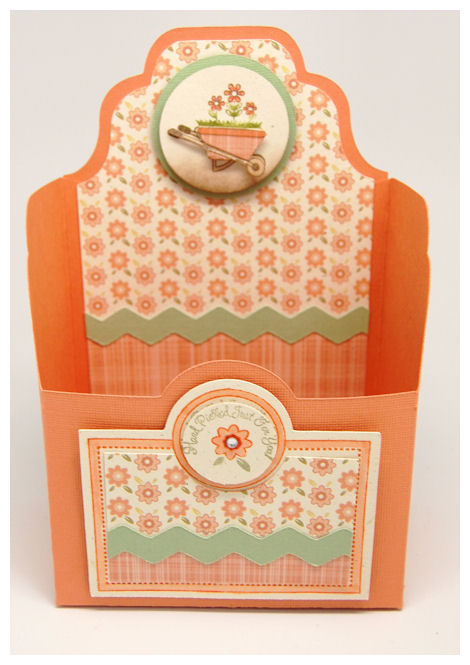
This is the empty version of the box.
The base was made from Acorn Squash cardstock. It has a gorgeous texture!
I designed my label using the cut file from the Take Time Pocket template © in a natural ivory cardstock. Stamped my label in a rust colored ink, and I used a marker to color around the edge. Easy peasy. I designed my decorative layers using my Pretty Printables © Fresh Flowers © digital paper in the coral color, and printed it with my Fresh Fabric © digital paper to match (can you say HEAVEN!). The flowers in this paper match the flower stamp you see on the label! It comes in 2 sizes and fits perfectly! Don’t you LOVE coordinating items without having to THINK?!
Lastly I added the ZigZag pattern from the Random Ribbons © Pretty Pieces Cut File.
I KNEW I needed a wheel barrow stamp! My project from last month was actually inspired by this image!
(HA!! Little did you know (wink))
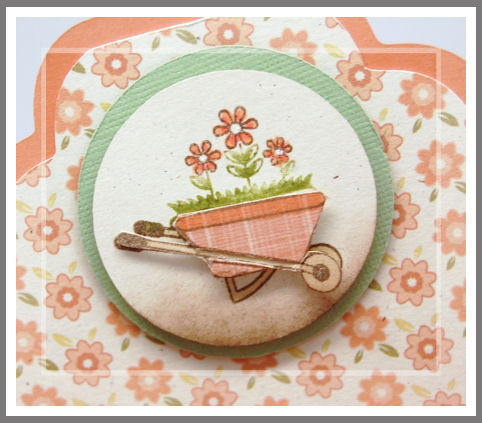
I stamped it twice, once on my circle layer, then again on my Fresh Fabric © digial paper, so I could paper piece it.
I used a 1.60 circle and a 1 .75 circle to create this label. It was perfection. One of my favorite images 😀
The labels on the jars, well I just used some scrap left over from my printing, punched it out and added my sentiment and flowers. This came together in just a few minutes!! If you look at it, it is all pretty basic.
So there you have it!
Are you still here? I know, a lot to digest. Can you tell I’m in excitement OVERDRIVE? Jeepers. It’s just an amazing month of possibilities….and with Mother’s Day around the corner….you better get to work!
I know I’ve been workin my hiney off, and I still have TONS of ideas to share. It will blow your mind what these 3 Pretty Impressions © stamp sets can do! Just you wait 😀 (if you are totally into them already!)
Supplies:
Pretty Packaging © template: Take Time Pocket ©
Pretty Impressions © stamps: Take Time, Petal Perfection, Just for You
Pretty Printables Digital Paper: GaGa for Gingham, Fanciful Flourishes, Fresh Flowers, Fresh Fabric
Cardstock from Couture Cardstock:Carousel, Lancelot, OSW white, Acorn Squash, Thistle Stalk
Other: Natural Ivory, Adhesive Label Sheets
Pretty Pieces © Cut File: Petal Perfection, Random Ribbons
Ink: Versamagic, Momento, Copic Markers
Ribbon: May Arts
Other: Liquid pearls, branches
Well that was plenty for one day. I swear I took a nap in between posting these two projects, so I can imagine how it feels reading it (if anyone actually DID! LOL!). I am WIPED OUT!
I hope you can return tomorrow for our next round of peeks before the release on April 1st!!! On release day we have a special group post that I hope you all will enjoy too! LOTS of inspiration 😀
Thanks for stopping by.
My Etsy

Who I Designed For
Blogroll
- Alicia
- Alli Miles
- Ally Blankenship
- Amber
- Andi @ crafts on a whim
- Angel R
- Angie Z
- Anne Kranitz
- Becky O
- Bee
- Beth Silaka
- Bethany Paull
- Beverly Nash
- Bobbie
- Cambria
- Cammie
- Card of the Week
- Card Positioning System (CPS)
- Cards for Cancer
- Catherine Doucette
- Charmaine
- Cheryl Sims
- Chriss Rollins
- Christina
- Christine Ewing
- Christine Wooden
- Colleen Schaan
- Craft Critique
- Craft Gossip
- Crystal
- Dawn Easton
- Emily Giovanni
- Geny
- Holly
- Igne Groot
- Inspirational Craft Blogs
- Irene
- Jami Sibley
- Jeanne Streiff
- Jen del Muro
- Jeni Bond
- JenMarie
- Jenn Balcer
- Jenn Diercks
- Jenn O
- Jennifer E
- Jennifer Mick
- Jennifer Pereda
- Jennifer-Sweet Treat
- Joanne Basile
- Jodi Collins
- Julia Stainton
- Julie Masse
- Karen
- Kathryn Berthiaume
- Katie Cotton
- Kelley Holland
- Kendra
- Kim Scholfield
- Kris’s Color Stripes! Get inspired here
- Kristen Dubosque
- Kristin Eberline
- Kristine
- Laura @ Sunshine Stamper
- Laura Turnmire
- Laurie Schmidlin
- Lesa Rapp
- Linda Duke
- Linda-LSN
- Lindsey Botkin
- Lisa (lakind scs)
- Lisa Kind
- Lori Craig
- Maggie
- Mara Campbell
- Maria
- Maria Levine
- Mary
- MaryJo
- Melanie M
- Monique Hansen
- Moxie Fab World
- Pam Imholz
- PaperCrafts Connection
- Peppers and Pollywogs Kids party site
- Rebecca Grohall
- Rita
- Robyn
- Rose Ann
- Sarah Vrolyk
- Sharon Harnist
- Sharon Johnson
- Sharon Rivera (a chemisrty with paper)
- Sherrie
- Sophia Landry
- Storage Units, Ink, & More Blog
- Sue Berker
- Susan (Rainy)
- Tangii Crane
- Tracy
- Tricia Traxler
- Trudee
- Velta
- VivLyn
- Zena
MTME Pretty Palette Color Team
MTME Pretty Patterns Sketch Team
My Time Made Easy TM LLC
Shop till you drop!
Lauren Meader
About Me
Copyrighted material
Subscribe To My Blog
Pages
- About me
- Alexa’s Story!
- My Crafty Corner!
- My Time Made Easy™ LLC
- Our Make A Wish Trip to Disney!
- Resume/Publication List
Calendar
| M | T | W | T | F | S | S |
|---|---|---|---|---|---|---|
| 1 | 2 | 3 | 4 | 5 | ||
| 6 | 7 | 8 | 9 | 10 | 11 | 12 |
| 13 | 14 | 15 | 16 | 17 | 18 | 19 |
| 20 | 21 | 22 | 23 | 24 | 25 | 26 |
| 27 | 28 | 29 | 30 | 31 | ||
Archives
- August 2013
- July 2013
- June 2013
- May 2013
- April 2013
- March 2013
- February 2013
- January 2013
- December 2012
- November 2012
- October 2012
- September 2012
- August 2012
- July 2012
- June 2012
- May 2012
- April 2012
- March 2012
- February 2012
- January 2012
- December 2011
- November 2011
- October 2011
- September 2011
- August 2011
- July 2011
- June 2011
- May 2011
- April 2011
- March 2011
- February 2011
- January 2011
- December 2010
- November 2010
- October 2010
- September 2010
- August 2010
- July 2010
- June 2010
- May 2010
- April 2010
- March 2010
- February 2010
- January 2010
- December 2009
- November 2009
- October 2009
- September 2009
- August 2009
- July 2009
- June 2009
- May 2009
- April 2009
- March 2009
- February 2009
- January 2009
- December 2008
- November 2008
- October 2008
- September 2008
- August 2008
- July 2008
- June 2008
- May 2008
- April 2008
- March 2008
- February 2008
- January 2008
- December 2007
- November 2007
- October 2007
- September 2007
- August 2007
- July 2007
- June 2007
- May 2007
- April 2007
- March 2007
- January 2007
Categories
- About Me
- All That Scraps
- blogger challenge
- camera/photo play
- Cards
- Contests
- family stuff
- FOR SALE
- Home decor/3-D items
- How to FAKE it!
- Introduction
- JUGS Challenge
- JustRite Stampers
- Lizzie Anne Designs
- My family stuff
- My Stamping Space
- My Time Made Easy
- My Time To Color Challenge
- My Time to Create Challenge
- My Timeless Template Challenge
- My Timeless Templates
- Mytime Mail
- MYTIME MOVIE/VIDEOs
- Papertrey Newsletter
- Pink Cat Studio
- Pretty Palette Challenge
- Pretty Patterns Sketch
- Product Opinions and Must haves
- Recipe's
- Saturday Sketch
- Smilebox Creations
- Stampavie
- Tutorials
- Uncategorized
- videos
Most Popular
- Create your own Onesie Card Tutorial-and important NOTE! PLEASE READ (2529)
- Saturday Sketch-Boxed bag holder (2333)
- Going GREEN! Fancy Flower Flourish-Closure Video (1478)
- Fabulous Favorite - Giveaway! (1336)
- a Prayer Request (1232)
- QUICK-Easter Baskets from Nestabilities-PTI style-and blog challenge (1063)
- Teaser Sketch (999)
- February Release Giveway! (and a little peek) (996)
- Group Post and Rambling Rose Video Tutorial (985)
- GIVEAWAY! Who wants it all?! (895)
Recent Comments (RSS)
- Daya Sons: Daya Sons, a renowned manufacturer
- 첫충사이트: 완전히 흥미로운 블로그 게시입니다. 저는
- sarah: Wow, Lauren, what a stunning
- hedie: خرید راهبند
- 야동: Love to read it,Waiting For
- 야동: This seller is in a
- 바카라사이트: 여기 처음 왔어요. 나는이 게시판을
- 야동티비: I was surfing the Internet
- 바카라사이트: 비슷한 주제에 대한 흥미로운 정보를
- 바카라사이트: "여기에 제공해 주신 귀중한 정보와
Copyright © 2007 - My Time, My Creations, My Stampendence - is proudly powered by WordPress
This blog has been Tweaked and Designed by Sara Williams