Archive for the ‘My Time Made Easy’ Category
Perfect Peek: Day 1
Oct 28, 2010 Author: mytime | Filed under: Home decor/3-D items, My Time Made EasyToday is the first day of peek projects for the My Time Made Easy ™ LLC Release!
I’m keeping my posts brief because as I type I am literally in the middle of moving! It is late and I just spent the last 3 1/2 hours lugging boxes and furniture into a truck. My shoulders are KILLING me! LOL! It will all be well worth it when its over. Right now I’m exhausted. Despite that I’m plugging away to bring you some samples from our November Release!
Today’s peek is sure to be the Star of the Show! Literally!! Keep reading.
Speaking of Stars….many of you have been anticipating our next permanent design team member, and while the announcement is late (I apologize for that as my daughter’s hospitalization set me behind on that) it has been known amongst the design team. She was originally suppose to be our Guest Designer for this month, but she also applied for the permanent team as well. After viewing her jaw dropping creations, I’m ecstatic to announce that Monique Hansen will be a permanent part of the team!
You will want to check out Monique’s debuting projects!
Now back to my HINT…… our template this month is called the Star of the Show! Check out some fabulous projects by the team!
Now we have 4 Holiday themed stamp sets this month, which are perfect for the season, but I wanted the team to show you some limitless ideas for gifts using the templates, so you *may not* see the new sets on each and every project, but rather a mix of older stamp sets, and paper.
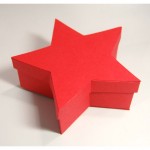
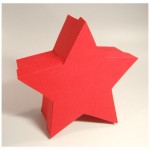
Star of the Show © Template $5

(Note: I swear the ribbon actually does match! LOL! Despite the photo)
Star of the Show © Template $5
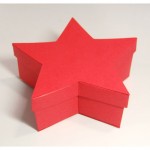
Completed Project Size
5 3/4 Inches Wide at points.
Box is 2 inches Deep
Available in PDF, SVG, GSD, DXF, WPC
No matter what the occasion, young, old, male or female, as its name suggests, this is sure to be the star of the show! This is perfect for any presentation! Resize the template to “stack” the stars for a sweet country theme, or decorate the “stack” to look just like a holiday tree. No matter how you decorate this is will be the SHINING STAR on any gift table, and be used time and time again!
This template was designed for quick and easy assembly!
CLICK PHOTOS FOR CLOSER VIEW!

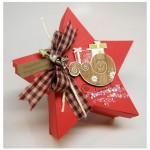
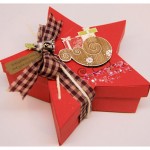
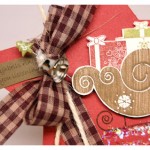
Today for my new template sample I AM using a new set I designed called Dashing Through the Snow ! I LOVE the sleigh (and other elements) in the set!
The tag uses a sentiment from the set: Sleigh bells ring are you listening?
Dashing Through the Snow © Set of 22 Images 20
*Also available in Digital for $12*
If you are looking for a great collection of unique winter themed images, then this is the set for you! Many of the sentiments were designed with the good ole’ Christmas jingles in mind. Perfect for designing your winter or holiday cards, treats and packaging!
Sentiments include:
Dashing through the snow
Winter Wonderland
Let it snow, let it snow, let it snow!
Have a Holly Jolly Christmas
Sleigh bells ring, are you listening?
Sending hugs and kisses
To: you
From: me
with love!
Snowflake’s are winter’s butterfly
Sleigh full of wishes
For a deer friend
Some image sizes:
Sleigh 2 inches tall: 2 1/4 inches wide
Large Reindeer: 2 inches tall, 1 1/4 inches wide
Tree: 1 1/2 inches tall
Large snowflake: 1 1/2 inches tall, 1 1/4 inches wide
Large gift: 1 1/8 inches tall, 3/4 inches wide
This possibilities are endless with this set!!
I hope you enjoy what you’ve seen so far 😀
More to come tomorrow.
Thanks for stopping by, and bearing with me as I juggle this crazy life 😀
Thanks for stopping by today!!
I need to keep this short and sweet! Something that “I” have a hard time doing, but have fallen behind on my TO DO list, and really wanted to share this idea before Halloween comes, and goes!!
I decided it would be AWESOME to use some green cardstock to create a Witch from the To Go! Template, so I did!
This is the result!!
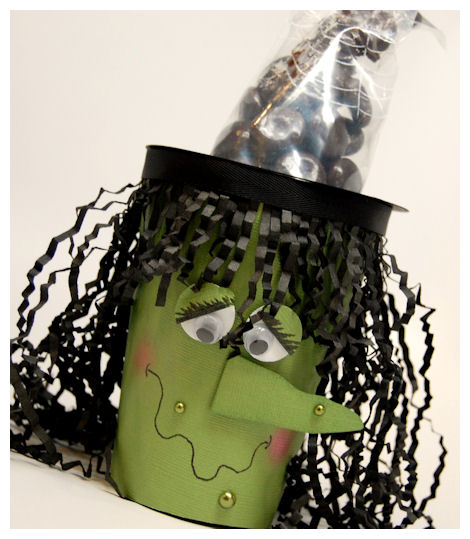
Upon creating my cup, I added some cut and crimped cardstock around the rim for my hair. I covered the hair with a ribbon, for a finished look.
I punched out my eyes, and added some googley eyes. On he lids I drew on the “lashes”. I hand cut my nose, and added some “warts”, using the adhesive pearls. I then doodled my mouth, adding my rosy cheeks with some pastels.
My hat……-I just cut a large circle, with a hole in the center. This allows me to have my frosting bag (filled with Junior Mints) to stick through which makes up my actual hat!
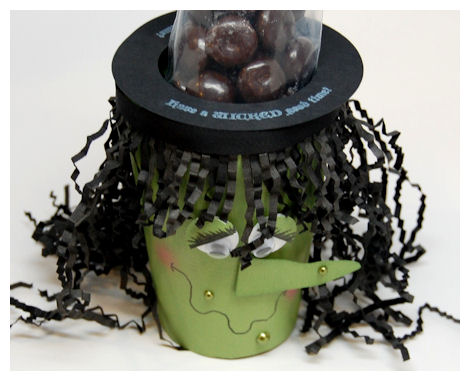
I curved my sentiment from A Spooky Surprise to fit the rim!!
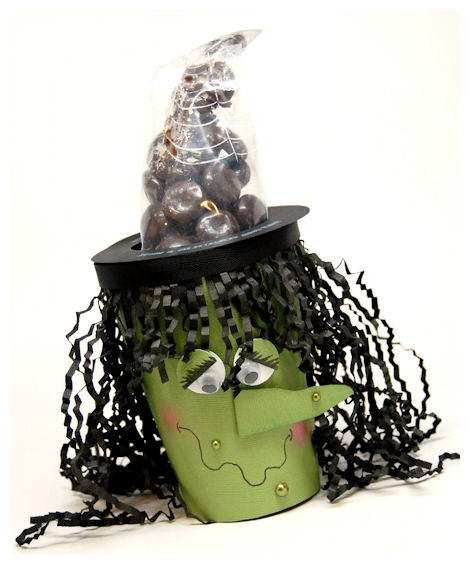
I stamped the web image from A Spooky Surprise, in white StazOn, onto my hat! I love the look, and it was SOOOOOO easy!
I hope you get inspired to try this yourself!
Thanks for letting me share 😀
What a release! Our biggest yet! Not sure I could ever do that much again, but it was a lot of fun. I figured it would be a good time considering the season, and it is the start of prime gift giving season. (My favorite thing to do is MAKE everything)
There was SO much to share and so little time. My daughter getting hospitalized was my top priority, and it certainly set me back on what I could get done. I have yet to complete all the amazing project ideas I have had using our FABULOUS October Release Products!
Today I thought I’d share some info about a project that is featured on the My Time Made Easy ™ LLC website, for the To Go! template. This is a fabulously fun, and simple “WOW” template. While its primary design is perfect for quick and easy gifting of *any* hot beverage themed gift, is is also designed to perfectly coordinate with the Fancy a Cuppa? template.
My purpose today is to share with you how it can be fabulous, all by its lonesome. This will be he perfect packaging for your hot chocolate (snowman soup), coffee, tea’s, lattes and chai-to name a few! You would even wrap some cute warm socks, mittens or how about a gift card in here too!!
So many possibilities. Our Grab a Cup/& Sentiments, Fancy a Cuppa?/& Add On, as well as our A Spot of Tea set is just the amazing combination of images and sentiments to cover all your hot beverage gifts!
Hot beverages are always a popular, and well received gift. Even if someone doesn’t like the type or flavor, it is an acceptable re-gift!
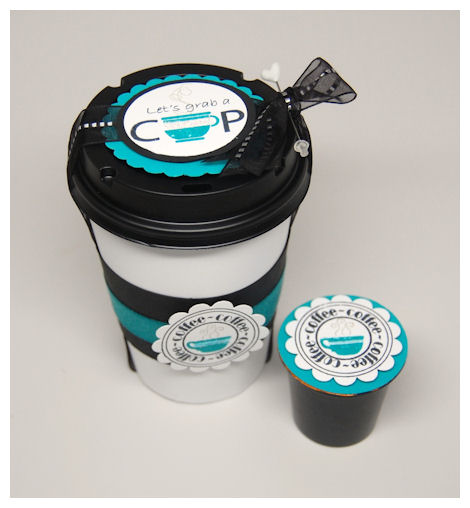
Let’s Grab a Cup
This template doesn’t take much to make it really wonderful.
My design here is VERY simple, I just relied on my colors for that POP, when in reality this set took under 10 minutes to make! You could mass produce these for everyone this holiday season. Perfect for teacher’s, co-workers, friends, family, and everyone in between!
I love that this cup makes a super simple gift, quick and easy, yet you still get that “WOW! you made this?” look!

One of my favorite things about the Grab a Cup set, is the idea for the coffee cup to be used to create the “U” in the word “CUP”. It fits perfectly on the lid of my cup. My favorite thing about the To Go! template, is the fact that it fits with the 12 oz. lids you can purchase in the store (or recycled), and you can actually cover a 12 oz cup with it instead, should you choose to not make the cup yourself. It isn’t easy creating or covering round items, so this makes it a breeze.
Now for the front of my To Go! Cup
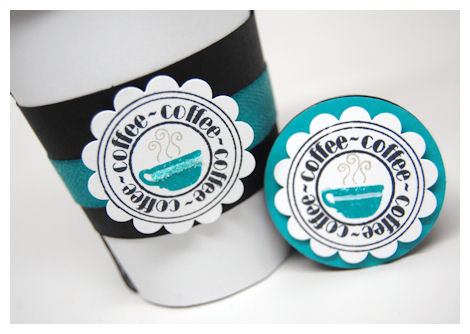
I made my coffee sleeve in black, keeping it super simple! I used the new cups from Fancy a Cuppa? and the Fancy a Cuppa? Add On for my circle sentiment. I was able to cover my K Cups too. Covering them allows you to coordinate every aspect of your gift. It is a simple detail that can make a world of difference.
A ll I did was stamp, and punch with a SU! scallop punch.
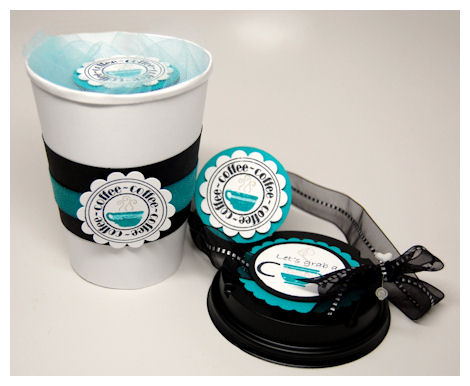
I filled the To Go! Cup with 2 K Cups, and some tulle, then was DONE!
Supplies from My Time Made Easy ™ LLC
Pretty Packaging Templates:To Go!
Pretty Impressions Stamp Set: Grab a Cup, Fancy a Cuppa? and Fancy a Cuppa Sentiments
Well thanks again for stopping by. I hope that I have time to complete more of what I have wanted to!!
Stay tuned for more to come.
Today I have a spooky sweet surprise to share with you all!!
Many of you pre-ordered the A Spooky Surprise set, and now you may want some sweet ideas! I hope you will find some great inspiration from this one today!
Wicked Witch Brew: Boo Kit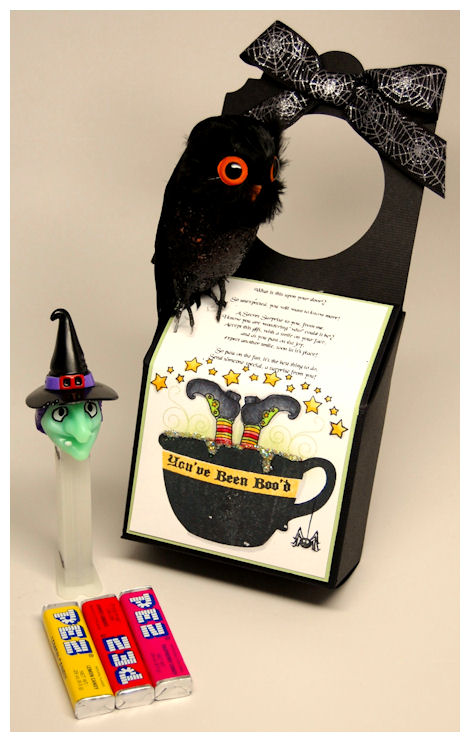
Imagine seeing this hanging upon your door this Halloween season?!! This bring a whole new meaning to a SWEET spooky surprise.
I used the NEW! In Suspense template to create a fun Halloween Boo Kit!
The In Suspense template, as well as the coordinating stamps designs: A Secret Surprise, A Spooky Surprise & Thankful, were all designed to be used alone, together, or in coordination with the In Suspense template so that you can easily take the old tradition of “Boo-ing” someone, and leave a special treat upon someones door step ANY time of year! We will be adding seasonal/all occasion kits like this all year long!!
I decided I to not use the window cut out on the front, but rather just used a complete stamped panel. There are so many different design possibilities with this one.
I thought this witch PEZ dispenser was the perfect treat to put inside my “Wicked Witch Brew”
Here is the close-up of the A Secret Surprise poem!
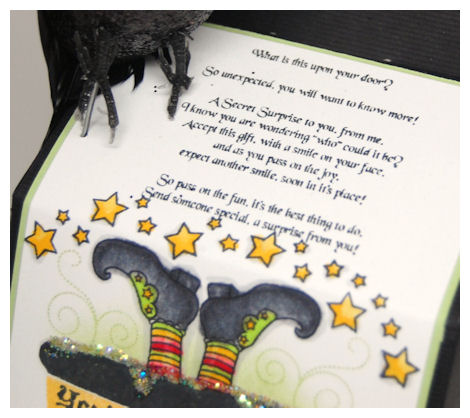
This poem is PERFECT for surprising someone on ANY occasion!!
I love the witch feet most in this set! The stars are a really cute accent to this too. I am honestly NOT a Halloween person, but I have to admit I am smitten with the cute nature of this set, as oppose to creepy/scary/evil like images. It really is then perfect treat set!
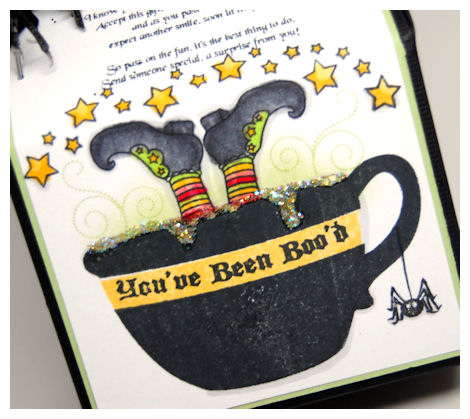
I loved the idea of her feet sticking out from my ” Fancy a Cuppa?” cup that I stamped in black, to mimic the look of a fun cauldron!! I added the swirls from Fanciful Flourishes for my hot steam, and sponged on some green “froth”, as well as added green stickles, so my Witch Brew was overflowing! I stamped my sentiment in the cup trim, which was a perfect fit.
The little spider detail was a cute touch I think too!! I LOVE combining sets!
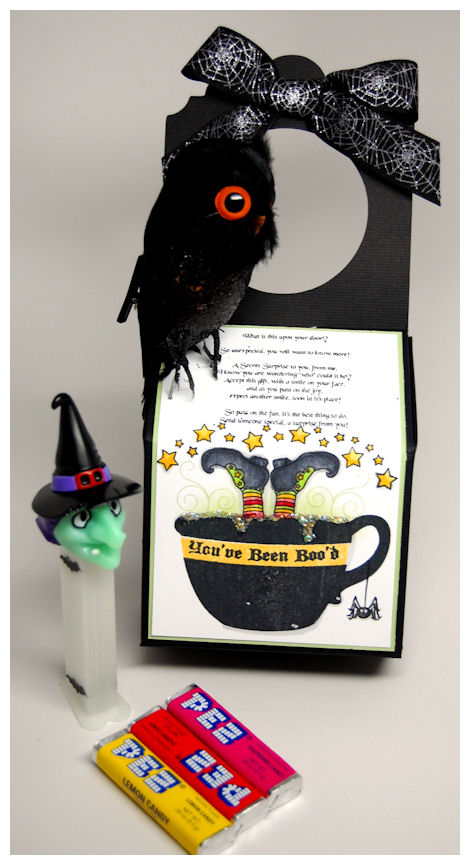
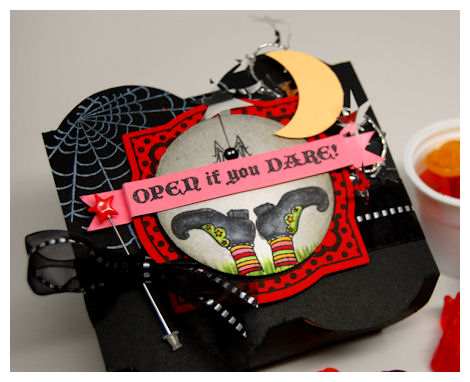
The spider themed ribbon, and cute spooky owl are a great addition to this design!
I just punched some holes in the top for my owl to sit ON my box! There were some wires in his feet, that allowed me to do this 😀
(Sorry about this next photo :C)
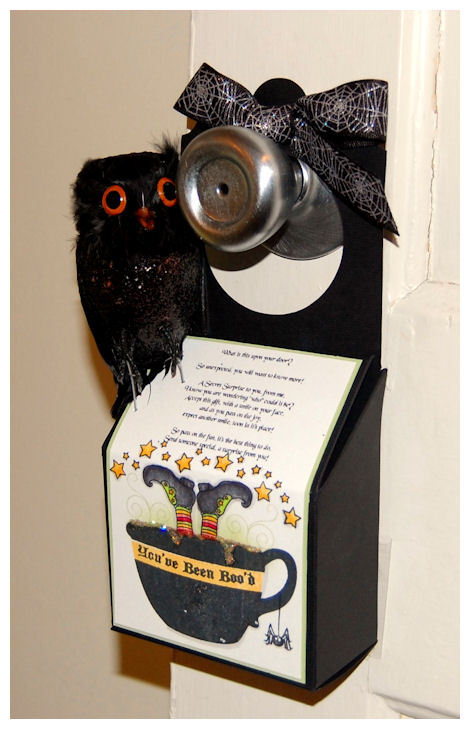
Here he is on the door!
Note: If you put the candy on the right side, the weight of the owl balances perfectly to hang correctly!
Don’t forget you can cut off the hanger portion, so you have a cute treat box too!!
How about another sample using the A Spooky Surprise set?
Tricky Treat Tag
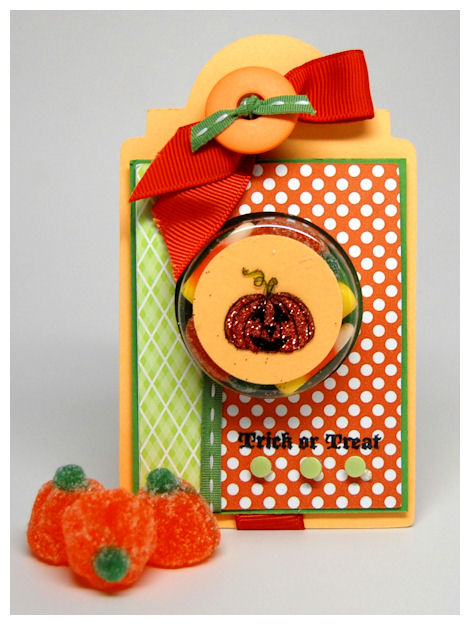
I used the tag from Tag you’re it! I used a condiment cup for this design.
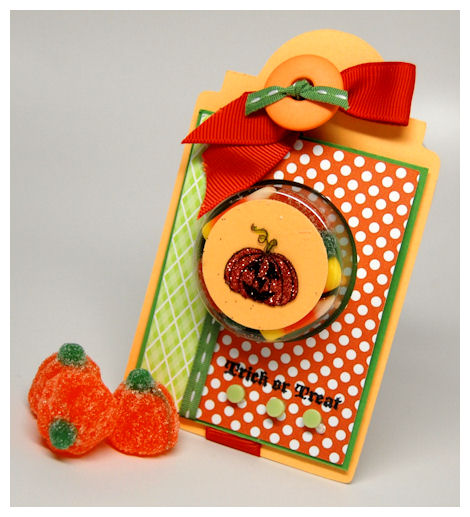
My pumpkin was stamped in black StazOn, then I used Art Glitter Glue and glitter to color it from the inside of the cup. I added a cardstock layer to make it POP and keep the candy glitter free.
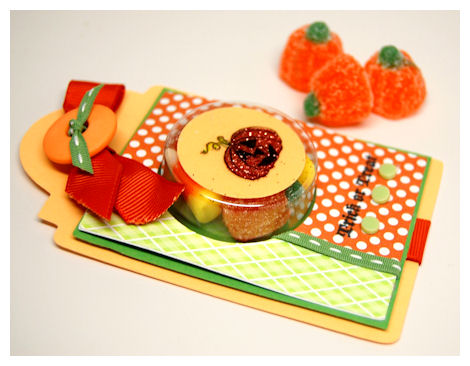
It holds a few gummy pumpkins, and candy corn!
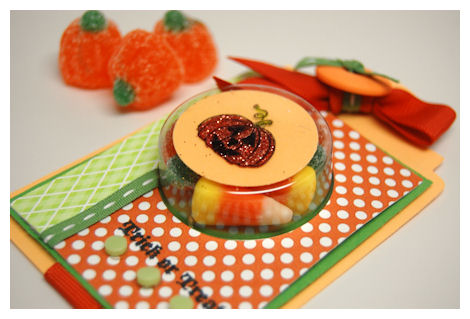
A super sweet treat for any “treater”.
Supplies from My Time Made Easy ™ LLC
Pretty Packaging Templates: In Suspense
Pretty Impressions Stamp Set: A Secret Surprise, A Spooky Surprise, Fancy a Cuppa?
Pretty Printable Digital Paper: School Plaid 1, Shutt-erfly
Pretty Pieces Cut File: Tag You’re It
Well, I hope this gets your creative juices flowing for for some spooky sweet treats!!
Tune back in tomorrow.
Pinch Me! A Group Post
Oct 4, 2010 Author: mytime | Filed under: Home decor/3-D items, My Time Made EasyWelcome to our Group Post today!
We have all shared many samples over the last week, and today we will all feature samples using the Pinch Me template!
There is nothing better than a unique style treat box, that is versatile and EASY to assemble! This will be a template you turn to over and over again! Wait until you see all the possibilities.
Stop by an visit:
Since you are here, let me shaare the 2 samples I created using the NEW! Pinch Me template. I couldn’t help but make them look like something to suit the fall feeling of the season. I LOVE the pinched version of this one.
Hand Picked Pumpkin
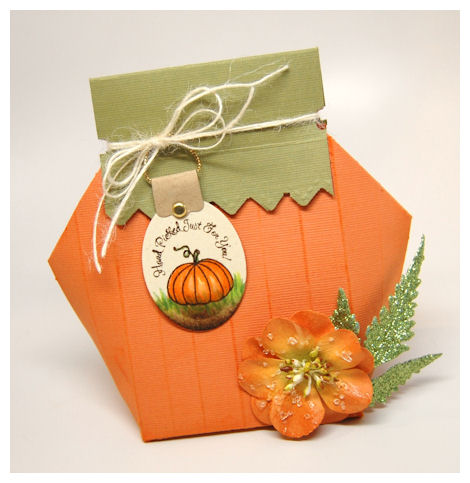
Here I used this *SUPER* cute template to create a “pumpkin” that is perfect for any fall themed dinner! I can see this placed at every seat on a holiday table, can’t you??
4 1/2 Inches Tall
2 3/4 Inches Deep
4 3/4 Inches Wide ( at widest part)
Note: 2 3/4 Inches Wide (if not pinched out)
It can also double as a flap top “bag”! Directions provided with purchase 😀 Talk about VERSATILE!!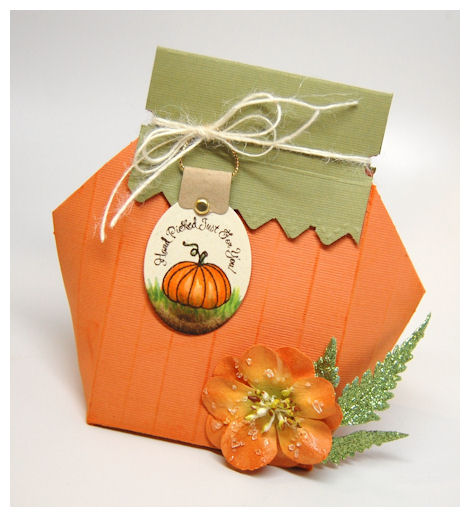
Here I scored, and distressed it, to make it realistic, and added some green cardstock to the top flap, for my pumpkin stem.
I used the pumpkin image from A Spooky Surprise for my tag, with a sentiment from Just For You! Sentiments reads: Hand Picked Just For You. It was simply perfect!
Now how about another idea?
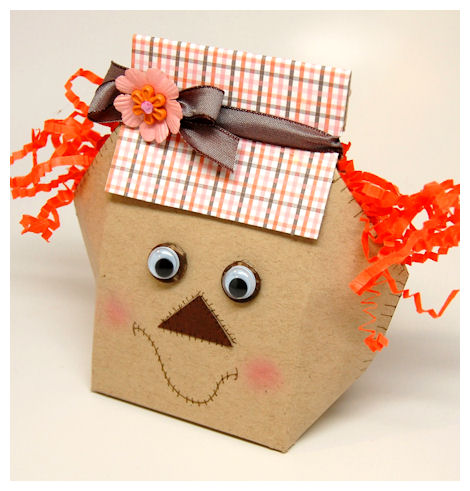
Silly Scarecrow!! Truly adorable and great for boy/girl, young and old! Just a little doodling and this was done.
Isn’t this SO cute???? Fill it with Candy Corn, fudge, maple syrup chocolates, cookies….you name it! You could leave it plain and put the supplies to decorate it inside, for a family fun craft too. It would be great for Girl/Boy Scouts and fro a school activity too!
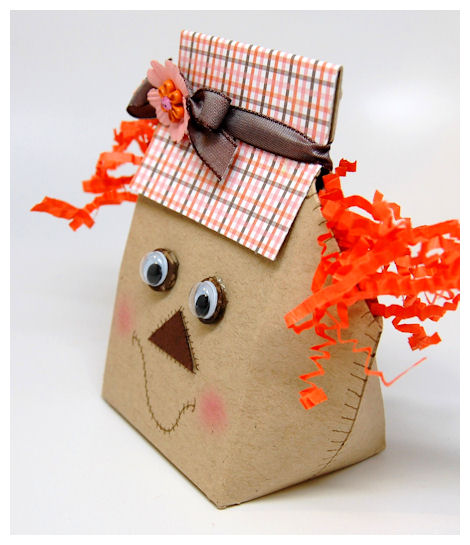
I made sure I faux stitched all my seams to make it look like a actual scarecrow! What a cute idea for a kids harvest party, don’t you think?
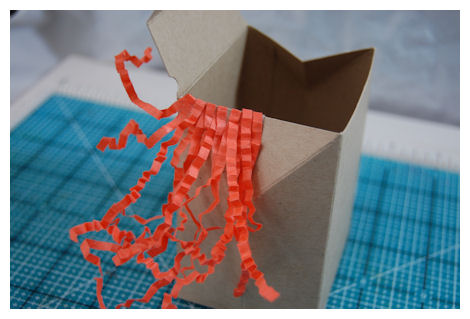
I just adhered my confetti strips to the inner fold, as seen here, to get this funky and fun look!
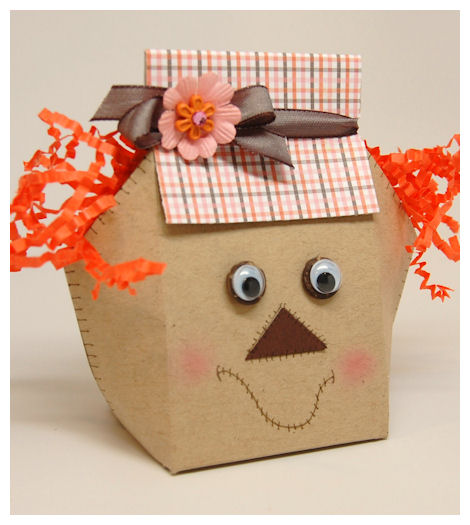
I love the noted flap topper, as you can now stop hoarding all those ribbons and make them a stunning addition to this project!
I used plaid paper from the Flutter-by collection for my “hat”. I love not having to use a lot of effort to get a real WOW!
Supplies from My Time Made Easy ™ LLC
Pretty Packaging Templates: Pinch Me
Pretty Impressions Stamp Set: A Spooky Surprise, Just For you
Pretty Printable Digital Paper: Flutter-by
Thanks a bunch for stopping by and hanging in there with me the last week or so, while I care for my family! Keeping up with this release has kicked my butt! LOL!
I will have some more samples over the next couple of days, so I hope you can return!
In the meantime, I hope you are all getting started using your new goodies from MTME!!
Soup for the Soul
Oct 3, 2010 Author: mytime | Filed under: Cards, Home decor/3-D items, My Time Made EasyHere we are with another great day of amazing samples!
Today you will want to check in with
Today I wanted to share a little Get Well care package I made using the NEW! Grab a Cup template, with the Grab a Cup & Sentiments set!! With the cold winter months, seems all to often we need such gift items!
Cup O’ Chicken Soup
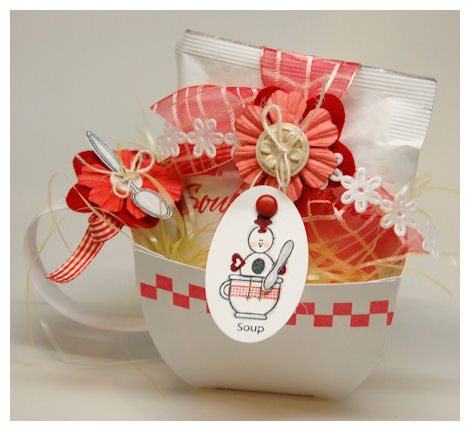
I wanted to wrap up a special little get well packet, so I packaged up a Chicken Noodle Soup packet from Cup O’ Soup. I love giving a gift packet of that because you can easily mail it!!!
I kept this simple so I could whip up a bunch of these.
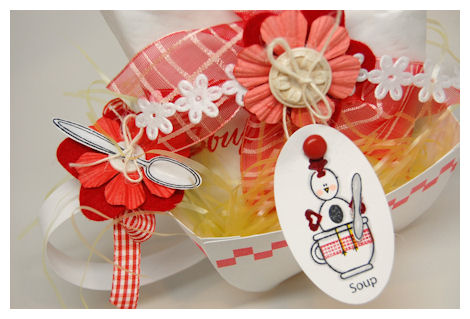
My soup packet is simply tied with some ribbon, then has my tag hanging from it.
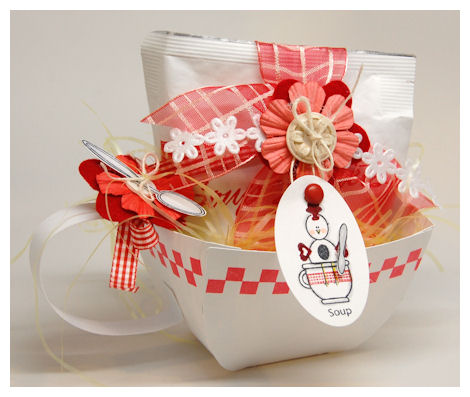
I used the checkered border builder from Fancy a Cuppa? to create my cup design on the Grab a Cup template. It was SUPER easy! I love having a checkered pattern builder. I just made the Grab a Cup template in white cardstock, and stamped the border in a red ink along the edges, prior to assembly. I left off the bottom to keep it looking like a bowl of soup. I think its SUPER cute. Sometimes simpler is better.
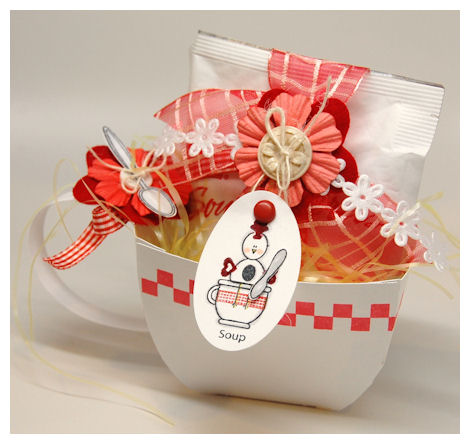
I also stamped/colored/cut out the spoon from the Fancy a Cuppa? set, and tied it onto my handle.So it looks like you are ready to dig into the soup bowl!
I love the little chicken from the Grab a Cup set. If you didn’t know, he fits perfectly on top of the cup, for “chicken soup”. The soup sentiment is included in Grab a Cup set. I stamped the checkered border on my little cup center, to match my template. The spoon is perfect for him to hold too!!
Now I made a card to match!!!
Cup of Get Well Wishes
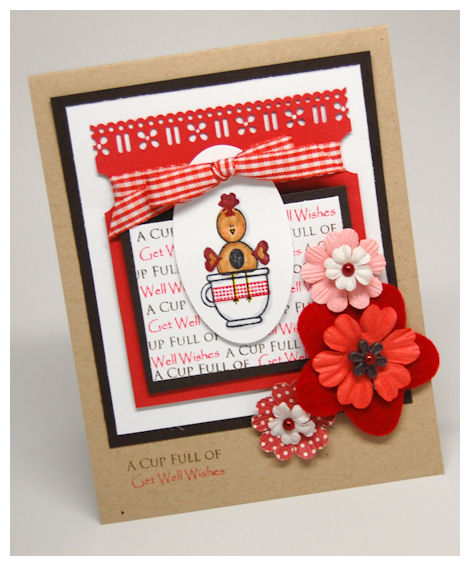
I love this card! It is ALL stamping!
I used the same tag idea, and ribbon, as in my template. I utilized the Grab a Cup sentiment set to create my own background paper!! Isn’t it perfection?
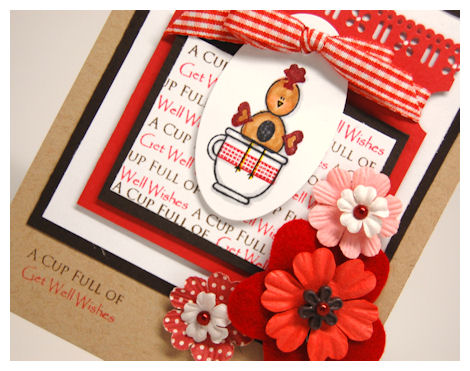
The “A Cup Full of Get Well Wishes” was continued in the lower left corner. I love that you have a lot of sentiment combinations with the Grab a Cup Sentiment set!
Supplies from My Time Made Easy ™ LLC
Pretty Packaging Templates: Grab a Cup
Pretty Impressions Stamp Set: Grab a Cup & Sentiments, Fancy a Cuppa
I hope this inspires you to create your own little Get Well care packets, so when someone you are about, near or far, falls under the weather.
Tune in tomorrow for a GROUP POST, using another fab template: Pinch Me!
Thanks for coming back for more ideas and inspiration!
Today you will want to visit:
Today I am excited to share a great stamp addition to the Shop Around © Mega Template!
I’ve stated previously that we plan on continuing to add to this template/stamp combination to maximize the design possibilities! We already have Home Improvement, On Display 1, Sign It, and Window Shoppe, now we have a French “Cafe” like se,t to add to the collection called A Lil’ Cafe.
Next month we will offer some holiday themed inspiration for the Shop Around © Mega Template , but this month, with our hot beverage theme we decided to go in the “Cafe” direction.
This set makes an amazing “cafe” and it also makes some great cards/tags too!
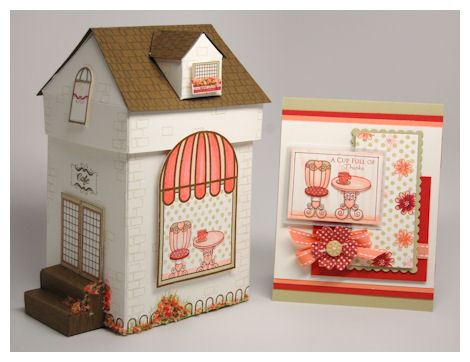
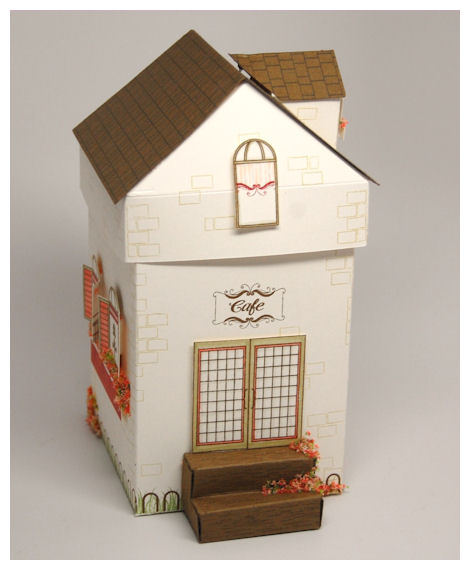
This is an adorable set if images that were designed to coordinate with the Shop Around © Mega Template! This set was created for you to be able to create your own little French style Cafe/Bistro/Pasticceria or Flower Shoppe. The scene building possibilities have no limitations!
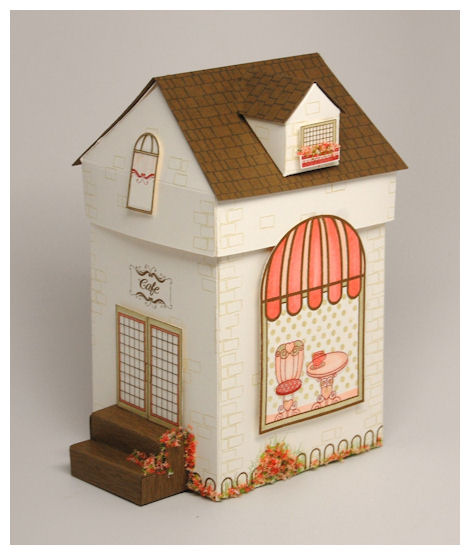
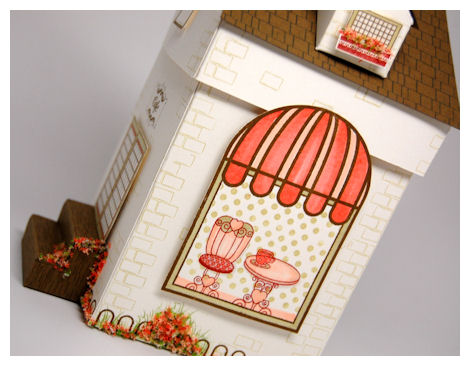
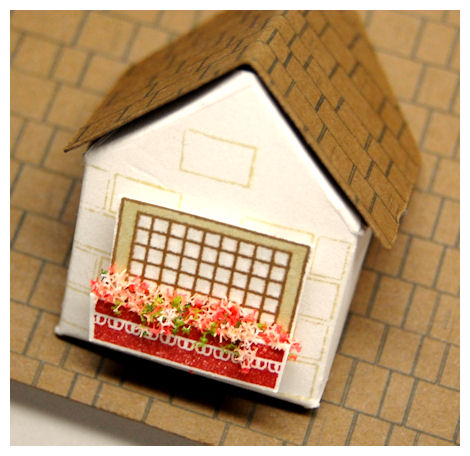
Here is the “Cafe” window! I loved creating the scene inside the Shoppe.
I used the Shoppe Window set, and stamped the table, chair and coffee cup (on the table) to set the “scene”. The “brick” pattern is part of the A Lil’ Cafe set as well! Makes a really nice random pattern, similar to a realistic cafe!
There is also 2 sign options, a shutter for the window, flower box, brick patterns, vase, flowers, menu, bottle of wine, wine glass, coffee/tea cup, plate of biscotti, Pastry/Napkin holder/table element.
Images in the set also include:
A cafe table: 1 1/4 inches tall
A cafe chair: 1 1/2 inches tall
French Door: 2 inches tall x 1 inch wide-stamp the two doors together for dual French doors
(handle image also included)
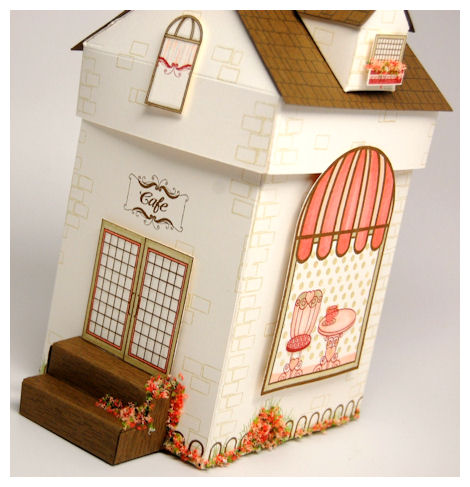
Here is the French Door image-dual stamped, with door handles! On the stairs I used the wood grain from the Home Improvement set.
Set also includes: 2 sign options, shutter for window, flower box, brick patterns, vase, flowers, menu, bottle of wine, wine glass, coffee/tea cup, plate of biscotti, Pastry/Napkin holder/table element.
I used the sign and Cafe sentiment
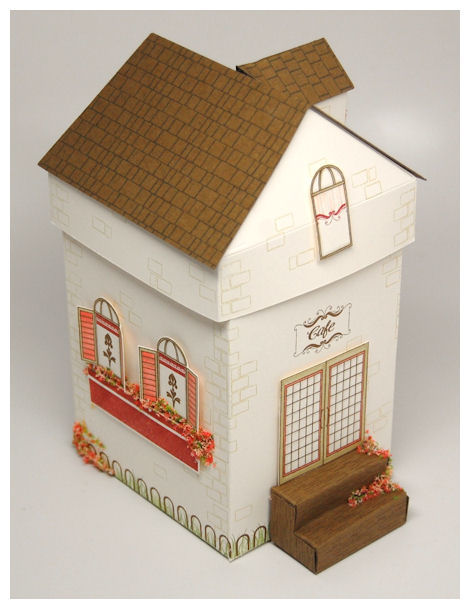
Around the bottom I also used the grass, and rounded “fence” like image, also from the Home Improvement set. I love the coordination of sets! I added flower Soft randomly to look like flowers/grass.
Window: 3/4 inch wide X 1 1/4 inch tall
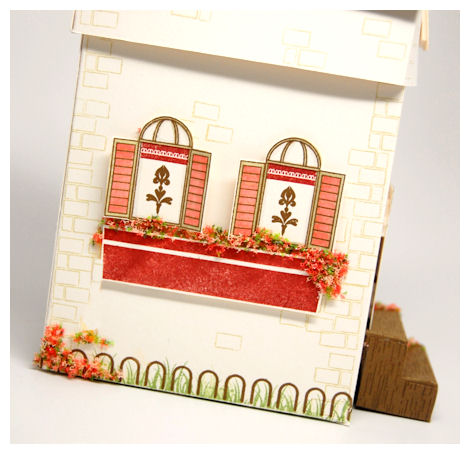
Here I stamped 2 of the windows, and used the “flowerbox” in that set as my “curtains”. I stamped the neat lil’ French emblem “on the windows”. I took the actual flower box image from Home Improvement for under my two windows. I added some Flower Soft to it.
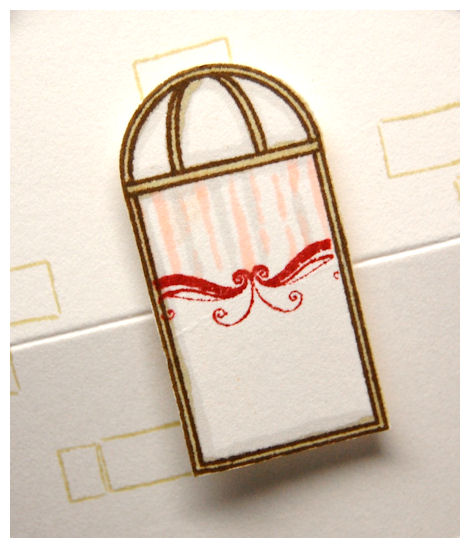
Here is the other window I created. I used the bottom swirl from the “sign” image (just masked the window) and I colored it in to look like a curtain/shade!! Super cute, quick and FUN!
Now we have another window……
Here is the Pop Up window, using the rectangle window, and the window box to decorate it.
No matter what combination of elements you choose to use this Lil’ Cafe is sure to be stunning!
This set is super for cards too!! So I thought I’d share a coordinating one with you.
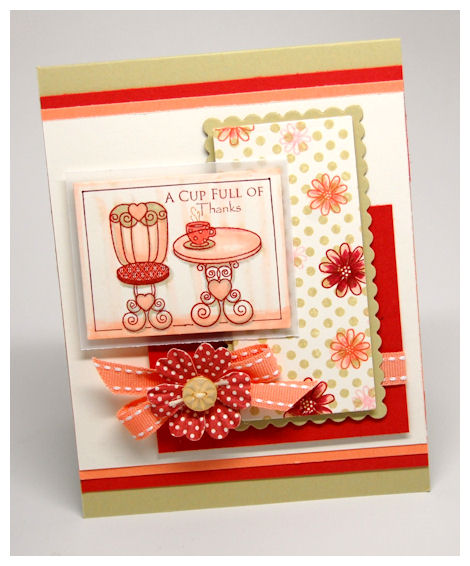
I LOVE the table and chair image, and all the elements you can add to the table!! Its perfect for the template or on its own. You can use *just* the table or chair or stamp two chairs at the table too!
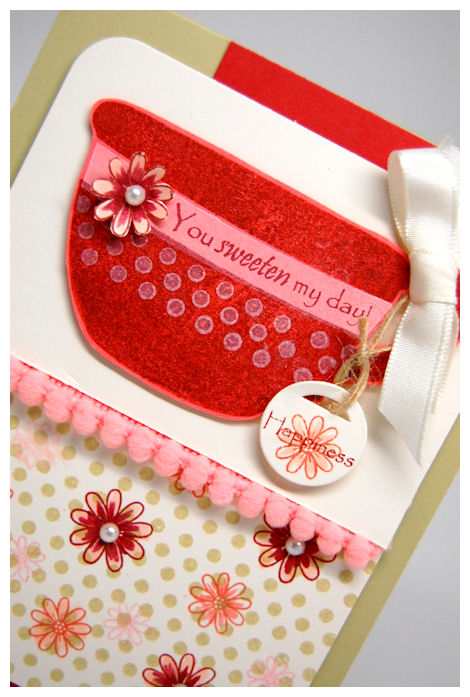
Here I chose to use the coffee cup 😀 and used a combination of sentiments from the Grab a Cup Sentiments for my card sentiment. 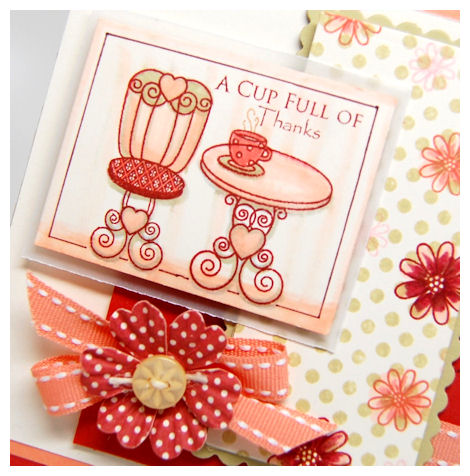
I created my own paper pattern using the Fancy a Cuppa set. I stamped the polka dots and daisies for my pattern. Really too fun! Then I found a similar Prima flower to complete the look!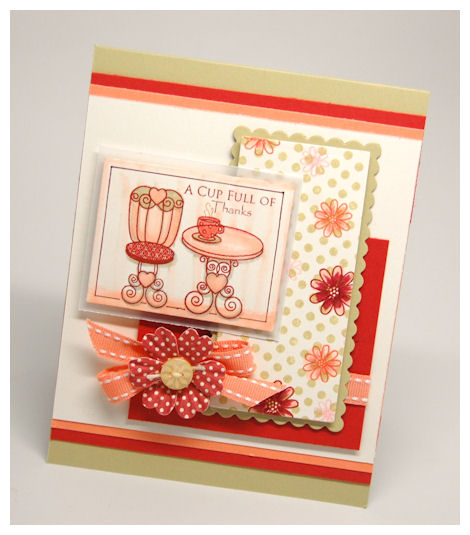
Supplies from My Time Made Easy ™ LLC
Pretty Packaging Templates: Shop Around & Accessories Mega Template
Pretty Impressions Stamp Set: A Lil Cafe, Grab a Cup Sentiments, Home Improvement, Shoppe Window
Pretty Printable Digital Paper: Custom Constructions Materials
Pretty Pieces Cut File: Home Improvement Coordinating Cuts
Well I hope this Lil’Cafe inspired you!! There are so many possibilities with more to come!
Thanks for stopping by 😀 See you back here tomorrow!!
Oh-K Dokey
Oct 1, 2010 Author: mytime | Filed under: Home decor/3-D items, My Time Made Easy, Product Opinions and Must havesWell this release is SMOKIN HOT! Literally!
I’m so happy to see that you ALL love gifting hot beverages as much as I do!
We have MUCH more to share, so be sure you pay a visit to:
Today I’m so excited to share one of our NEWEST Pretty Pieces Cut Files: Oh-K Dokey
But before I do that I will share a card using an image from the Grab a Cup stamp set, that suits the “theme” of our gift packaging!
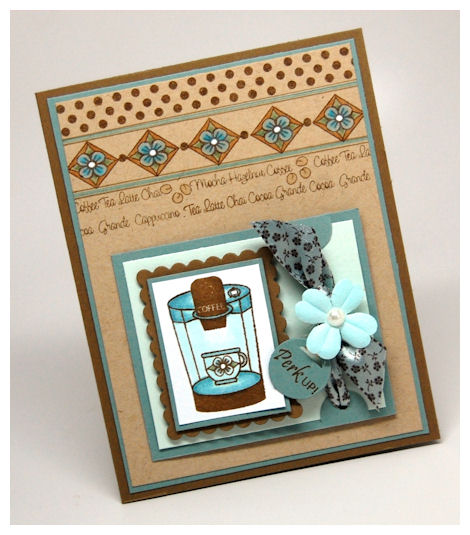
Perk Up!

I love this “coffee maker”, as it is fashioned after my favorite coffee machine. I went with blue and “coffee” for my colors on this, with my ribbon being my starting point!

I stamped the flower from the Grab a Cup set, onto the cup that is in this image. Then stamped the sentiment from the Grab a Cup Sentiment set, on a lil’ tag.
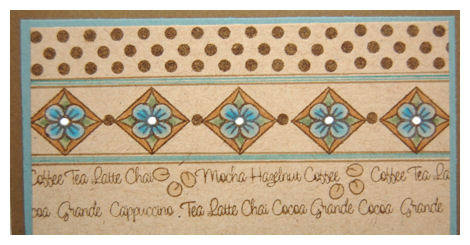
I stamped my polka dot border from the Fancy a Cuppa? set, the argyle from Argyle Amazement set, and drew in some border lines. I then used the sentiment block from the Grab a Cup set to add to my pattern.
I’m totally LOVING this release, and had so much fun with the variety of images 😀
Oh-K Dokey, let us move along to some more eye candy!

This is a super cute, and quick “wrapper” for a product favorite of mine!!
I am a HUGE Keurig lover (those of you stumped—>Click Here) and love giving and receiving samplers of the K Cups that are used in theKeurig.
The K Cups are simply so cute, and giving a sampler pack-especially for the holidays, is a great gift idea! Since they are *about* 0.19 cents each, giving a set of 4 costs ONLY $0.76 cents!!
I decorated my Oh-K Dokey wrapper to let the receiver know WHAT I packaged inside–>latte!
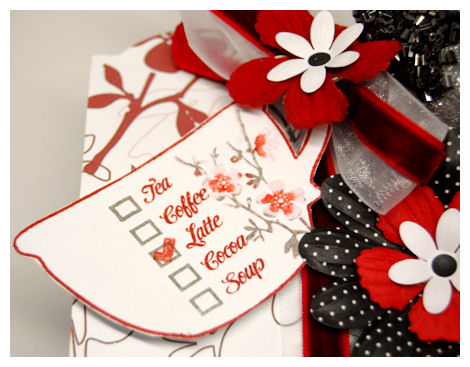
On this sample I used the outline cup from the Fancy a Cuppa? set, and stamped it with my 5 block, with the 5 block of beverage choices, and used the check mark to mark what I wrapped inside.
I used the Cherry On Top digital paper, so I used the Cherry Blossom image from the Killer Curves set to stamp it to match my paper!
Then I added my paper flowers, and my beaded bird.
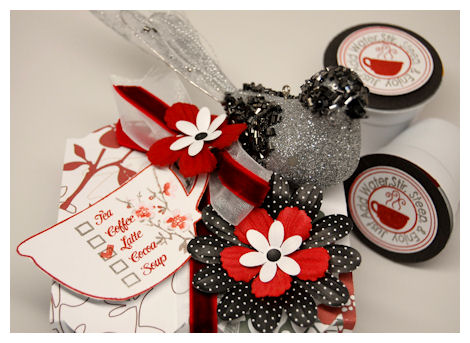
I love this project!
It really is a SIMPLE, and thoughtful gift for anyone, since these K Cups come in all sorts of types: Flavored coffee’s, teas, chai, mocha, latte, and cocoa! Now I have created the ultimate wrap for such treatlets! Read on!!
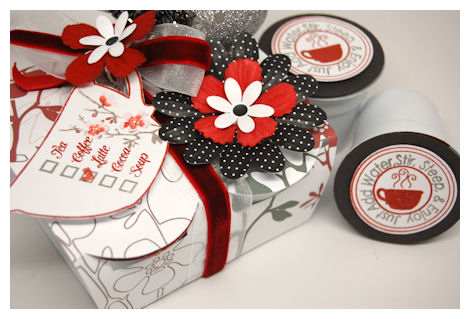
Oh-K Dokey Pretty Pieces Cut File $ 2.50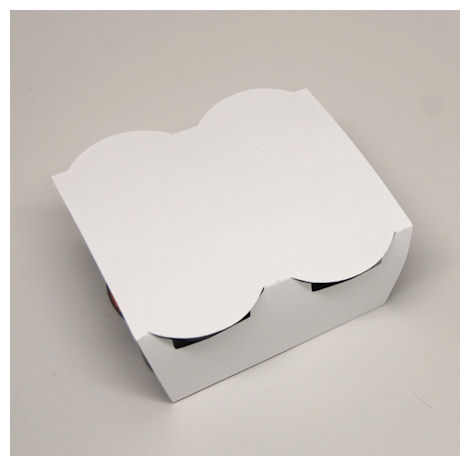
4 X 4 1/4 Inches Wide
1 3/4 Inches Tall
This wrapper is the perfect gift when you want to simply “wrap” and share a little of something that you love!
!chai and latte’s © brand coffee machines. The K cups come in a variety of beverages like coffee, tea, cocoa’s, KeurigThis is an adorable “wrapper” that was designed for wrapping up 4 of those simply sweet K Cups that are sold for use with the
Just take a 2 inch circle, and adhere over your label.
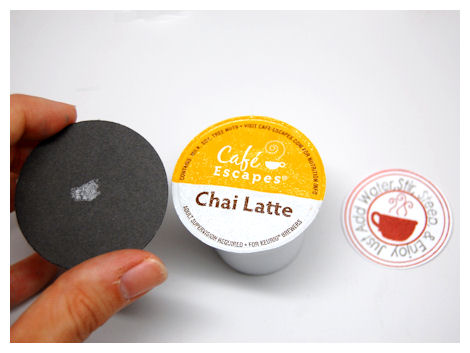
This will cover your K Cup top!!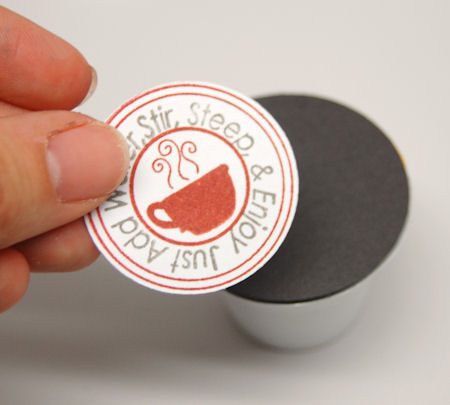
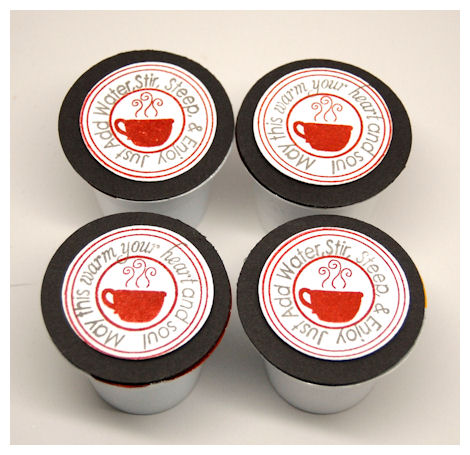
Here I used the Fancy a Cuppa? and the Fancy a Cuppa? Add on set for my K Cup label cover. I stamped the outline circle, and cup in cranberry, then the sentiments in a smokey shadow ink. Once done, just add atop your covered K Cup.
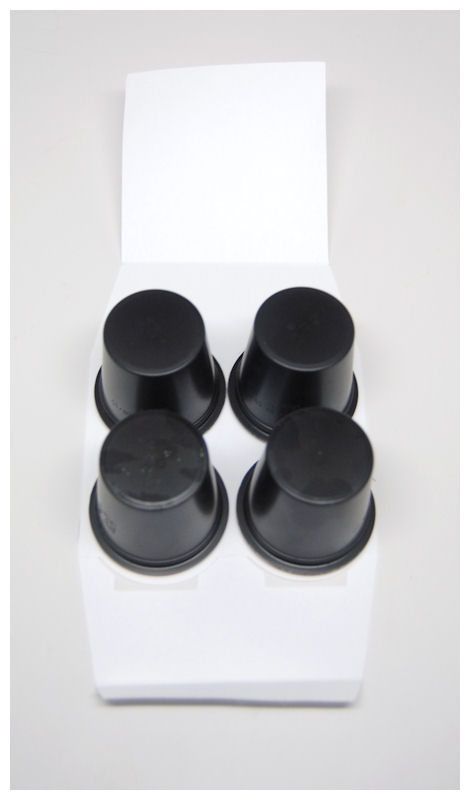
Complete set of 4:
Once your K Cups are ready, just place then face down…..and wrap!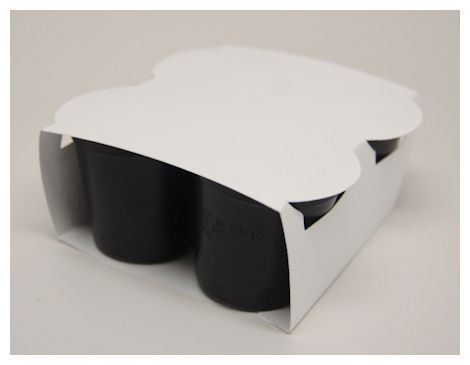
Decorate as desired!
Not a hot beverage lover? Here is another idea!
(note you saw peeks of this the other day!)
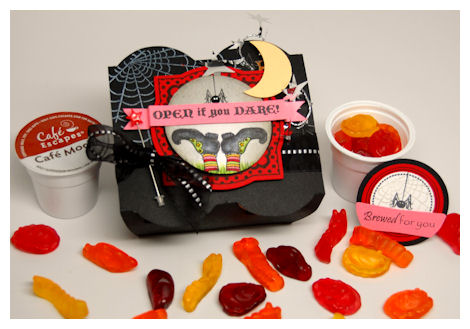
This Oh-K Dokey wrapper can also be used with a recycled set of K Cups, a set of 4 Votive candles, tart warmer, Crystal Light 2 oz drink mix cups and even a set of 4 mini flower pots.
Another FUN idea-when you are done using a K Cup, recycle it!
Lookie here….
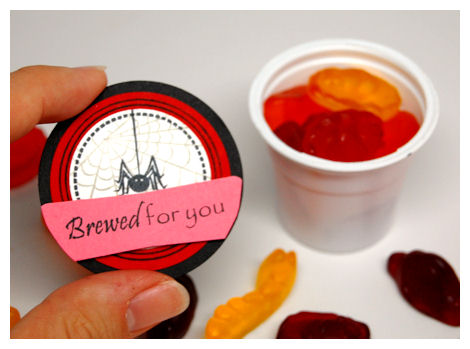
Simply peel off the top, remove the filter (if there is one), wash and dry thoroughly, add adhesive to the edges, and fill with something else that is wonderful!!

(note the sentiment “Brewed or you” is from the Grab a Cup Sentiments)
Here I filled my cup with Gummy Bugs! EW!!
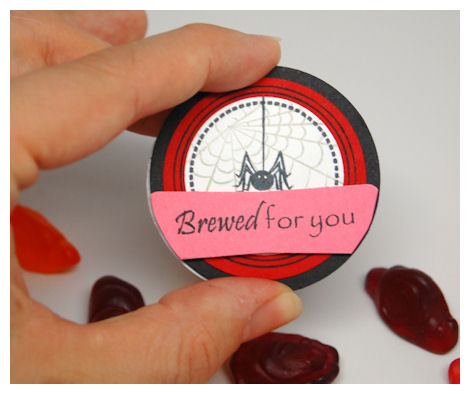
Use a 2 inch piece of cardstock to cover it, and you have a world of treat ideas!

In this project I used A Spooky Surprise set, with the Killer Curves Cut File using the polka dot frame from Killer Curves set.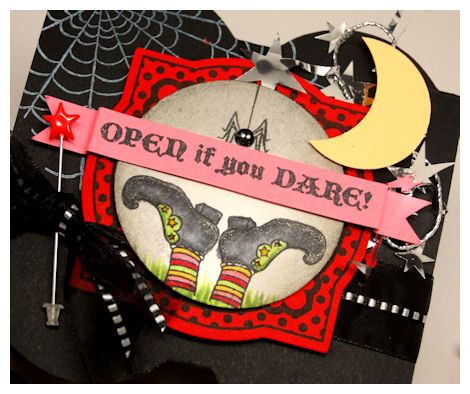
Isn’t this a simply adorable treatlet cover?! So even if you don’t have Keurig, and you have an “office” or somewhere that people use these, you can recycle them! They may also work with 2 oz condiment cups.
One simple, inexpensive cut file, so many possibilities.
Supplies from My Time Made Easy ™ LLC
Pretty Impressions Stamp Set: A Spooky Surprise, Grab a Cup Sentiments, Killer Curves, Fancy a Cuppa?
Pretty Printable Digital Paper: Cherry on Top
Pretty Pieces Cut File: Oh-K Dokey, Killer Curves
October Release!! Group Post: So In Suspense!
Sep 30, 2010 Author: mytime | Filed under: Home decor/3-D items, My Time Made EasyWell today is the official My Time Made Easy ™ LLC Release! I can’t believe I got through this one! LOL!
It is also my husbands birthday today! So Happy Birthday Jay!
You can view ALL our NEW! Release products for October HERE!
Today the entire team and I are sharing some samples using a NEW! Template called In Suspense ©!! Together we will share teh MANY ideas and uses for this great new release.
While the template concept in itself is exciting, there are 3 NEW! Pretty Impression stamp sets to make it even more AMAZING!
Stop by an visit:
The 3 NEW! sets we have that coordinate with the In Suspense template are: A Secret Surprise, A Spooky Surprise, and our very first Pretty Petite stamp set Thankful!
Now I had fully planned on creating a sample that utilized the A Secret Surprise frame, with the poem, for today’s group post, but obviously my daughter being hospitalized took precedence. I’m certain the team will show you the endless possibilities this template and stamp combination have to offer!
So without further delay…..
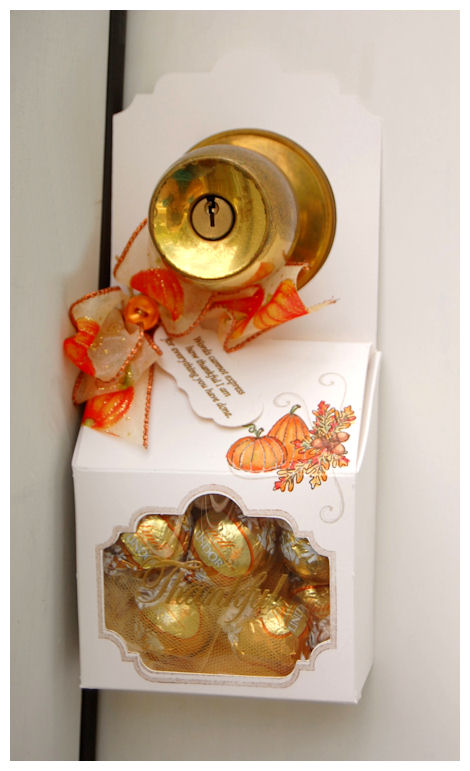
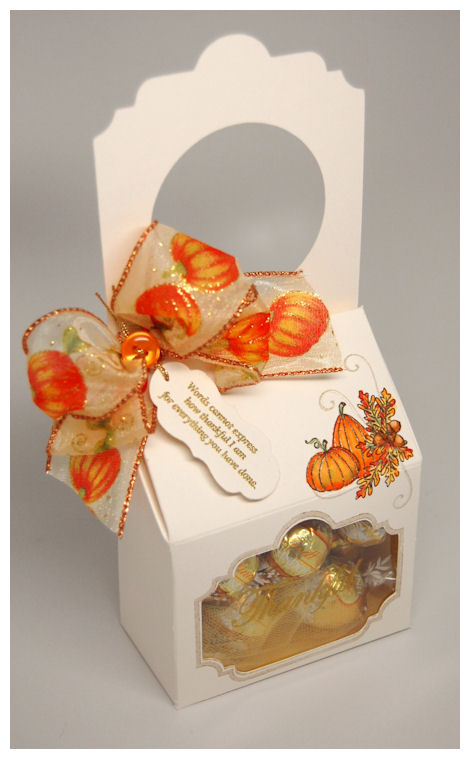
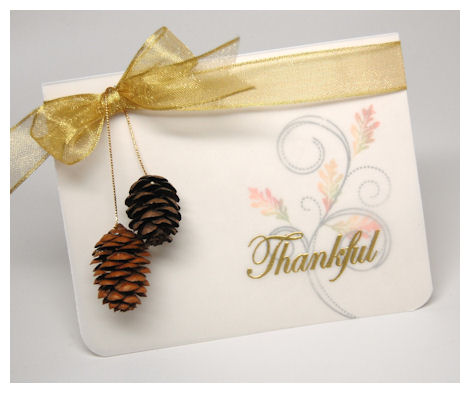
This idea of this template is to not only “suspend” it from the door knob of the recipient, but to also put them in “suspense” of what surprise could be hanging on their door! What a wonderful treat to find, no matter what the occasion.
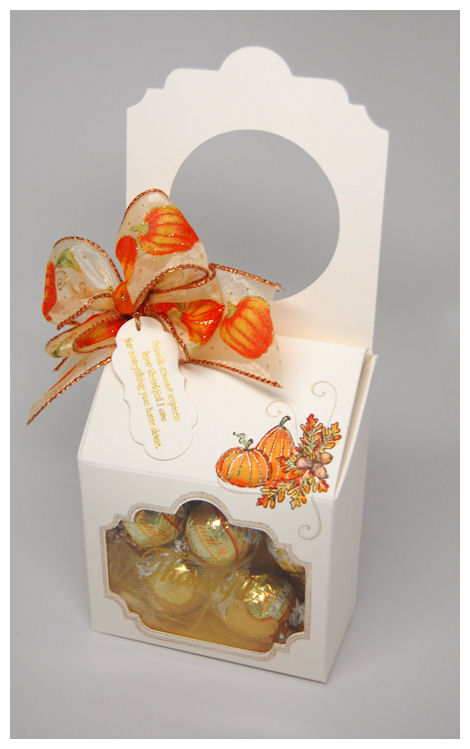

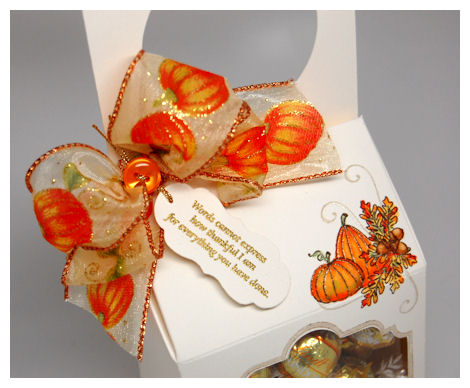
The sentiment on the tag is from So Sentimental, embossed in gold.

As you can see on my sample, I stamped the acorn cluster in the right corner. I masked the cluster so I could stamp the pumpkin images “behind” the cluster. One pumpkin is from the A Spooky Surprise set. I stamped the swirls in a gold ink, and added gold with a glitter pen.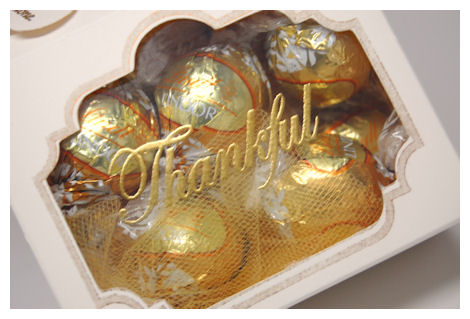

Supplies from My Time Made Easy ™ LLC
Pretty Packaging Templates: In Suspense
Pretty Impressions Stamp Set: A Secret Surprise, Thankful
Well that does it for me!
Come back for even more inspiration tomorrow!
Day #2 Perfect Peeks:Grab a Cup
Sep 29, 2010 Author: mytime | Filed under: Cards, Home decor/3-D items, My Time Made EasyHere we are on Day #2 of peek projects and there is still so much to share!!
You will be able to order all the new goodies on Oct 1st, even though you have yet to see all the cool new stuff we have to release!! The team and I will be sharing ideas and samples with our biggest release yet!! So stay tuned!!
Today you will really want to visit our guest designer Debbie and the following team members:
Today we are all sharing samples using the Grab a Cup template!! We have 4 hot beverage stamp/sentiment sets this month, and we have 3 other sets that will add to the ideas for gift-giving this Halloween and Fall!
So let’s get started!!
Today I am sharing a super cute sample using the Grab a Cup template, with Fancy a Cuppa? stamp set, Grab a Cup and Grab a Cup Sentiments. So let me get sharing!
Grab a Cup Template $5
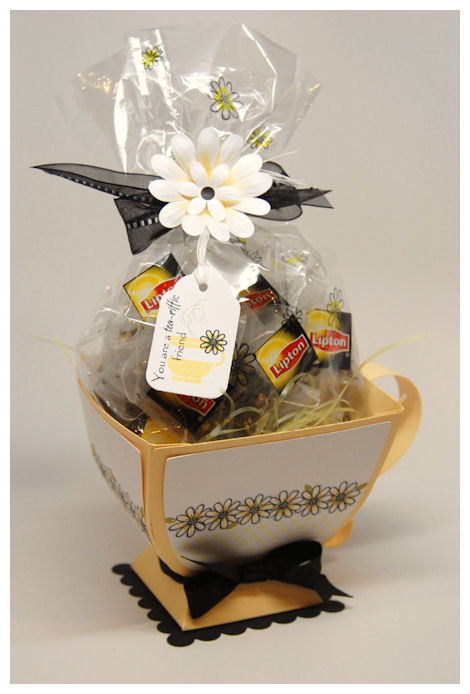
You can fill it with a variety of gifts, or use it as the perfect party favor! A great option for place settings too. This could really dress up a table, or make the perfect addition for a “tea” party.
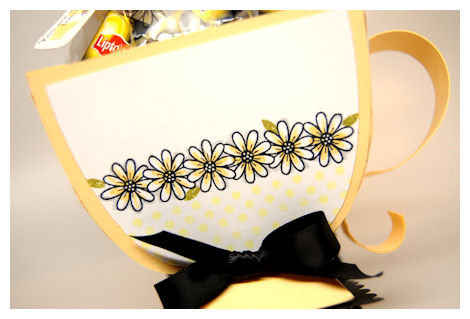
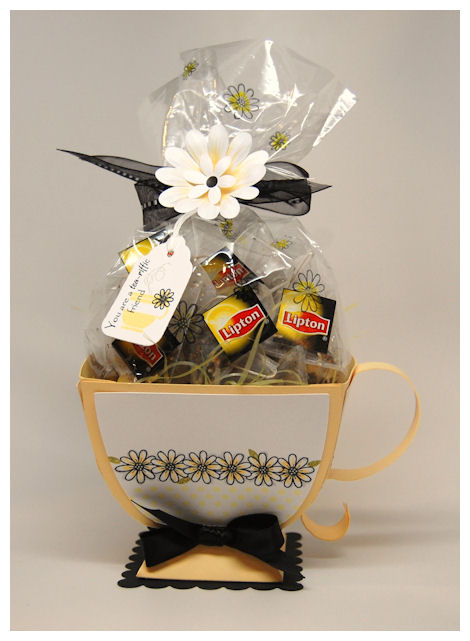
My cup was created using a yellow cardstock. The panels were made from white cardstock, and were stamped with the stunning Daisy border image from Fancy a Cuppa?,which I colored. The white layer was also stamped with the polka dot builder image in the set as well. I used a scallop nestability for the bottom layer on my cup. Just an additional sweet touch.
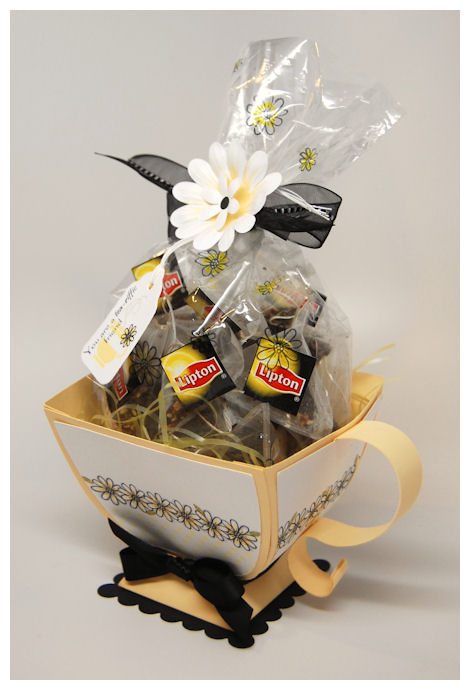
My colored were pulled from the herbal tea that I chose to wrap up in a cello bag, which was stamped to match using the single daisy images in the set, using black StazOn, and a sharpie marker was used to color them in.The flower is a cut file from our Flutters & Flowers. I just used an embossing stylus to create the lines in it, then I sponged on some color!
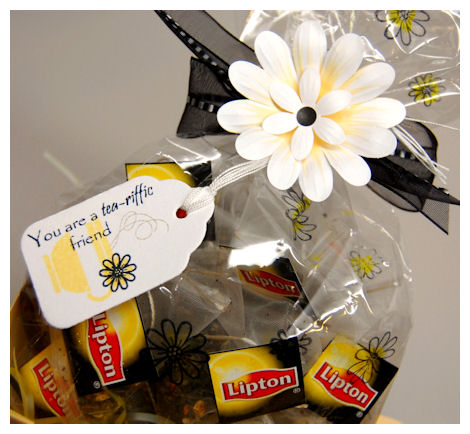
My tag- I used the cup image from the Grab a Cup set, with the steam! I used another small daisy from the Fancy a Cuppa? set. The sentiment is from the Grab a Cup Sentiment set. That set is a MUST have!!
Supplies from My Time Made Easy ™ LLC
Pretty Packaging Templates: Grab a Cup
Pretty Impressions Stamp Set: Fancy a Cuppa?, Grab a Cup, Grab A Cup Sentiments
Pretty Pieces Cut File: Flutters & Flowers
Now you may be curious as to what the Fancy a Cuppa? set, bu Catherine Doucette is all about!
We really love the focus of “hot beverages” this month. There really are so many great gift ideas where hot beverages are the main focus, and they deserve to be properly gifted and highlighted!! We have the perfect coordination of images and sentiments for such an occasion!!
There are two- 5 block sentiments that align perfectly with our “check boxes”, that fit on the cup itself or can be used alone.
The two 5 block sentiments feature sentiments that can easily be used alone or when combined with the check boxes within the set, allow you to “check off” what you are giving the card. tag, or gift for!
Sentiments Read:
Block 1:
Thanks so much
Have a nice day
Oh, happy day
Thinking of you
Just because
Block 2:
Tea
Coffee
Latte
Cocoa
Soup
You can also see there are some great additions to the set that will allow you to further decorate your cup, which features a solid cup, or an outlined version of the cup, or create your own borders and backgrounds.
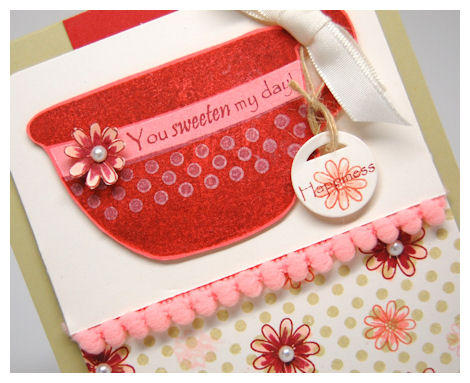
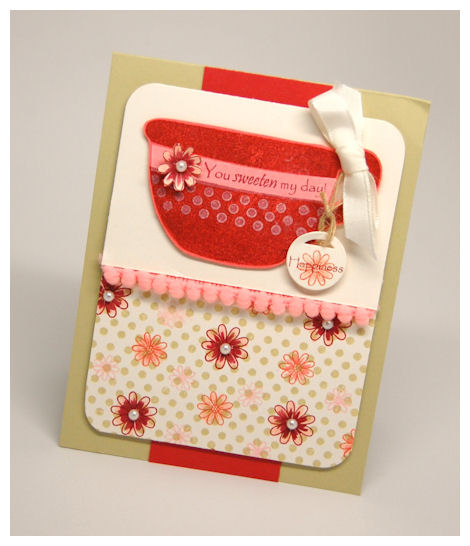
Here I stamped my solid cup onto a regal rose cardstock, in Cranberry Crisp ink. I cut it out, then used the solid rim stamped in white for my design.The cup sentiment (and my “tea tag”) is from Grab a Cup Sentiments was perfect for the inside rim, and tea tag! I also chose to stamp some white polka dots on the cup as well.
I used the daisy image from the Fancy A Cuppa? set to adorn my cup, and I used the various size daisies, with the polka dot pattern to make my own patterned paper!! Some adhesive pearls randomly placed add to the WOW of this simple card.
I made a hanging tag to look like a little tea tag, hanging from my cup. So simply sweet.
The two smaller cup images in the set fit perfectly within the center of the Fancy a Cuppa? Add On circle sentiments. Whatever you fancy in your cup, this set is certain to warm the heart of receiver for whatever you create using it.
Supplies from My Time Made Easy ™ LLC
Pretty Impressions Stamp Set: Fancy a Cuppa?, Grab a Cup Sentiments
Now how about the add on set? Here is some info on that!
Just add water, Stir, Steep & Enjoy!
Hope you are feeling better soon!
Rest, Relax, and Rejuvenate
My Etsy

Who I Designed For
Blogroll
- Alicia
- Alli Miles
- Ally Blankenship
- Amber
- Andi @ crafts on a whim
- Angel R
- Angie Z
- Anne Kranitz
- Becky O
- Bee
- Beth Silaka
- Bethany Paull
- Beverly Nash
- Bobbie
- Cambria
- Cammie
- Card of the Week
- Card Positioning System (CPS)
- Cards for Cancer
- Catherine Doucette
- Charmaine
- Cheryl Sims
- Chriss Rollins
- Christina
- Christine Ewing
- Christine Wooden
- Colleen Schaan
- Craft Critique
- Craft Gossip
- Crystal
- Dawn Easton
- Emily Giovanni
- Geny
- Holly
- Igne Groot
- Inspirational Craft Blogs
- Irene
- Jami Sibley
- Jeanne Streiff
- Jen del Muro
- Jeni Bond
- JenMarie
- Jenn Balcer
- Jenn Diercks
- Jenn O
- Jennifer E
- Jennifer Mick
- Jennifer Pereda
- Jennifer-Sweet Treat
- Joanne Basile
- Jodi Collins
- Julia Stainton
- Julie Masse
- Karen
- Kathryn Berthiaume
- Katie Cotton
- Kelley Holland
- Kendra
- Kim Scholfield
- Kris’s Color Stripes! Get inspired here
- Kristen Dubosque
- Kristin Eberline
- Kristine
- Laura @ Sunshine Stamper
- Laura Turnmire
- Laurie Schmidlin
- Lesa Rapp
- Linda Duke
- Linda-LSN
- Lindsey Botkin
- Lisa (lakind scs)
- Lisa Kind
- Lori Craig
- Maggie
- Mara Campbell
- Maria
- Maria Levine
- Mary
- MaryJo
- Melanie M
- Monique Hansen
- Moxie Fab World
- Pam Imholz
- PaperCrafts Connection
- Peppers and Pollywogs Kids party site
- Rebecca Grohall
- Rita
- Robyn
- Rose Ann
- Sarah Vrolyk
- Sharon Harnist
- Sharon Johnson
- Sharon Rivera (a chemisrty with paper)
- Sherrie
- Sophia Landry
- Storage Units, Ink, & More Blog
- Sue Berker
- Susan (Rainy)
- Tangii Crane
- Tracy
- Tricia Traxler
- Trudee
- Velta
- VivLyn
- Zena
MTME Pretty Palette Color Team
MTME Pretty Patterns Sketch Team
My Time Made Easy TM LLC
Shop till you drop!
Lauren Meader
About Me
Copyrighted material
Subscribe To My Blog
Pages
- About me
- Alexa’s Story!
- My Crafty Corner!
- My Time Made Easy™ LLC
- Our Make A Wish Trip to Disney!
- Resume/Publication List
Calendar
| M | T | W | T | F | S | S |
|---|---|---|---|---|---|---|
| 1 | 2 | 3 | 4 | 5 | ||
| 6 | 7 | 8 | 9 | 10 | 11 | 12 |
| 13 | 14 | 15 | 16 | 17 | 18 | 19 |
| 20 | 21 | 22 | 23 | 24 | 25 | 26 |
| 27 | 28 | 29 | 30 | 31 | ||
Archives
- August 2013
- July 2013
- June 2013
- May 2013
- April 2013
- March 2013
- February 2013
- January 2013
- December 2012
- November 2012
- October 2012
- September 2012
- August 2012
- July 2012
- June 2012
- May 2012
- April 2012
- March 2012
- February 2012
- January 2012
- December 2011
- November 2011
- October 2011
- September 2011
- August 2011
- July 2011
- June 2011
- May 2011
- April 2011
- March 2011
- February 2011
- January 2011
- December 2010
- November 2010
- October 2010
- September 2010
- August 2010
- July 2010
- June 2010
- May 2010
- April 2010
- March 2010
- February 2010
- January 2010
- December 2009
- November 2009
- October 2009
- September 2009
- August 2009
- July 2009
- June 2009
- May 2009
- April 2009
- March 2009
- February 2009
- January 2009
- December 2008
- November 2008
- October 2008
- September 2008
- August 2008
- July 2008
- June 2008
- May 2008
- April 2008
- March 2008
- February 2008
- January 2008
- December 2007
- November 2007
- October 2007
- September 2007
- August 2007
- July 2007
- June 2007
- May 2007
- April 2007
- March 2007
- January 2007
Categories
- About Me
- All That Scraps
- blogger challenge
- camera/photo play
- Cards
- Contests
- family stuff
- FOR SALE
- Home decor/3-D items
- How to FAKE it!
- Introduction
- JUGS Challenge
- JustRite Stampers
- Lizzie Anne Designs
- My family stuff
- My Stamping Space
- My Time Made Easy
- My Time To Color Challenge
- My Time to Create Challenge
- My Timeless Template Challenge
- My Timeless Templates
- Mytime Mail
- MYTIME MOVIE/VIDEOs
- Papertrey Newsletter
- Pink Cat Studio
- Pretty Palette Challenge
- Pretty Patterns Sketch
- Product Opinions and Must haves
- Recipe's
- Saturday Sketch
- Smilebox Creations
- Stampavie
- Tutorials
- Uncategorized
- videos
Most Popular
- Create your own Onesie Card Tutorial-and important NOTE! PLEASE READ (2529)
- Saturday Sketch-Boxed bag holder (2333)
- Going GREEN! Fancy Flower Flourish-Closure Video (1478)
- Fabulous Favorite - Giveaway! (1336)
- a Prayer Request (1232)
- QUICK-Easter Baskets from Nestabilities-PTI style-and blog challenge (1063)
- Teaser Sketch (999)
- February Release Giveway! (and a little peek) (996)
- Group Post and Rambling Rose Video Tutorial (985)
- GIVEAWAY! Who wants it all?! (895)
Recent Comments (RSS)
- Daya Sons: Daya Sons, a renowned manufacturer
- 첫충사이트: 완전히 흥미로운 블로그 게시입니다. 저는
- sarah: Wow, Lauren, what a stunning
- hedie: خرید راهبند
- 야동: Love to read it,Waiting For
- 야동: This seller is in a
- 바카라사이트: 여기 처음 왔어요. 나는이 게시판을
- 야동티비: I was surfing the Internet
- 바카라사이트: 비슷한 주제에 대한 흥미로운 정보를
- 바카라사이트: "여기에 제공해 주신 귀중한 정보와
Copyright © 2007 - My Time, My Creations, My Stampendence - is proudly powered by WordPress
This blog has been Tweaked and Designed by Sara Williams