Archive for June, 2009
Coffee or Tea?
Jun 11, 2009 Author: mytime | Filed under: Home decor/3-D items, My Timeless Templates, Papertrey NewsletterNo matter which is your favorite, I think I have something you *might* like!
If you can’t tell I’m totally having a blast with the templates 😀 My mind is just RACING with idea, after idea. I LIVE for making boxes/gift items. I love personalizing things and making it all matchy matchy!
I just delivered Amber’s end of the year teacher gifts, (they are featured in the exclusive Idea Book-for the Pack a Picnic ©-if you are wondering WHAT I gave them :d) and they could not believe I MADE them from paper! They were in awe. It was SOOOOO nice to see them so appreciated. I told them they can re-gift them and they looked at me like I had 12 heads! They said NO WAY! We are keeping this for ourselves. YEAH! Mission accomplished.
That is *just* the best feeling in the world.
Now I have another set of gifts here that I hope get the SAME response!
Today’s post shares samples from my NEW! My Timeless Template Release-Pack a Picnic © & Card Couture ©
They are being released on the 15th
As I said, be it coffee or tea, I think these 2 ideas are going to be a HUGE hit.
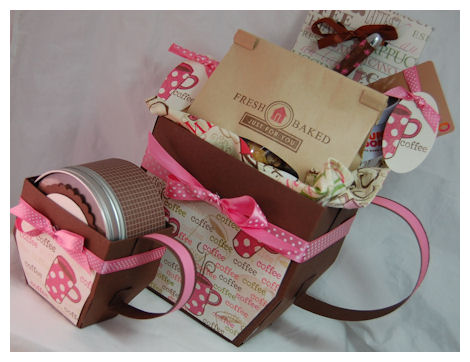
Pack a Picnic © goes Coffee Cups
Seriously?! Does it get ANY cuter, AND easier? I think not :D)
I LOVE the large and small variation of the template. TOO CUTE.
I was so over the moon with this sample! It was *almost* in the exclusive idea book, but I HAD to share it instead. I’m seriously in LOVE!
I made my own patterned paper using Heather’s Warm Happiness set. I stamped the various mags, and “coffee” sentiment all over! It was inspired by the coffee themed fabric napkin/supplies I purchased at Joann’s Craft Store.
I used my handle template to make coffee mug handles instead 😀
Large cuppa

This is the close up view of the large coffee cup. Its filled with treats for one of the aides in Alexa’s classroom who LOVES coffee.
Coffee House Cookies

This is a bag filled with my Coffee House Style cookies. My favorite recipe.
YES! I baked these! They are SCRUM*DID*DILLY*UMPTIOUS!
I have 8 in the Coffee Bag, that I stamped with Holiday Treats.
They have chocolate chunks, white chocolate, butterscotch, AND peanut butter chips too!
They are SOFT-and probably 1,000 calories easy. They are very big-Like you can only eat one :D)
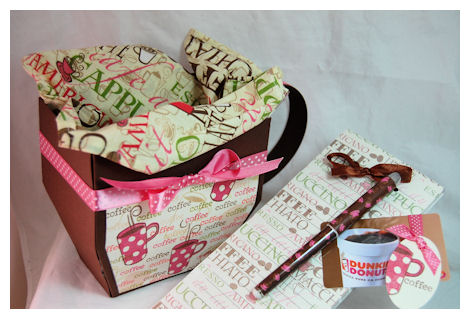
I also included a matching magnetic notepad, and a gift card to Dunkin Donuts.
She always has a XL coffee, everyday!
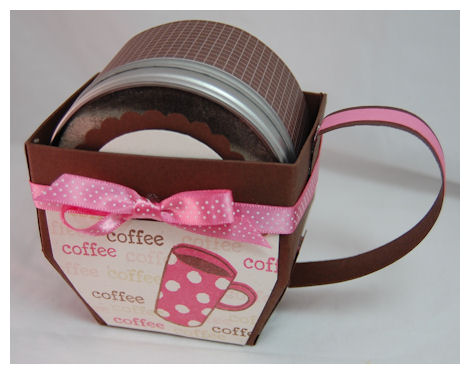
Now in the mini coffee cup
This is one of the large round tins, filled with the Cappuccino mix that I LOVE adding to my coffee 😀

Here it is in the tin.
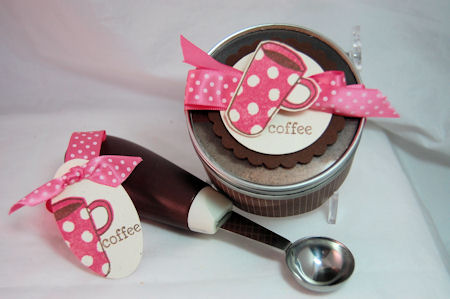
I bought the coffee scoop at Joann’s as well. Just 3 scoops to 80z of coffee, and YUM!!!
I made my tags to make it all matchy!
ME also being a coffee lover, am going to have a VERY hard time parting with this set.
I think she will like it :D) If she doesn’t she can give it back! LOL!
SUPPLIES:
My Timeless Template: Pack a Picnic ©
Stamps: Warm Happiness, Holiday Treats
Cardstock: Dark Chocolate, Vintage Cream
Ink:Dark chocolate, hibiscus burst, spring moss, blush blossom
Ribbon: Hibiscus burst collection
Clear top tin, coffee bag, scooper, notepad, gift card
Now let’s move onto the TEA project!
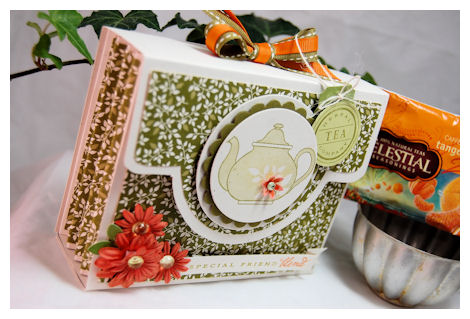
Tea for you

I THINK you will really like this idea (OK- I HOPE you will :D)
Obviously I love the pairing of Tea for Two and Green Tea Leaves paper!
This particular tea pot is my fave! Most likely because I LOVE Beautiful blooms-its like my MOST used set.
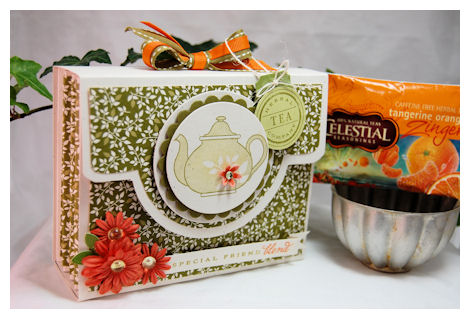
Sentiment reads: Special Friend Blend
Now this gift uses my Card Couture template. This gift today is meant to be a tea sampler!
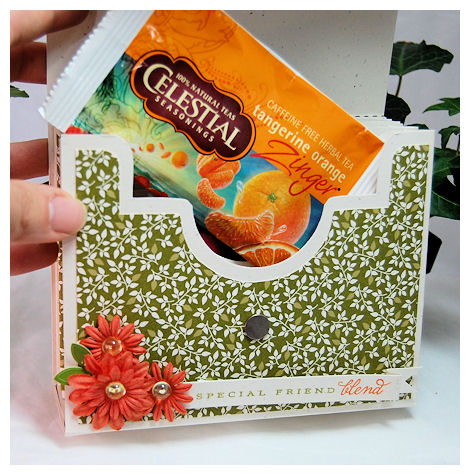
You just purchase the box of assorted teas, from Celestial Seasonings, and you can put each one in each pocket!
(I only had two left! have to buy some more-sorry)
They fit perfectly! What a delicious gift, to help sooth someone each night before bed. They are individually wrapped, so they will stay FRESH. These are caffeine FREE!
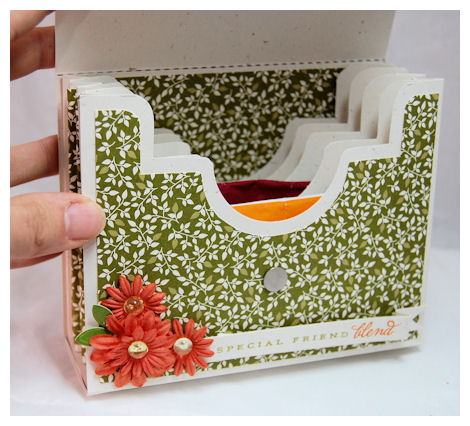
Just a nice way to keep them out on the counter, or where ever. When they are DONE with the tea, they can refill it, or use it for something else.
You TRULY will love how many things you can gift in this.
I LOVE adding a layer of designer paper to the side panels
TIP: I do the scoring BEFORE I layer on the patterned paper. I then do my folding after I layer my paper on. Because the main layer is pre-scored, it folds in and out nicely. Hardly no work to get this gift done.

I know I’d buy MORE tea if it was all packaged like that, JUST for the box!
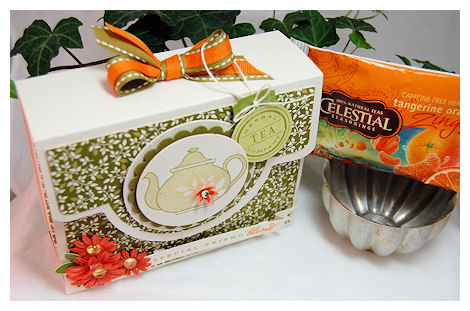
Here are the front details.
I love the herbal tea tag too! Cute touch.
SUPPLIES
Stamps: Tea for Two
Cardstock/patterned paper: Vintage cream, Ripe avocado, Spring Moss, Green Tea Leaves
Ink: Spring Moss, Ripe Avocado
Ribbon: Ripe Avocado stitched-other pumpkin grosgrain, cream twill
other: Prima flowers, dew drops, bling, magnetic closure, tea
So that does it for me today.
Amber is graduating Pre-School today! My, my, my. Where does the time go? Feels like they just placed her in my arms in the hospital, now she will be going to BIG school, 5 days a week. Oh, how I will miss her when she is gone. She is my little sidekick. Getting SO big.
Well I hope you enjoyed the peeks.
Dont forget to check: Nichole’s Blog as well as Lisa! Lots more ideas to spark your creativity 😀
Thanks for stopping by
Template Peek : Card Couture
Jun 10, 2009 Author: mytime | Filed under: Cards, Home decor/3-D items, My Timeless Templates, Papertrey Newsletter, Recipe'sIts time to share a NEW! My Timeless Template peek with you all.
I want to say THANK YOU.
I love reading your feedback on the ideas I share here during the countdown. Lots of hours, and many late nights go into all of it, and knowing you are excited, and can’t wait to try your own, is a true DREAM for me 😀 Thanks for sharing your excitment with me 😀 And always being so supportive of my creative efforts. I so appreciate that.
If you have emailed me in the last few days I have a email JAM, and I haven’t been home AT ALL! My kids have tons going on, so that is where I am at. Ill work on returning emails this weekend sometime (crossing fingers!) Plus lots of stuff has been getting stuck in my SPAM folder-GRR!
Without further delay-
Introducing ……… Card Couture
Merci

This will be released on the 15th.
There is nothing better than organization that is decorative, and beautiful! We don’t all want to shove everything into a closet or cabinet-and even then, we want it to somehow be pretty, don’t we? Well keeping up with the trends is very important, as is keeping things together. This is not only the PERFECT organizer, but make a fabulous couture presentation. I love giving a variety of cards as a gift. Often the receiver has no idea how to store them until used. Maybe they have begun collecting various occasion cards, and need something to help them stay organized! Well problem solved. We now have a very fashionable organizer that you can make for those special people in your life, or make it for yourself to keep organized!Talk about a fashionable way to store, sort and organize your card creations! Now remember this couture case isn’t *JUST* for cards-you can use it for your children’s notes, your own receipts or coupons, photos, inspirational items, sketches, a birthday organizer, meal planner, …….you name it.
All I know is WHATEVER you decide to use this for, you will certainly be the most fashionable.
So this was my concept project for the template-I made the Couture Holder, without the CARDS! LOL! Oh! WELL! You get the idea right?
It can easily hold standard A2 size cards (4 1/4 X 5 1/2) with envelopes, only in a much more FANCY way.
Close up of the closure:
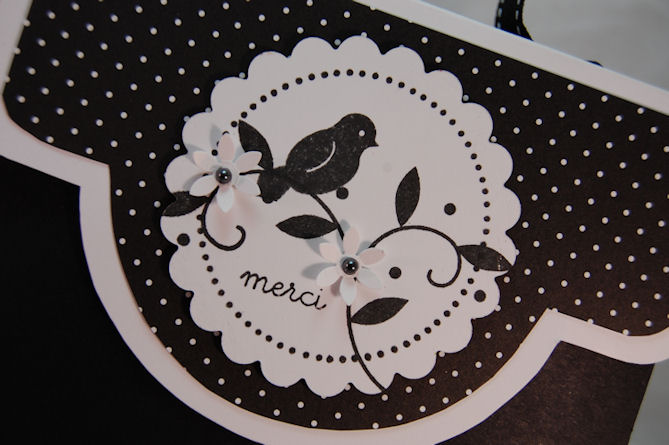
I love the curves, and mat layers.
Now for the side view:
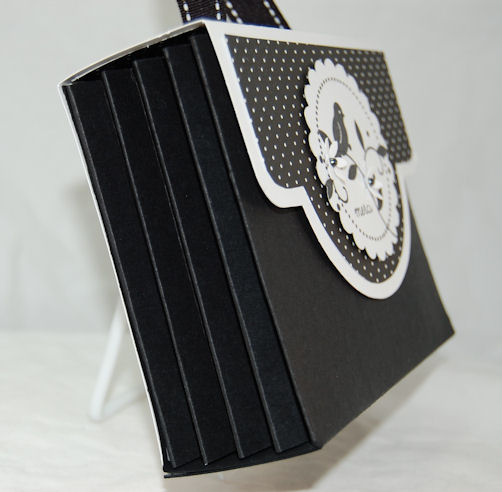
See the fan folding?
Now you would think this is difficult to put together, but after MUCH work and tweaking, it all folds together easily!
Now the MOD/Couture part is the very pretty curvy details of the lid, decorative layers, and the inserts
INSIDE VIEW
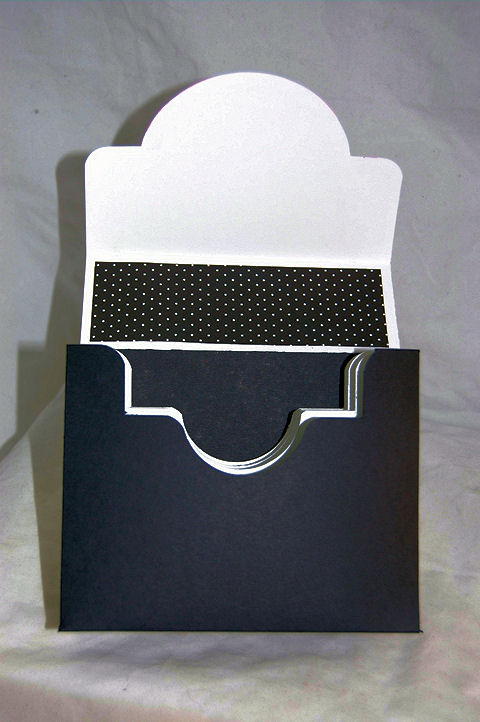
EEK! Bad photo. It was a late night when I designed this one-SORRY
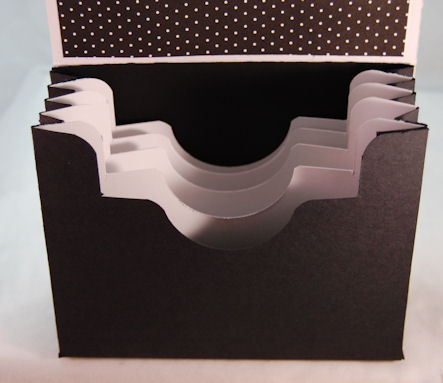
Now you get the idea. You can make the inserts POP! Or make them blend. Up to you.
Supplies:
Stamps: Beyond Basic Borders, Bird Watching, Mega Mixed Messages, Borders & Corners circle
Cardstock: Black, white, Bitty Dots 2008
Ink: True Black
Ribbon: Saddle Stitch black
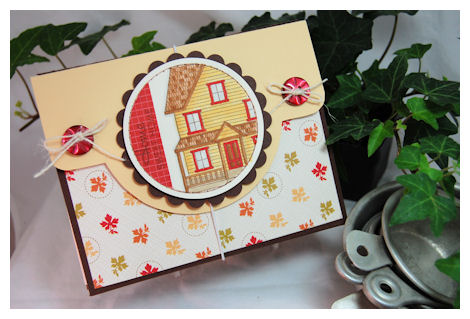
Here is a sample of another idea use Card Couture
Home Sweet Home- Rolodex
Now-Who doesn’t need a way to keep phone numbers/addresses organized AND handy?
Better yet, have an attractive way to keep then on display, while in reach?!
I know I do!
This idea would make the perfect TEACHER gift, and or a NEW! Home, Bridal shower……any time really! Oh! or new business! All you Demo’s out there , for home based companies-perfect!
Top view:
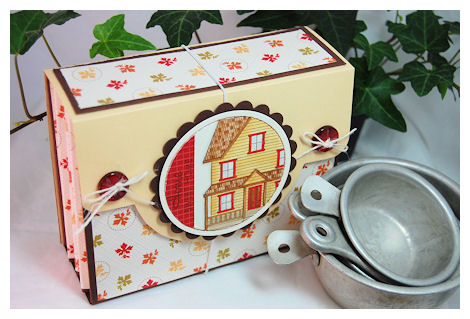
This has an elastic closure.
I got some elastic white ribbon at Joann’s. It is just perfect for this!
I used some pretty paper First Fruits-for this design. The leaf paper lines my fanned side panels, and top/front decorative layers as well.
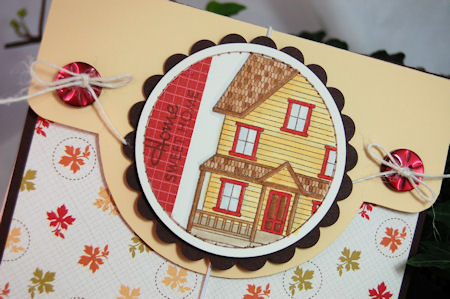
I LOVE the house image from Boards & Beams
I used masking to get only a portion of it in my paper pierced circle. Love the look pf the partial image. Plus it’s a big house to color! LOL!
Loving the twine too .
OK how about an inside view?
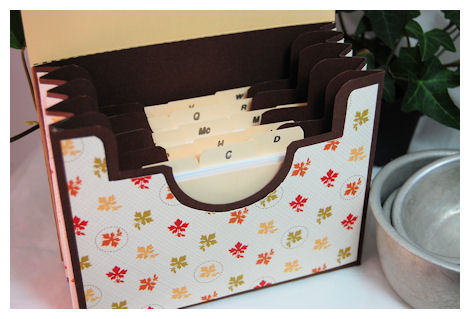
Now what I LOVE is the fun curves the holder has! Each insert is so cute!
It also makes it easier to see what is in each section, and easy to pull particular items from the pockets out.
I bought the inserts at Staples! They fit perfectly!! I added some lined index cards too! VERY inexpensive.
Most pre-made Rolodex systems are $10 and UP! Mine was made for just a few dollars (like $3), and I was able to PERSONALIZE it.
Use your stamps and you don’t even have to buy inserts! (Sorry! I’m too lazy for that these days! LOL!) It is more cost effective, and you can make a bunch for gifts at once.
Supplies:
Stamps:Boards & Beams
Cardstock: Chocolate, Rustic Cream, Holiday Vintage Prints, saffron
Ink: Dark Chocolate, asst Copic Markers
Rustic Twine in Cream
Vintage Buttons in Scarlet
Nestabilities, Rolodex inserts, index cards
So what do you think? Pretty cute, functional and fun huh? Oh and you can’t pass up ORGANIZATION, right? :D) Can you tell I have OCD?! LOL!
I know most of you are cramming for Teacher gifts right now! Hopefully with the INSTANT download, you will have time to put the ideas to use 😀
Let’s not forget the IDEA book, that you get with 5 exclusive ideas, with each template purchase 😀
OK Im so tired I may not even be making sense, so I’m signing off. Thank you for taking time out of your own busy life to visit me 😀
In the mean time…….go see more ideas : Nichole’s Blog , Lisa, and Heather
More TEMPLATE peeks from My Timeless Template Guest designers blog Leigh Ann Baird
Also Kelly has another peek.
Thanks for stopping by!
Till tomorrow-MORE fun projects.
Busy Posting Day
Jun 10, 2009 Author: mytime | Filed under: UncategorizedToday was the Pink Cat Studio Release, and my Papertrey Ink countdown project!
Don’t miss any of the projects-SCROLL DOWN!
Sporty Billy is NOW available
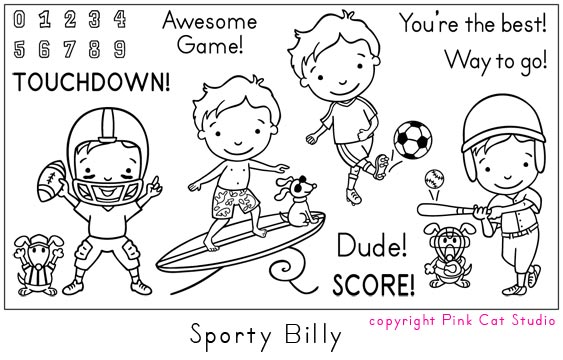
This is my release peek for you

Hi DUDE!
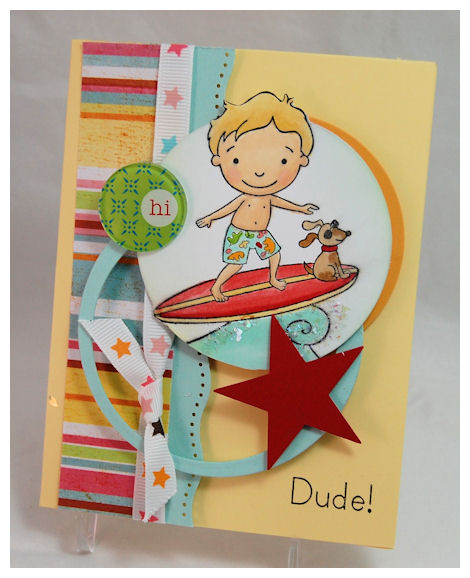
I think he is so cute! Any BOY would like this. Plus its a general card, so it could be for any occasion really.
I wanted a retro sort if feel with the funky circles, summery colors, and stars!
I love the glittery wave-I got to add some BLING , yet keep the boyish feel 😀
Enjoy the release! I know I had a lot of fun with these images
#1 Pack Me a Cupcake Picnic-Template Peek! Announcement :D
Jun 9, 2009 Author: mytime | Filed under: Home decor/3-D items, My Timeless Templates, Papertrey Newsletter, TutorialsOh my gosh! It’s THAT time of the month! YIPPEE!!
The 10th is becoming my favorite day of the month! Then of course everyday from then till the 15th! LOL!
When its the 10th that means it’s my turn to share a Papertrey Ink Countdown Peek, AND share one of my NEWEST My Timeless Templates © with you!
This month I have a UBER cute stamp set designed by Nichole Heady called Cupcake Collection!
Its a super adorable set of “build-a-cupcake” type elements! I’m in LOVE!!! SO much so that the stamp set inspired my gift idea and perfect packaging to match!!!
So I used my Pack a Picnic for today’s project! This template will be available for purchase on June 15th —>HERE
There is post about the original design —–>HERE! That way if you are seeing this you aren’t asking “How is that a “Pack a Picnic” type of template?!
This is by far my fave to date.
Now for my project
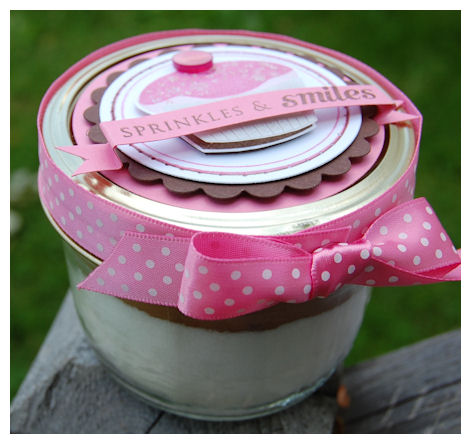
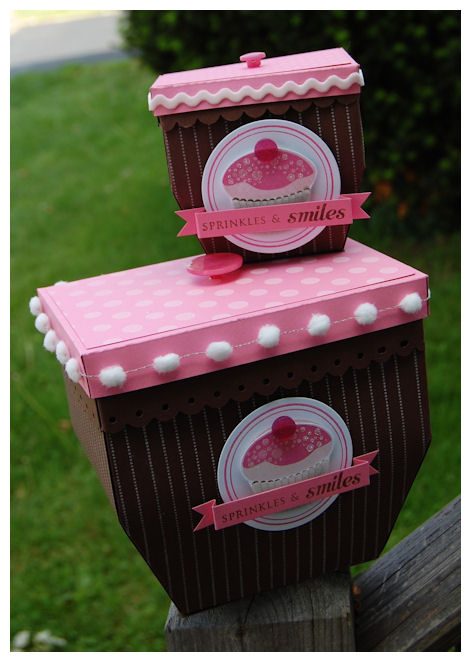
Cupcake Pack a Picnic Duo-
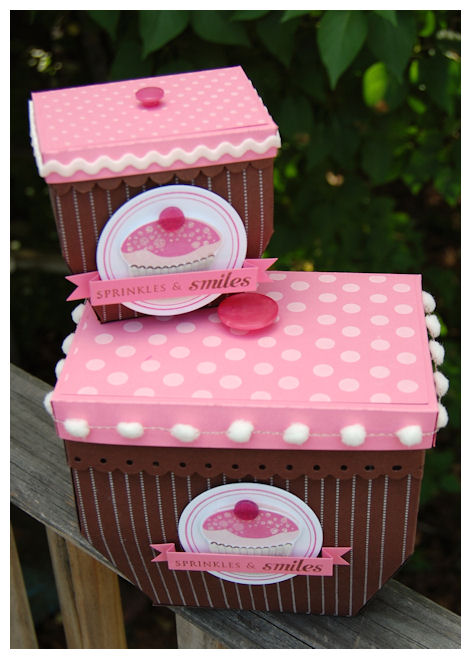
I decorated my Pack a Picnic templates (yes template”s”), to LOOK like cupcakes!
I think they are super CUTE!! Now think what adorable things you can make, having a large and small version of the same template!
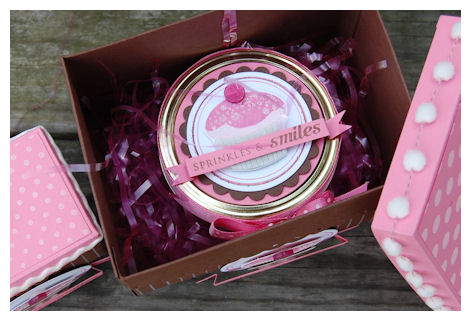
This holds my gift of a Cupcake in a Jar! Keep reading for more on that
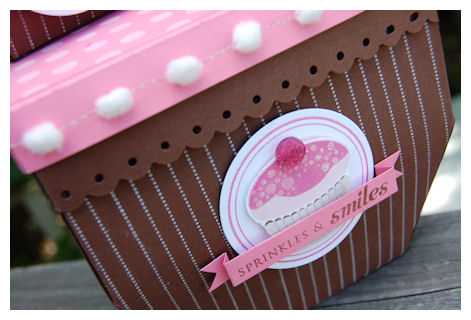
Close up of the box detail
Now I mentioned yesterday that I had a special announcement about this template!
In case you missed the BIG news in my description-
The Pack a Picnic template will also feature a MINI Pack a Picnic template for you!!!
This is a close up photo of the 50% smaller template: Pack a Picnic mini

ALL the files for a large and small version of the template, for ONE great price–> $5!!!
Here is another size comparison
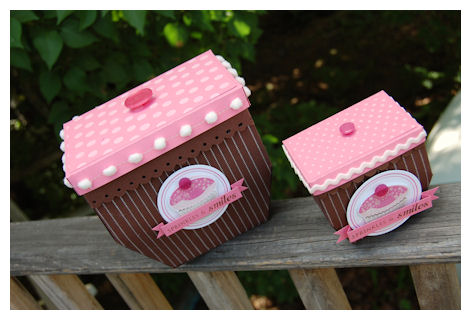
It is 50% smaller than the original template
I think its uber adorable!!
COST EFFECTIVE!
Now I decided I would share how INEXPENSIVE it is to MAKE the boxes using My Timeless Templates!
Given the fact you can use them UNLIMITED, they pay for themselves with ONE gift 😀 (In my opinion-this box set would cost WAY more to BUY!)
When you buy your cardstock in the 50 pack it comes to 0.18 CENTS a sheet.
The large template used 3 sheets of cardstock-2 Chocolate, and one Hibiscus Burst
so it cost ONLY 0.54 CENTS for the cardstock! (You can feel free to add a few more cents for the decorative pieces-but Im certain we ALL have PLENTY of scraps!)
The mini used 1 1/2 sheets of cardstock-costing ONLY 0.27 CENTS!
EVEN well embellished- you can do the math, WAY most cost effective (and FUN!)
OK-back to the project!
I just stamped my template base with Just Journaling Lines, in white craft ink, for the cupcake bottoms.
My “cupcake frosting” lids use polka dot basics. Buttons for the “cherry”.
The large lid has a pom pom border, and the smaller lid has ric rac ribbon in white for added “cupcake decor”.
Cupcake in a Jar-
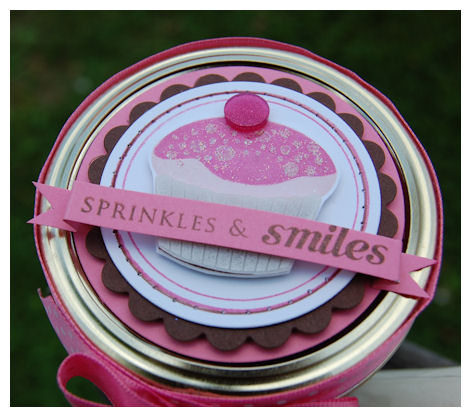
About the cupcake image:
The center cupcake design is the same on all my boxes.
I used borders & corners circle set for my border, then die cut it. I also pierced the edge on the design for the jar-only.
The bottom is stamped in chocolate ink. The top in Sweet Blush, then the “frosting layer” in Hibiscus Burst. I used White craft ink and glitter for my “sprinkles”. Added a Hibiscus Burst flat button for the “cherry”.
I stamped a solid cupcake base, in white craft ink, onto vellum cardstock, to make my cupcake bottom! Cut it out, and layered it on. So easy and CUTE!
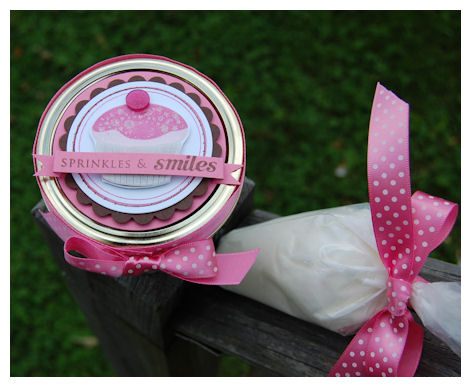
Side view of the jar
This was complete with homemade frosting in disposable decorator bag
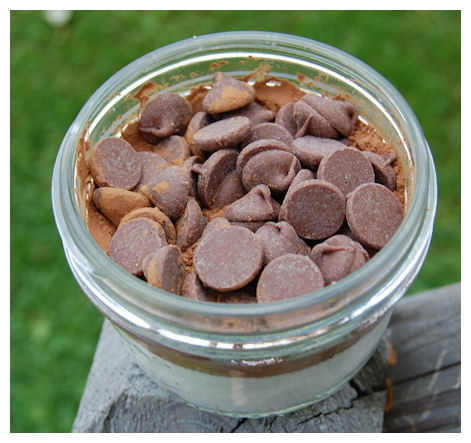
This is the side view of the cupcake in a jar mix, all layered!

Isn’t it just SOOOOO pretty?
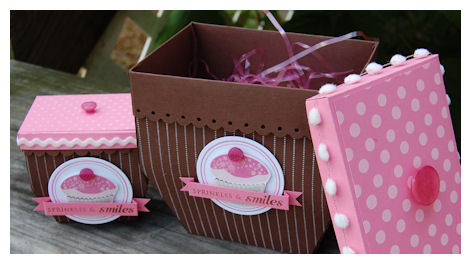
Now you can FILL your Pack a Picnic
You can put the mini pack a picnic-filled with sprinkles and the frosting bag inside the larger one

OR You can put the little Cupcake in a Jar mix in the box-with room to spare :D)
Now onto the FUN!!!
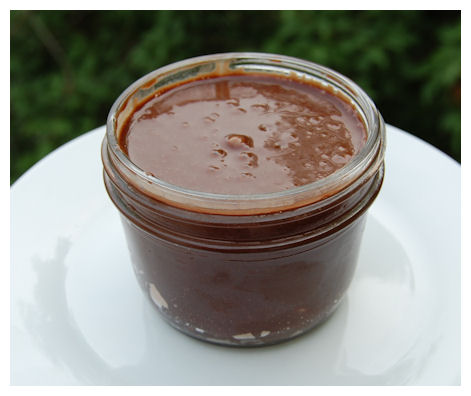
This is the mix when you open the jar
I’m sure you ALL want to know HOW to make these for family, friends and teachers! (its not too late! My kids get out of school on the 19th! WHEW!)
The idea for this Cupcake in a Jar came to me after purchasing some DELICIOUS cupcakes from Bangerang Bakeshop Cupcakes in a Jar!
You have to try the Pinch Me Cupcake! MY FAVE!
They come in a 8 oz Ball glass jar-which is what I used in my project.
Now I was just going to order a few cupcakes (I know! BAD LAUREN!) when someone emailed me about making Teacher Mug Cakes! She was looking to find a template to package her mugs to give as gifts. We got to “chatting” and I asked her about using her mix on my blog for an upcoming project! She said yes.
Next thing you know one idea, turned into another-and this project was made!
I want to thank Tracy Burtt for sharing this with me, and giving me permission to use it here :D)
5 MINUTE Cup Cake in a Jar !!
4 tablespoons flour
4 tablespoons sugar
2 tablespoons cocoa
1 egg
3 tablespoons milk
3 tablespoons oil
3 tablespoons chocolate chips (optional)
A small splash of vanilla extract
1 80z. Ball Glass jar
Add dry ingredients to your jar and mix well.
Add the egg and mix thoroughly.
Pour in the milk and oil and mix well.
Add the chocolate chips (if using), vanilla extract, then mix again.
Put your mug in the microwave and cook for 3 minutes at 1000 watts (high).The cake will rise over the top of the mug, but don’t be alarmed!
Allow to cool a little, and tip out onto a plate if desired.
———————————————————————————–
NOTE: Now I layered my DRY ingredients, and would then print a tag with the instructions and remainder of ingredients needed for the recipient to make the Cupcake in a jar.
When I made mine, I dumped the dry mix OUT of the jar, mixed it, then poured it back in.
HONESTLY-Me being the NON baker, that I am-I would just buy some cupcakes in a jar (from Bangerang Bake Shop! LOL!)and package it in my Pack a Picnic Cupcake box!!! You can MAKE the boxes while you wait for your order to arrive! LOL! But this is definitely more COST EFFECTIVE.
That is how “I” do things 😀 I call it the busy mom recipe. I’d rather work on the packaging (wink), than the BAKING stuff
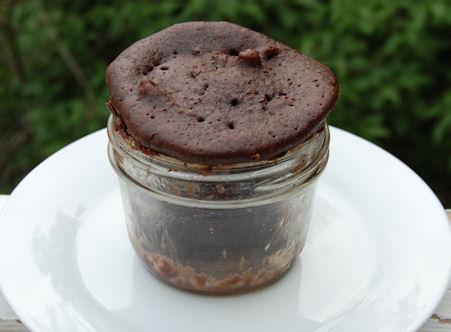
Now here is my baked in a jar goodie
Cupcake in the jar-mixed
Cupcake in the jar, all cooked
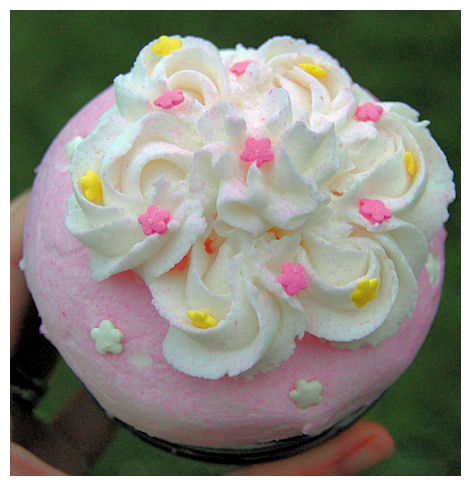
This is the cupcake all decorated
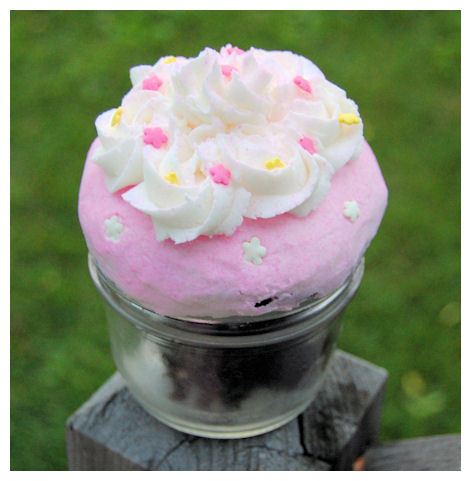
I took it OUT of the jar, and cleaned it! It looked too messy! LOL!
Then I put it back into the jar to decorate with homemade buttercream frosting!
Yes! I actually cooked and frosted a cupcake! LOL! Who’d of thunk it.
(PS Yes I strategically placed each sprinkle too)
My husband was in shock! The cool thing is you can even out the volcano top with the frosting!
YUM!!!!!!!!!!!!!!
Granted my frosting skills are RUSTY!
Now seriously, who wouldn’t DIE over this gift set?! I love it!
Supplies:
My Timeless Template: Pack a Picnic
Stamps: Cupcake Collection, Just Journaling Line, Borders & Corners Circle
Cardstock: Dark Chocolate, Hibiscus Burst, White, Vellum cardstock
Ink: Dark Chocolate, Hibiscus Burst, Sweet Blush, Snow White Craft ink
Ribbon and Vintage Buttons: Hibiscus Burst Collection
Ric Rac and Pom Poms in white
Glitter
Nestabilities, SU! Scallop border punch for lip
8 oz. jar
I’m putting this up in my Esty Shop! (sometime today-fingers crossed) So SOMEONE can use it 😀 Complete with cupcake in a jar mix! No frosting though-I think that has to be refrigerated.
(I made the cupcake in another jar, and saved the one for my project!)
So that is my template/countdown peek today! I SOOOOO hope you liked it. I put a lot of time and thought into it!! If it helps or inspired just ONE of you, it was worth it.
Now for MORE template peeks:
Be sure to stop by this months My Timeless Template Guest designers blog Leigh Ann Baird
Also Kelly has a peek too!
Then don’t forget to hop on over to Nichole’s Blog (I know! Like you need a reminder), Lisa and Candice also have sets this month too.
Come back tomorrow-I have my 2nd template to peek for you!
Thanks for stopping by, and sharing my excitement every month! You are the best. I kow I say that all the time, but I mean it. You make all the hard work worth it, and your comments and completed projects just put me in complete AWE!
THANK YOU!
2 posts!
Jun 9, 2009 Author: mytime | Filed under: UncategorizedIntroducing Pack a Picnic-Template PEEK! EARLY
Jun 9, 2009 Author: mytime | Filed under: Home decor/3-D items, My Timeless Templates, Papertrey Newsletter, Product Opinions and Must havesI got permission to post this template peek for Papertrey Ink a little early!!
YIPPEE!! Thanks Nichole
Tonight’s peek is my favorite template to date!
I know, I say that every month, and I swear every time I MEAN it! I think, as papercrafters/stampers you all GET what I mean right?! Every month is the best!
But, THIS one is right up Summer’s Alley! Oh and perfect for the release too!
Now you know we have so MANY templates, just waiting for their turn for a release. We bumped the original for this month up one, because of a last minute addition :D)
This month, after seeing this peek of an upcoming set release:
I was VERY inspired to take the idea, and make a fun, modern twist on a classic design!
After almost 7 hours of work (yes! Those smooth angles are a KILLER!) The Pack a Picnic © was designed!
This was my concept template for the release.
I don’t put too much into these, so its not my top notch work, just a sampler of what is to come.
Just used Melon Berry , and Spring Moss cardstock , paired with some Green Tea Leaves paper-DONE!
Punch for basket border is a EK Success slim
Template is being released June 15th.
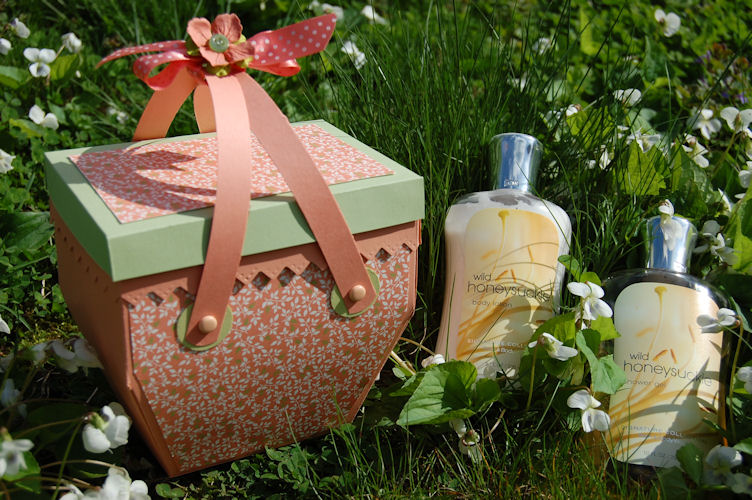
Pack a Picnic description:
Who doesn’t LOVE a Picnic? Did you ever think what an adorable gift packaging a oldie, but goodie, everyday item could make? This “basket” was inspired by the style of the old-fashioned 1950’s Picnic basket, but kicked up a notch, to a modernized Picnic basket of the Millennium! I love the size, and the fun curvy shape this has to it. It is almost hard to believe its made form *just* cardstock! Now we are adding a MINI version too which make this even MORE fun, with over the top options for all sorts of gifts, be them BIG or small. The punched border option that is ONE piece gives you a beautiful clean and professional look as well! You can really take along a great variety of items in this template. This box would look perfect sitting out ANYWHERE in someone’s home, office, or classroom. OR use the smaller version for Wedding/Shower favors. party favors or treats like candy, or little jar’s of jam, or home made yummies. The handles are not only adorable and fit a pretty design, but are functional as well! I LOVE the option of the lid, or no lid at all. Opens a world of possibilities, and an entirely new look.
Whatever you decide to pack in your Picnic basket, it is sure to be a great “present”-ation.
Here is the side view

These are LARGE bottles of Bath & Body Works Lotion & Body Wash!
There is still room in there for another one!
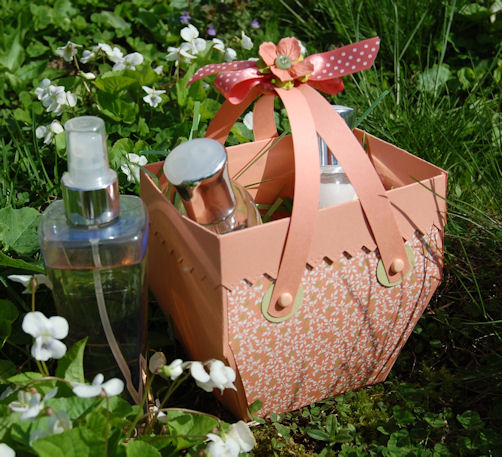
This basket is a fabulous size!
I think lid on or off, its just beautiful!!!!! Oh and FUN!!!
Now the details
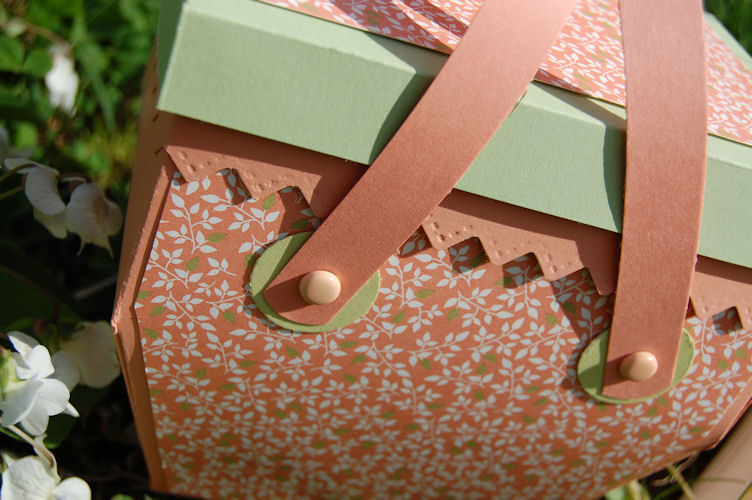
This basket has a unique one piece lip, so that you punch your border, and fold it over, for a finished look, and this easy to achieve! No extra layering and gluing!
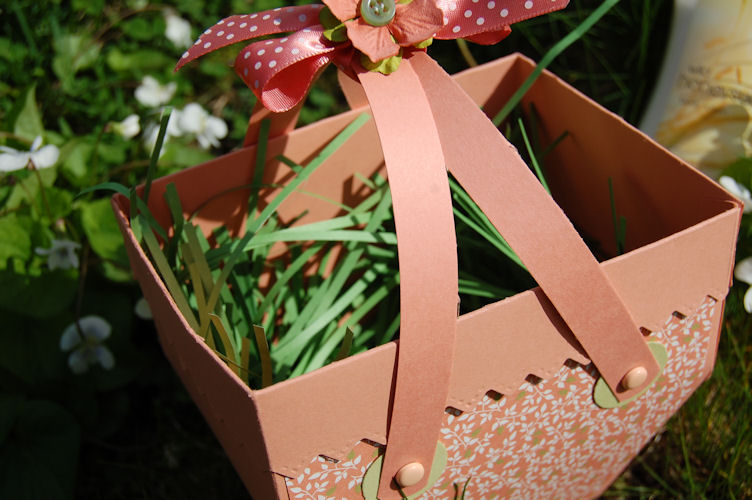
See nice lip to the basket! Goes together so easy too! All the hours were well worth it!!
You get the decorative mat layers as well :D)
Im just SOOOOOOO excited about the possibilities this template has!
I hope you are too!
I have some AMAZING projects to share over the next few days (OH! and lets not forget yet ANOTHER template!) so stay tuned!!
I’m over the moon to hear what YOU think so far!
Thanks for letting me share my excitment with you all! I know you GET IT!
Well its day #2 of Pink Cat Studio Peeks! Good thing this is the last day-tomorrow you can order! WOOT! WOOT!!
Today I have 2 peeks using the Sporty Billy Set!
First Up: Soccer Billy Lily

Yes! I HAD to do it! I made Soccer Billy into Lily!
Both Noah and Amber Play soccer, so I wanted to see if I could get this set to be GIRLY!
I think it worked PERFECTLY!!!
I used red & pink as my “team” colors. I think its pretty cute.
Bring on your “A” game
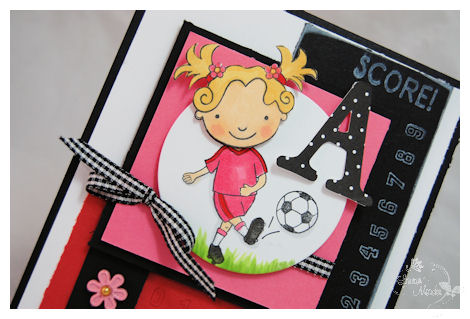
“A” is for Amber, “A” is for Awesome game!
What do you think? Is she not ADORABLE?!! I wanted to make ALL the images girly, but figured that took away from the BILLY set! So I stopped at one (for now :D).
Details
I used the HEAD from Lily at the Beach, to color, cut and paste my Lily (aka Amber head). Other Lily heads work too, but I liked the flowers on her hair ties, already done for me 😀
I used the numbers in the set, and the SCORE for my “score board” of sorts.
The “A” was cut using my SLICE machine
Now moving on to a BOY card
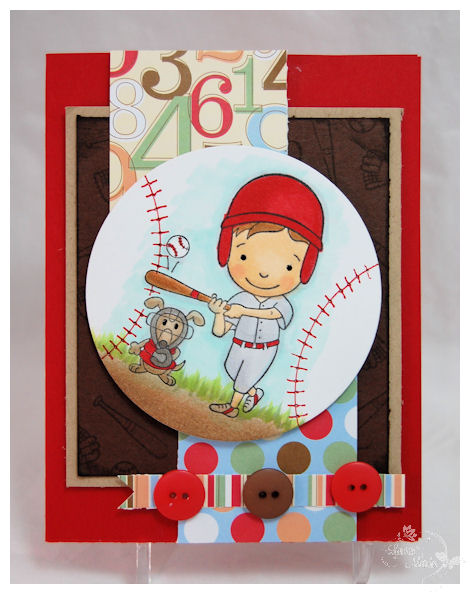
Let’s Play Ball
Do you not love it?
I made my main image to be like it was ON a baseball, coming right for ya!
I know I’m boring with the red, but we have the Boston Red Sox here, so that was my “inspiration” for the team outfit.
I used the baseball mitt, globe, bat and ball image from the Dress Up Billy set for making my background paper on the chocolate layer.
Same patterned paper as yesterday-Making Memories.

I think he looks like Noah 😀
I actually pierced the ball to look more like a baseball. I think its such a cute touch. Really makes the entire card.
Well be sure to check the Pink Cat Blog
As well as the Design Team blogs for more info on their creations
June Guest Designer: Cyndi Bundy–>scrappychick.typepad.com
Tomorrow I’ll have another peek with a sample!
Also tomorrow kicks off my Papertrey Ink countdown where I’ll reveal one of my newest My Timeless Templates!! I think you will like it 😀 Im beyond excited for this release 😀
Till tomorrow.
Pink Cat Peek-Sporty Billy and some excercise chatter
Jun 8, 2009 Author: mytime | Filed under: Cards, Pink Cat StudioCalling All Sports Fans!
I hope that got your attention 😀 I have so much to share today
Today I have a peek at Sporty Billy from Pink Cat Studio!
This set is being Released Wednesday the 10th! If you like sports OR have kids in Sports you will LOVE this set (I’m particularly fond of tomorrows peek :D)
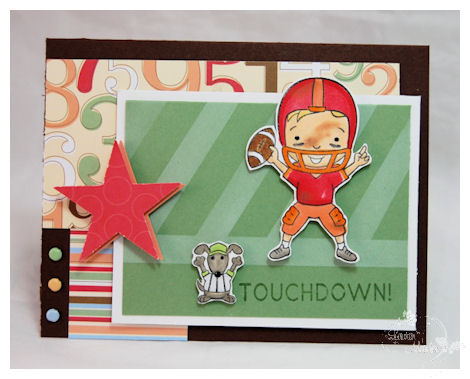
Touchdown!!!!!!!
HOORAY!!!!
Can you just see him doing his touchdown dance on the football field?!
I really love this image 😀 My son doesn’t play football, nor do we have a football league here, but I still love it!
I made Billy “dirty” my using a Fantasix stick, and some caramel ink to DIRTY him up a bit!!

I went with red and melon (or orangey color) for my “team colors”. I don’t follow ANY sports so don’t know if they are any actual team, but that OK! I used what “I” liked and wanted! LOL!!! I chose my paper by Making Memories first-and went on from there. I LOVE how it turned out!
I made my “field” using Eclipse tape, a sponge and white craft ink! I think it came out pretty cool, considering I’m not positive WHAT the field looks like! (Yes I am Sports challenged! I have no problem admitting it!)
Well check out PINK CAT STUDIO BLOG for more peeks!!
Also the Design Team blogs:
June Guest Designer: Cyndi Bundy–>scrappychick.typepad.com
Speaking of Sports
I have been trying my hand at a new “SPORT” and that is running!!
I KNOW!!! Who would of thunk it? Not ME!
My friend Paulette runs and I said I would NEVER try it. I use to run as a little girl. I was actually quite good and won many races for my school!! ( I can’t even believe that and I actually happened) Then I hit puberty, and got way too girly :D! LOL! I didn’t even like GYM (still don’t! LOL!). Any-who, I mentioned that I wanted to really mix up my workouts and SHOCK my body into SUPER shape!!!
Now that I hit my ULTIMATE goal weight and have been maintaining it for a while now, I want to get that 6 pack! SERIOUSLY!
I grab Daisy and go. I feel so much SAFER running with my dog-(even though we live in a safe area) granted she is by no means FIERCE, she is a little powder puff, BUT she can have a mean bark! She may pee with excitement if someone comes to pet her, but can be very protective of HER yard and PEOPLE ![]() Plus its good for her too!
Plus its good for her too!
I have run 3 days-and OH MY! My butt and legs hurt! Even my abs!
I didn’t think I’d even get around the BLOCK! But I did a great job-in my opinion, for my first few times. Im not trying to run a relay here, just keep focused and moving.
But I feel awesome. Each day I pushed to be better than the last. I’m quite proud of what I did each day. Running outside is VERY different because you have uneven ground and HILLS!! OYE! The uphill jog-what a killer. Even the SLIGHTEST incline can hurt. I think I’m in pretty good shape and I was a hurtin mess day 1! Now day 3 I’m already feeling better. I’m looking forward to my jog tonight. Its something different too-to keep me focused and interested. PLUS, the intervals of walking (fast paced people! No SLOW MO) and running is really good for your heart, and burning calories. I think this is what I need to shed any extra fat, and really tone up my legs.
I’m also trying:
some Ball exercises. I got one at Target for $10!! No one tells you you NEED practice! It LOOKS easy but I rolled off onto my butt a few times! The kids got a good laugh! LOL! Plus it feels like a good workout. One of my workout Vid’s had a ball workout. I like it so far, Im just not GOOD yet.
I just got Denise Austins Best Belly Fat Blasters! Im loving it. Each of the 7 segments is about 10 minutes. I am combining this DVD with my running. I used this DVD in the morning at 6am, and am running at night on M-W-F since those are my BUSY days.
(I want to get the Get Fit Daily Dozen) Seriously WHO can’t find 12 minutes a day?! Don’t fool yourself. My posts take longer to read some days! LOL!
Also got Tae-Bo Cardio from Billy Blanks. I got it at a yard sale for $2!-that will be tomorrows workout-so I’ll let you know how I do! LOL! Im expecting to die!
Another one I borrowed from my friend Paulette is Core Rythms. Haven’t tried it, but if you see Dancer’s bodies, you wouldn’t knock it! LOL!
Many of you ask about this stuff so I thought I’d share.
You ask WHAT time do I work out?
Well it varies! The BEST time for me is in the morning to get it over with! I get up at 6am and do 1/2 hour or one of my other SHORTER videos on Mon-Wed-Fri since those days are my busiest, and I’m out the door by 7:45am
I don’t like to workout after I showered! Although the night run is good, and the shower after relaxes me for bed! I slept great after.
On Tues-Thurs I do a LONGER more intense workout since I don’t have to leave the house till 11am (Im AWAKE at 6am just not out the door) These are the 45 min to hour long workouts.
Then I generally leave Sat and Sun for REST! LOL! OR if I had a day or 2 that I didn’t get a workout in I may squeeze one in on the weekend. Also sometimes I just WANT to do it those days, since I get energy and feel good.
Well I had a great full weekend! I hope you did too. Its starting to FEEL like summer! June is just the beginning of my insanity!! If you have children, you know how busy summer vacation can be-its a good busy!
HOW Do you find the time?
I figure if I have time to blog, or read emails and stamp I can find at LEAST 15 minutes a day. Who doesn’t have 15 minutes? You really DO!
You DESERVE it. You NEED it.
You will feel so good too.
What workout do you recommend?
ANYTHING that you think looks interesting to YOU! Just MOVE!!! Whatever it is that gets you going is fabulous. I haven’t found a video that I didn’t like. Some are harder than others, and if you have a lot of weight to lost may make you feel like you CAN’T do it!! So start slow, and do what you can. Modify moves if you can.
Denise Austin is really good for ALL levels I think (even though she is a little weird and annoying-you’ll see what I mean if you buy) but hello she is like almost 60 and has had 2 kids. She looks fabulous (yes I have RECENT videos-not 1980!) and if she does these workouts and looks like that, I’m buying!! I have loved her workouts. Especially for the BUSY mom!!!
Do I need a lot to get started?
Not usually. Id suggest a mat, and a set of hand-weights. LIGHT! Like 2 or 3 lbs.
You don’t need a million videos either! I just like to mix it up and keep it interesting. I have been doing this for 9 months now! So you get bored with the same ole same ole! PLUS you want to use different muscles, and keep your body guessing!
You can RENT videos at the library!! Check it out. You can TRY before you buy or NOT buy, just keep renting new ones!
OH! And get your family and friends involved! The more people you have on your journey the better the support!
How do you keep going?
Results!! Having the body I want and or seeing results is the best. Fitting to my clothes that I buy off the rack! And being and FEELING healthy. My kids get involved to some extent so Jay and I are setting healthy examples.. Plus eating healthy as a family will help them NOW NOT form bad eating habits into adulthood.
I also think deciding to NOT outgrow your jeans is PERFECT! GET RID of anything the next size up. NO comfort clothes. If your jeans get tight that will remind you ALL day WHY you shouldn’t eat that cookie! LOL!
What do you eat?
Everything!
TOO many people think because I lost weight that I must not eat or LIVE on salad. NOPE! I actually think I eat MORE! Its all about drinking plenty or water, and MODERATION!
I never ate breakfast (I’m still not hungry in the morning) but I make myself eat it! Your body is like a furnace! You need to heat it up and get it going with breakfast. If you have several small meals of 3 meals 2 healthy snacks that keeps the metabolism going.
I’m not on a DIET! NO WAY! I can’t maintain that long term, and I’m in this for life. I just make HEALTHIER choices.
I eat what my family eats! Just not huge portions. I also don’t make myself finish my plate! If I’m satisfied I STOP. I don’t USUALLY eat after dinner time. If I do I think about it carefully! I will have popcorn or something.
Do I crave stuff? YUP! Not as much as before, and PMS is still hard! LOL! But I do “indulge” just not in LARGE portions or as often. For instance-instead of FOUR cookies Ill have ONE.
I also take trail mix and stuff and measure and pack it into snack bag- that are serving size portions. That makes it easier to grab and go and not mindlessly eat the entire bag of trail mix! LOL! Sometimes I do have that second baggie, but I make that conscious decision and make sure I had a healthy day overall
I also my LOW FAT or NO FAT stuff as often as possible. Use Splenda too.
I’m also loving to drink Lipton Diet Green Tea with Citrus. Green Tea is FAB for the metabolisim.
EATING OUT!
I try to plan ahead what I MAY eat. No matter what I take 1/2 my meal immediately and package it up to go! Sometimes I will eat just salad so I can SAVE up and really indulge! LOL! Like on my Birthday 😀
PLAN YOUR WEEK!
I have a schedule. What I like to do is plan my workouts a head of time, and psych myself up for each one!
This helps me keep focus and MAKE the time for it. I don’t let myself stamp till I workout.
Like today: 6am I did the Denise Austin Belly Fat Blaster: Ball workout that works my abs, buns and thighs. Tonight after dinner I plan on running.
Tomorrow I know I am going to try the Tae – Bo Cardio.
I hope that helps. I gott go wrap up some Teacher gifts!! Oh and stop by the book store and Staples!! RUN! RUN! RUN!
Time To Create Sketch Challenge!
Jun 6, 2009 Author: mytime | Filed under: Cards, My Time to Create Challenge, Saturday Sketch, StampavieHi everyone!
Im running off to t-ball and stuff and wasn’t home at all yesterday, so this is a QUICKIE post that Ill come back and edit later! SORRY!! Duty calls
Today’s challenge is a Sketch! Hope you like it.
Here is the sketch
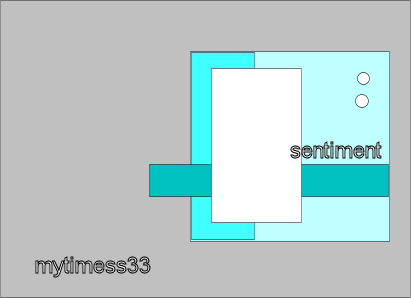
If you get a chance to play along link it HERE!!
I’ll come back to edit this!
Here is my peek! A VERY loose interpretation! LOL!
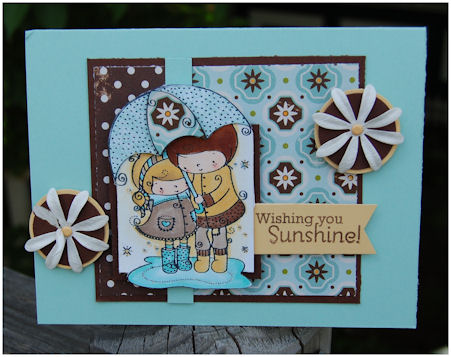
Mine couldn’t fit all the way over! LOL! Same idea though, with some added touches.
Stamp is from Stampavie Rachelle Anne Miller line-Rainy Days
My umbrella is 3D too!
Here are the My Time To Create Challenge Team Member Peeks:
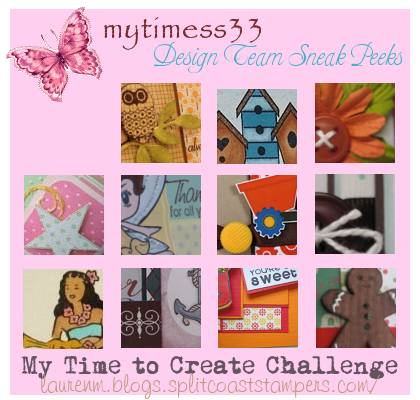
A HUGE thanks to Kristen who has really taken the lead roll and helping me keep organized! She did the icon for today!!!
THANK YOU GIRL!!! I’d be so lost! My team has been fabulous, as are their peeks! So check them out 😀
Check out their blogs for MORE!!
On a side note: Please pray for my friend ‘Alicias son Ethan 😀 According to his Caring Bridge site (whcih I just cannot even read -breaks me apart) they did NOT get good news about Ethan. The disease progressed in his bone marrow. They’re bringing him home and setting up supportive care.
My Etsy

Who I Designed For
Blogroll
- Alicia
- Alli Miles
- Ally Blankenship
- Amber
- Andi @ crafts on a whim
- Angel R
- Angie Z
- Anne Kranitz
- Becky O
- Bee
- Beth Silaka
- Bethany Paull
- Beverly Nash
- Bobbie
- Cambria
- Cammie
- Card of the Week
- Card Positioning System (CPS)
- Cards for Cancer
- Catherine Doucette
- Charmaine
- Cheryl Sims
- Chriss Rollins
- Christina
- Christine Ewing
- Christine Wooden
- Colleen Schaan
- Craft Critique
- Craft Gossip
- Crystal
- Dawn Easton
- Emily Giovanni
- Geny
- Holly
- Igne Groot
- Inspirational Craft Blogs
- Irene
- Jami Sibley
- Jeanne Streiff
- Jen del Muro
- Jeni Bond
- JenMarie
- Jenn Balcer
- Jenn Diercks
- Jenn O
- Jennifer E
- Jennifer Mick
- Jennifer Pereda
- Jennifer-Sweet Treat
- Joanne Basile
- Jodi Collins
- Julia Stainton
- Julie Masse
- Karen
- Kathryn Berthiaume
- Katie Cotton
- Kelley Holland
- Kendra
- Kim Scholfield
- Kris’s Color Stripes! Get inspired here
- Kristen Dubosque
- Kristin Eberline
- Kristine
- Laura @ Sunshine Stamper
- Laura Turnmire
- Laurie Schmidlin
- Lesa Rapp
- Linda Duke
- Linda-LSN
- Lindsey Botkin
- Lisa (lakind scs)
- Lisa Kind
- Lori Craig
- Maggie
- Mara Campbell
- Maria
- Maria Levine
- Mary
- MaryJo
- Melanie M
- Monique Hansen
- Moxie Fab World
- Pam Imholz
- PaperCrafts Connection
- Peppers and Pollywogs Kids party site
- Rebecca Grohall
- Rita
- Robyn
- Rose Ann
- Sarah Vrolyk
- Sharon Harnist
- Sharon Johnson
- Sharon Rivera (a chemisrty with paper)
- Sherrie
- Sophia Landry
- Storage Units, Ink, & More Blog
- Sue Berker
- Susan (Rainy)
- Tangii Crane
- Tracy
- Tricia Traxler
- Trudee
- Velta
- VivLyn
- Zena
MTME Pretty Palette Color Team
MTME Pretty Patterns Sketch Team
My Time Made Easy TM LLC
Shop till you drop!
Lauren Meader
About Me
Copyrighted material
Subscribe To My Blog
Pages
- About me
- Alexa’s Story!
- My Crafty Corner!
- My Time Made Easy™ LLC
- Our Make A Wish Trip to Disney!
- Resume/Publication List
Calendar
Archives
- August 2013
- July 2013
- June 2013
- May 2013
- April 2013
- March 2013
- February 2013
- January 2013
- December 2012
- November 2012
- October 2012
- September 2012
- August 2012
- July 2012
- June 2012
- May 2012
- April 2012
- March 2012
- February 2012
- January 2012
- December 2011
- November 2011
- October 2011
- September 2011
- August 2011
- July 2011
- June 2011
- May 2011
- April 2011
- March 2011
- February 2011
- January 2011
- December 2010
- November 2010
- October 2010
- September 2010
- August 2010
- July 2010
- June 2010
- May 2010
- April 2010
- March 2010
- February 2010
- January 2010
- December 2009
- November 2009
- October 2009
- September 2009
- August 2009
- July 2009
- June 2009
- May 2009
- April 2009
- March 2009
- February 2009
- January 2009
- December 2008
- November 2008
- October 2008
- September 2008
- August 2008
- July 2008
- June 2008
- May 2008
- April 2008
- March 2008
- February 2008
- January 2008
- December 2007
- November 2007
- October 2007
- September 2007
- August 2007
- July 2007
- June 2007
- May 2007
- April 2007
- March 2007
- January 2007
Categories
- About Me
- All That Scraps
- blogger challenge
- camera/photo play
- Cards
- Contests
- family stuff
- FOR SALE
- Home decor/3-D items
- How to FAKE it!
- Introduction
- JUGS Challenge
- JustRite Stampers
- Lizzie Anne Designs
- My family stuff
- My Stamping Space
- My Time Made Easy
- My Time To Color Challenge
- My Time to Create Challenge
- My Timeless Template Challenge
- My Timeless Templates
- Mytime Mail
- MYTIME MOVIE/VIDEOs
- Papertrey Newsletter
- Pink Cat Studio
- Pretty Palette Challenge
- Pretty Patterns Sketch
- Product Opinions and Must haves
- Recipe's
- Saturday Sketch
- Smilebox Creations
- Stampavie
- Tutorials
- Uncategorized
- videos
Most Popular
- Create your own Onesie Card Tutorial-and important NOTE! PLEASE READ (2529)
- Saturday Sketch-Boxed bag holder (2333)
- Going GREEN! Fancy Flower Flourish-Closure Video (1478)
- Fabulous Favorite - Giveaway! (1336)
- a Prayer Request (1232)
- QUICK-Easter Baskets from Nestabilities-PTI style-and blog challenge (1063)
- Teaser Sketch (999)
- February Release Giveway! (and a little peek) (996)
- Group Post and Rambling Rose Video Tutorial (985)
- GIVEAWAY! Who wants it all?! (895)
Recent Comments (RSS)
- 첫충사이트: 완전히 흥미로운 블로그 게시입니다. 저는
- sarah: Wow, Lauren, what a stunning
- hedie: خرید راهبند
- 야동: Love to read it,Waiting For
- 야동: This seller is in a
- 바카라사이트: 여기 처음 왔어요. 나는이 게시판을
- 야동티비: I was surfing the Internet
- 바카라사이트: 비슷한 주제에 대한 흥미로운 정보를
- 바카라사이트: "여기에 제공해 주신 귀중한 정보와
- 온라인홀덤: 유익한 웹 사이트를 게시하는 데
Copyright © 2007 - My Time, My Creations, My Stampendence - is proudly powered by WordPress
This blog has been Tweaked and Designed by Sara Williams