Archive for May 31st, 2009
Embellish It
May 31, 2009 Author: mytime | Filed under: Home decor/3-D items, Papertrey Newsletter, TutorialsIts the first! So this post is all about facing a Challenge! Keep reading.
Before I begin I have NO IDEA what is up with my photos running into the sidebar. I resized a few times with little success. I honestly don’t have time to resize each one for the 5th time, then reload! GRR This post ended up taking several hours because of it, and I am over it. I hope you get the general details of it all. SORRY!
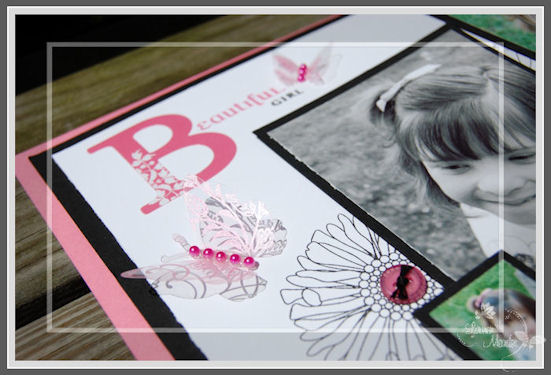
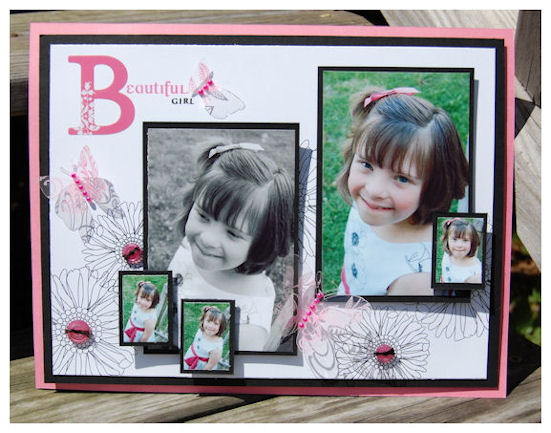
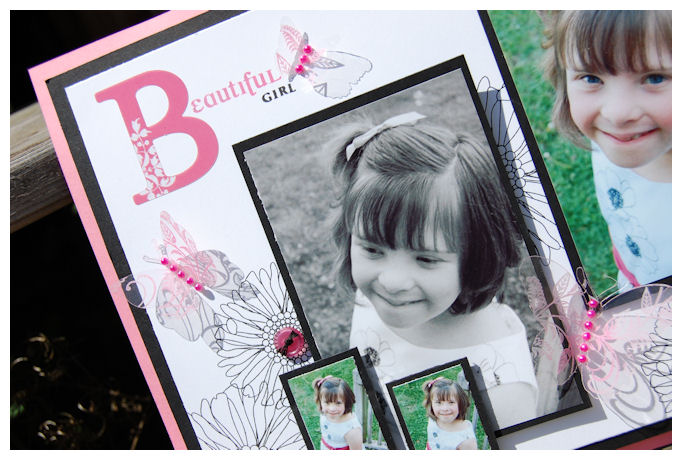
Alexa-Beautiful Girl

It is NOT often I do a “scrapbook page”.
I have to be REALLY inspired by something to even THINK of it. I had a particularly inspiring “photo shoot” with my daughter Alexa. She is ALMOST 10!
She was in a Spring Concert at School a week or so ago. She looked ADORABLE in her new dress that she picked out. We curled her hair, and got her ready- all pretty, so we had a photo session outside before the Concert.
To me, these are some of the BEST photos I have ever gotten of her! She was SOOOO “Alexa” when she is NOT in front of the camera. She usually can’t pose or makes funny faces, when you tell her to smile. She just contorts her face so unnaturally! LOL! So I just tried to let her be natural, herself. Cracking jokes while I took photos. THAT actually worked!!
I KNEW I wanted to capture them in a special way-forever!
This page just FLOWED out of me so easily. I’m beyond proud of it-especially my SUBJECT-Alexa :D)
She, to me, is like a butterfly. Hence my page. It is more than just a pretty page to me. It is capturing my thoughts, feelings and journey with my little girl, who has changed so much over the last few years.
This seemingly fragile human being, that started with so many odds against her, and despite it all, has morphed from the caterpillar (who avoided getting eaten by the “birds”-aka all her life obstacles) into a BEAUTIFUL butterfly. Spreading her wings, and taking flight. Never did I think I would have such a blessing in my life 10 years ago. Many times I thought I would lose her sweet little life. I always cry when I type these posts about her. I hate that!
I could go on and on, but will end it there. I get very emotional when I think of Alexa and her journey through life. I already know I will ALWAYS be so proud of her and where she will be in life. I am now! And Im so thankful for our journey. ALL OF IT. Thankful that God chose me, off all the people in the world to take her journey with her. What a blessing she is.
Now I switch my emotional gears to the project challenge.
That then lead me to the challenge that Nichole posed for her design team.
We were to create our own embellishments, inspired by some embellishments on the market, that you could purchase. Our goal was to share how much more affordable-and even how EASY, it is to create your own.
I was inspired by Heidi Swapp Butterfly Ghost Shapes, that I had for like a year, and couldn’t bare to use up, since you only get 6 in a package for $3.99 and UP! That is INSANE.
See photo:
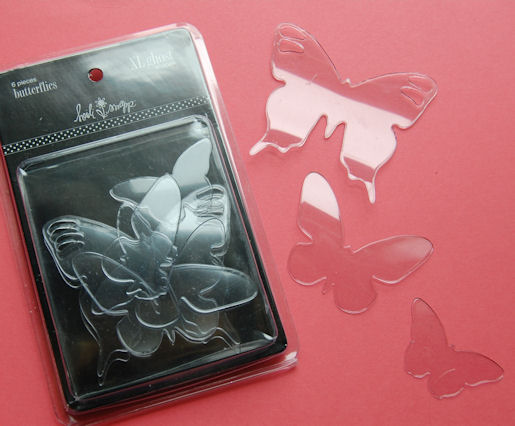
This is what comes in the package -these are the 3 shapes
You receive : 2 large, 2 medium and 2 small acetate butterflies as shown.
So I figured I could EASILY make my own, for FAR LESS! Maybe even BETTER 😀
I began my venture with Papertrey Ink’s Clearly Creative Cardstock
You get 10 sheets for $6.00. That means MY cost per sheet is 0.60 CENTS!

THIS receipt is the breakdown of the cost for making my OWN!!
Its actually CHEAPER than that! LOL! Read on.
So I used my Cuttlebug butterfly die for my largest butterflies.
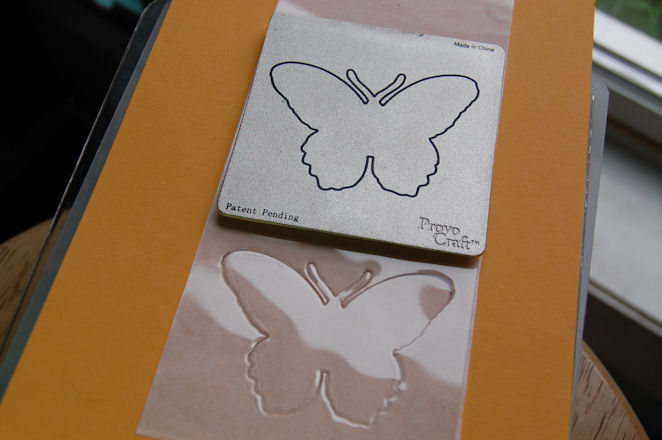
You can get 15 of the LARGE butterflies from ONE sheet costing ONLY 0.60 cents. You’d have to buy 7 or 8 packages of the Ghost Shapes to get that many of the largest butterfly shapes-costing upwards of $28-$32! What a savings!!
For my Med. size I used a Whale Butterfly punch by EK Success

I always keep the paper backing on till I’m done so I don’t LOSE anything I punch/die cut!
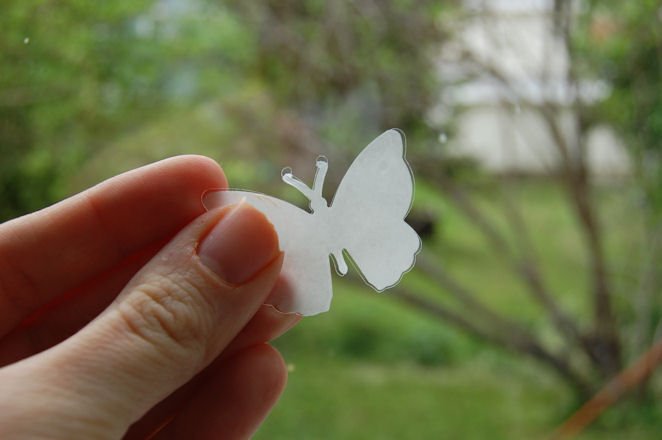
Now I can get 16 medium butterflies from one HALF sheet-or 32 per full sheet of acetate.
I the used a Martha Stewart Butterfly punch for my smallest butterflies.
I got 28 per half sheet of acetate, or 56 per full sheet!!!
Here are a few of the shapes I got from ONE piece of acetate-and I could have gotten even more!
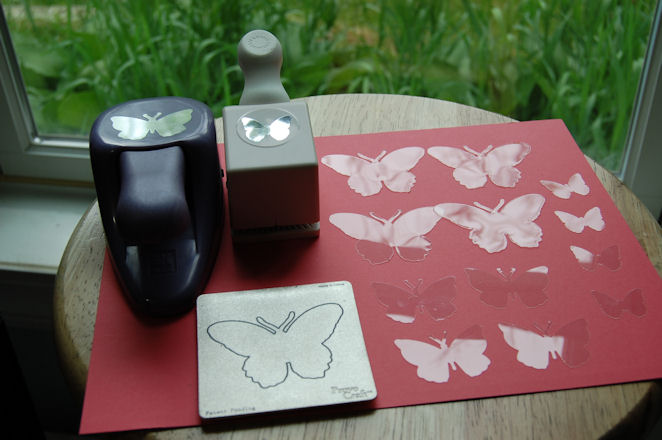
I just figured getting even 4 each per sheet is WAY more for your money ( UNDER 0.60 cents) as oppose to the $3.99 and up for ONLY 6 shapes that are store purchased.
That is where the recipt total came in
I then recycled the package that the Heidi Swapp Ghost Shapes came in, and put MY own butterflies inside!
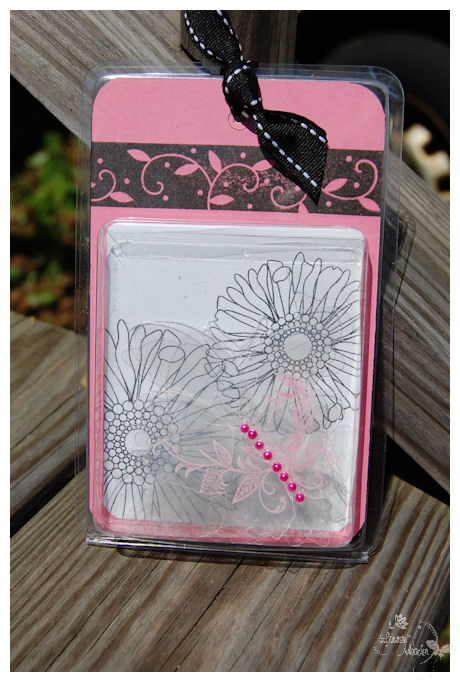
This is actually FULL of various shaped butterflies for a FRACTION of the cost!!!
I used one butterfly that I decorated for embellishing the front.
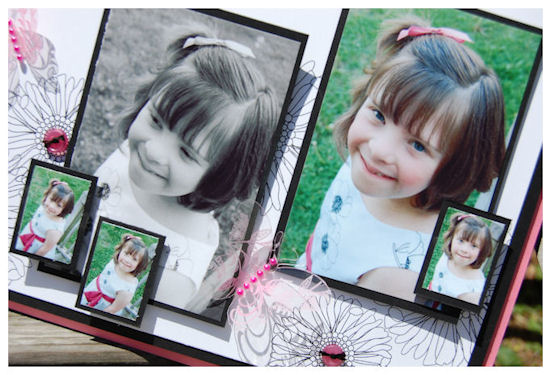
This is the product with my finished scrapbook page, that utilizes my embellishments: one of each size butterfly ON my page

Here is how I designed my own embellishment further by getting inspired by ANOTHER product
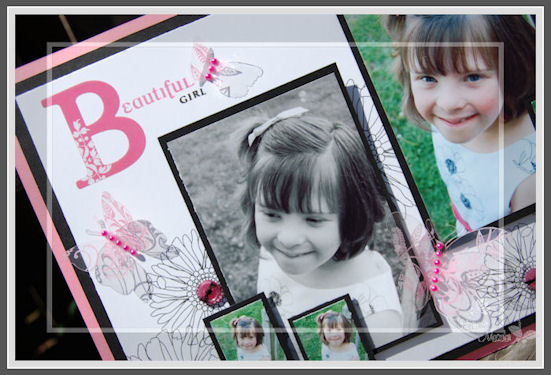
Notice my “B”.
Now here is what inspired my butterfly design
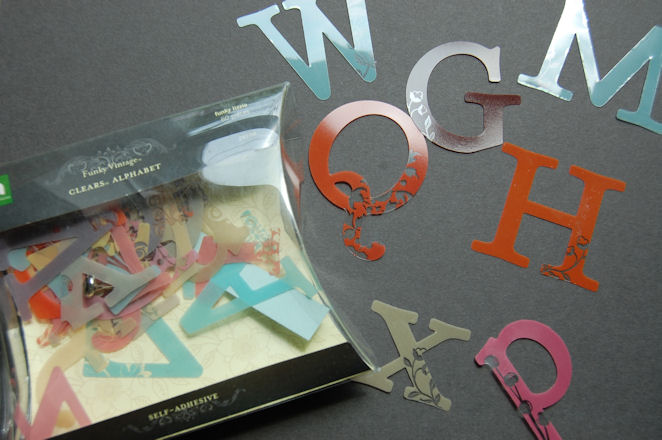
These are self adhesive acetate letters by Making Memories that sell for about $6 each
I used the “B” on my page. I loved the addition of the COLOR and FLOURISH on each letter, so I used that to further inspire yet another embellishment option for my plain acetate butterflies 😀
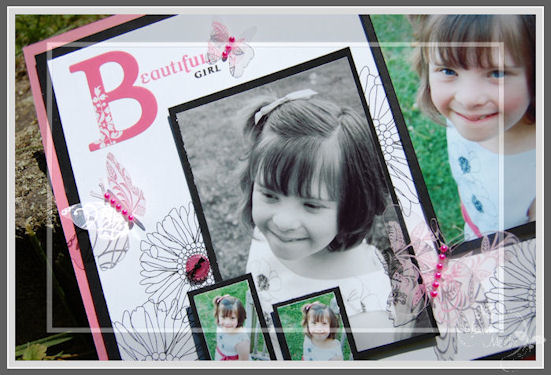
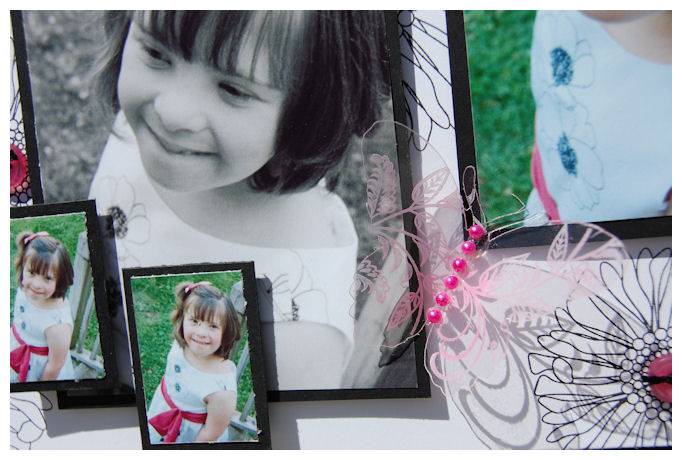
Here is a bit of a closer look at the B and the dimension my butterflies gave to my project.
Here is what I did:
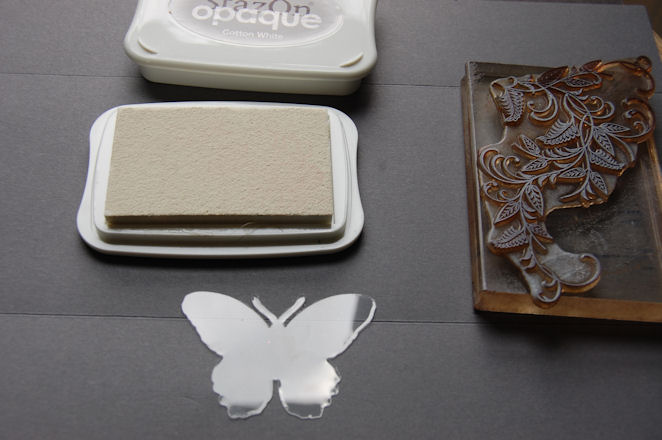
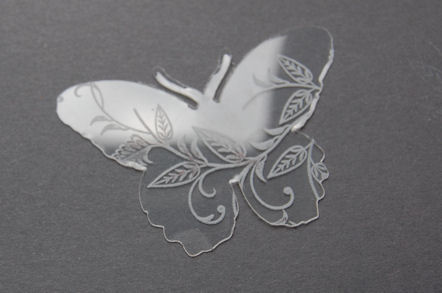
I just stamped my acetate butterflies using the flourish from With Sympathy, and White StazOn
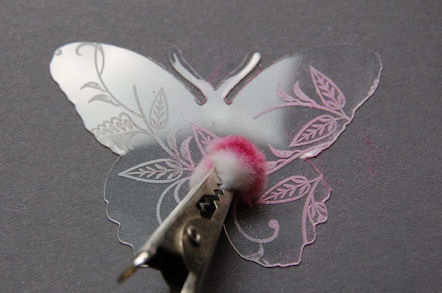
I added my color by using my own technique-Poppin Acetate with Jewel Tones Pastels
In SECONDS-a gorgeous butterfly embellishment!
I added some adhesive pearls to my butterfly centers, and was DONE!!

one more photo
So there you have it!
Now I can make SO many various embellishments JUST like these to suit ANY project!
I can die cut or punch ANY shape from the acetate I want or need, and I can embellish it without worry if I ruin one!
Supplies:
Stamps: With Sympathy (Flourish on butterflies), Friends til the End (flowers on white layer), Beautiful Blooms (sentiment)
Cardstock: Clearly Creative, White, True Black, Hibiscus Burst
Ink:True Black, Hibiscus Burst, White StazOn
Pebbles Pearlescent Pastels
Vintage Buttons , adhesive pearls, Making Memories Adhesive letter B
Cuttlebug butterfly die, EK Success butterfly punch, Martha Stewart punch
Now be sure to check out the design team!
Im sure this will get you making your own embellishments in no time, while saving yourself some money and using what you have! WIN! WIN!!
I hope you enjoyed my project 😀
Thanks for stopping by. I’d love to hear your thoughts, or if you give this a try too.
Well tomorrow is the BIG Release for All That Scraps!
Everything I have previewed over the last few days will FINALLY be available to you! YIPEE!!
Check out the blogfor more peeks and your chance to win todays set.
Feeling Fowl?
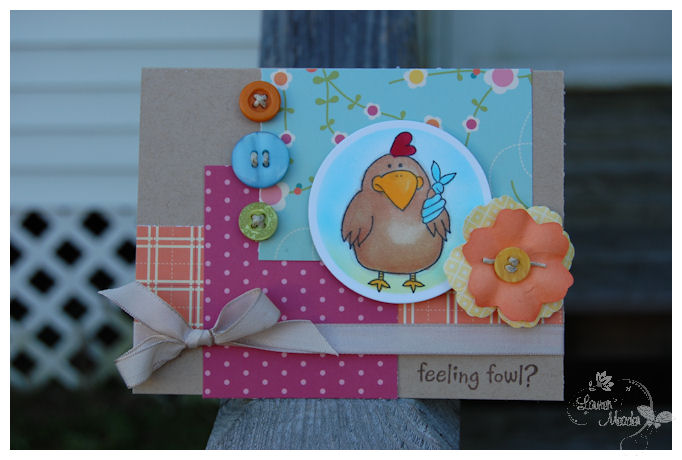
This set is called Get Well Critters from the Cookie Crumbs (aka Diane Zechman) line
Oh and yes this horrific photo was taken the same day as the last bad 2! LOL!
I have to say I ADORE this card! I love the FARM FRIENDLY (hahahaha) colors, and especially the layout!!
The chicken, to me, is cutest image in the set. I just loved him when I saw him-along with the sentiment.
So I hope you like the set too.
Now onto a personal level
SWING SET UPDATE:
8 hours in, and its still not done! My body hurts. So YES! “I ” am feeling “fowl”. We had some very big unexpected issues arise
The WORST part-the darn company “forgot” to include the instructions (we printed them online-all 48 pages!!!) some of the wood pieces and ALL the hardware! So Jay had to go out and BUY over $100 worth of nuts, blots and washers!
He spent 3 hours at the store getting every nut and blot known to man, while I was in the backyard, trying to keep the kids entertained at home, while sorting out the wood pieces, and then laying each one out on the ground in section for the pieces for
The rock wall, Swing Post, Ladder, Base, sides etc
Now if you KNEW me, you would know Im your typical GIRLY GIRL. This is so not a Lauren activity! LOL! Figuring it all out was far from enjoyable.
Keep in mind they label NOTHING! So I have to MEASURE each wood piece to ensure its the correct one-YEAH! So not fun.
It is also missing some decorative elements-like ONE window, the roof awning for shade, the chalkboard and swing stuff. GRR!!!
So after spending SO MUCH money on a swing set, to be missing so much is seriously upsetting. After we got the 2 HUGE heavy boxes down our HILL in the yard, we realized just WHAT the heck was missing. Had we known it was missing like everything other than the WOOD, we wouldn’t have LUGGED it down our HILL of a yard!
Keep in mind Jay has 2 herniated discs, and the shots have done NOTHING. We are looking at surgery-so I had to do the brunt of the lifting and pulling.
I called Toys R Us FUMING over our findings. Their response was-pack it back up and return it then!
NICE. Oh and not happening after I got THAT far into it.
I am calling the manufacturer tomorrow and trust me, someone else will know just how fowl I feel.
Toys R Us said they had NUMEROUS boxes like this missing hardware, and key parts to the set. I want to know how you can charge like a 1,000 for a wooden swing set, and NOT make sure EVERYTHING is included?!
OK Sorry-Im just very upset about this whole situation.
They should at the least ship out what was missing, and refund the hardware we HAD to buy (since we PROMISED our kids we would put it together this weekend) Can’t make them wait the 3 weeks for shipping hardware! Summer will be half done!
Granted I don’t mind that some of the decorative stuff will be missing-like the roof and whatnot. They can still PLAY and use it.
Anywho-enough of that disaster.
I hope to share HAPPY photos of the ids playing on the half decorated swing set this week! LOL!
OH! I will definitely keep you posted on what the swing company has to say.
Tomorrow is my Papertrey Ink Design Team Challenge! You won’t want to miss that. I busted my HINEY on it.
OK back to the yard
My Etsy

Who I Designed For
Blogroll
- Alicia
- Alli Miles
- Ally Blankenship
- Amber
- Andi @ crafts on a whim
- Angel R
- Angie Z
- Anne Kranitz
- Becky O
- Bee
- Beth Silaka
- Bethany Paull
- Beverly Nash
- Bobbie
- Cambria
- Cammie
- Card of the Week
- Card Positioning System (CPS)
- Cards for Cancer
- Catherine Doucette
- Charmaine
- Cheryl Sims
- Chriss Rollins
- Christina
- Christine Ewing
- Christine Wooden
- Colleen Schaan
- Craft Critique
- Craft Gossip
- Crystal
- Dawn Easton
- Emily Giovanni
- Geny
- Holly
- Igne Groot
- Inspirational Craft Blogs
- Irene
- Jami Sibley
- Jeanne Streiff
- Jen del Muro
- Jeni Bond
- JenMarie
- Jenn Balcer
- Jenn Diercks
- Jenn O
- Jennifer E
- Jennifer Mick
- Jennifer Pereda
- Jennifer-Sweet Treat
- Joanne Basile
- Jodi Collins
- Julia Stainton
- Julie Masse
- Karen
- Kathryn Berthiaume
- Katie Cotton
- Kelley Holland
- Kendra
- Kim Scholfield
- Kris’s Color Stripes! Get inspired here
- Kristen Dubosque
- Kristin Eberline
- Kristine
- Laura @ Sunshine Stamper
- Laura Turnmire
- Laurie Schmidlin
- Lesa Rapp
- Linda Duke
- Linda-LSN
- Lindsey Botkin
- Lisa (lakind scs)
- Lisa Kind
- Lori Craig
- Maggie
- Mara Campbell
- Maria
- Maria Levine
- Mary
- MaryJo
- Melanie M
- Monique Hansen
- Moxie Fab World
- Pam Imholz
- PaperCrafts Connection
- Peppers and Pollywogs Kids party site
- Rebecca Grohall
- Rita
- Robyn
- Rose Ann
- Sarah Vrolyk
- Sharon Harnist
- Sharon Johnson
- Sharon Rivera (a chemisrty with paper)
- Sherrie
- Sophia Landry
- Storage Units, Ink, & More Blog
- Sue Berker
- Susan (Rainy)
- Tangii Crane
- Tracy
- Tricia Traxler
- Trudee
- Velta
- VivLyn
- Zena
MTME Pretty Palette Color Team
MTME Pretty Patterns Sketch Team
My Time Made Easy TM LLC
Shop till you drop!
Lauren Meader
About Me
Copyrighted material
Subscribe To My Blog
Pages
- About me
- Alexa’s Story!
- My Crafty Corner!
- My Time Made Easy™ LLC
- Our Make A Wish Trip to Disney!
- Resume/Publication List
Calendar
Archives
- August 2013
- July 2013
- June 2013
- May 2013
- April 2013
- March 2013
- February 2013
- January 2013
- December 2012
- November 2012
- October 2012
- September 2012
- August 2012
- July 2012
- June 2012
- May 2012
- April 2012
- March 2012
- February 2012
- January 2012
- December 2011
- November 2011
- October 2011
- September 2011
- August 2011
- July 2011
- June 2011
- May 2011
- April 2011
- March 2011
- February 2011
- January 2011
- December 2010
- November 2010
- October 2010
- September 2010
- August 2010
- July 2010
- June 2010
- May 2010
- April 2010
- March 2010
- February 2010
- January 2010
- December 2009
- November 2009
- October 2009
- September 2009
- August 2009
- July 2009
- June 2009
- May 2009
- April 2009
- March 2009
- February 2009
- January 2009
- December 2008
- November 2008
- October 2008
- September 2008
- August 2008
- July 2008
- June 2008
- May 2008
- April 2008
- March 2008
- February 2008
- January 2008
- December 2007
- November 2007
- October 2007
- September 2007
- August 2007
- July 2007
- June 2007
- May 2007
- April 2007
- March 2007
- January 2007
Categories
- About Me
- All That Scraps
- blogger challenge
- camera/photo play
- Cards
- Contests
- family stuff
- FOR SALE
- Home decor/3-D items
- How to FAKE it!
- Introduction
- JUGS Challenge
- JustRite Stampers
- Lizzie Anne Designs
- My family stuff
- My Stamping Space
- My Time Made Easy
- My Time To Color Challenge
- My Time to Create Challenge
- My Timeless Template Challenge
- My Timeless Templates
- Mytime Mail
- MYTIME MOVIE/VIDEOs
- Papertrey Newsletter
- Pink Cat Studio
- Pretty Palette Challenge
- Pretty Patterns Sketch
- Product Opinions and Must haves
- Recipe's
- Saturday Sketch
- Smilebox Creations
- Stampavie
- Tutorials
- Uncategorized
- videos
Most Popular
- Create your own Onesie Card Tutorial-and important NOTE! PLEASE READ (2529)
- Saturday Sketch-Boxed bag holder (2333)
- Going GREEN! Fancy Flower Flourish-Closure Video (1478)
- Fabulous Favorite - Giveaway! (1336)
- a Prayer Request (1231)
- QUICK-Easter Baskets from Nestabilities-PTI style-and blog challenge (1063)
- Teaser Sketch (999)
- February Release Giveway! (and a little peek) (996)
- Group Post and Rambling Rose Video Tutorial (985)
- GIVEAWAY! Who wants it all?! (895)
Recent Comments (RSS)
- 야동: Love to read it,Waiting For
- 야동: This seller is in a
- 바카라사이트: 여기 처음 왔어요. 나는이 게시판을
- 야동티비: I was surfing the Internet
- 바카라사이트: 비슷한 주제에 대한 흥미로운 정보를
- 바카라사이트: "여기에 제공해 주신 귀중한 정보와
- 온라인홀덤: 유익한 웹 사이트를 게시하는 데
- 홀덤나라: 나는 당신의 블로그를 정말 좋아합니다.
- lisa: Technology, too, has left an
- 주소모음: 흠 !! 이 블로그는 정말
Copyright © 2007 - My Time, My Creations, My Stampendence - is proudly powered by WordPress
This blog has been Tweaked and Designed by Sara Williams