Archive for December 23rd, 2008
Do you cookie swap?
Dec 23, 2008 Author: mytime | Filed under: Home decor/3-D items, My Timeless Templates, Recipe'sOr know someone who does?
Then this is THE post for you 😀
This is a super last minute gift idea, that I hope you find useful.
I needed to finish making teacher gifts, and Amber’s teacher is a HUGE cookie swapper. She has special parties several times a year where they swap cookies and recipe’s!
While pondering what on earth to make her (she stamps too!) I figured why not a Cookie Swap Recipe Holder?! She can bring it with her and have her recipe’s ready to go, and it’s a great holder to house the favorite one’s she receives.
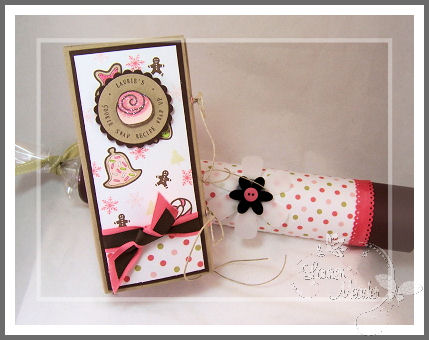
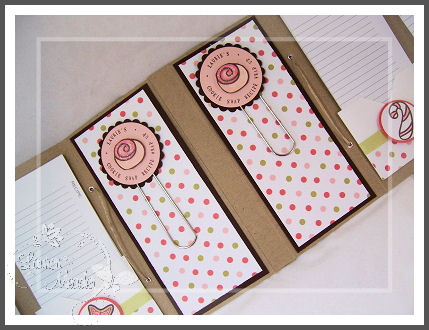
Here it is! Laurie’s Cookie Swap Recipe Wrap up
My Timeless Templates ©to the rescue. I mean it when I say my own templates saved me time this season on time, creative effort, and $$ . I have had fun sharing all these homemade treats with so many people. I keep hearing that I should open a store! LOL! Um, not sure about that.
I used my FREE template-the Recipe Wrap-Up for this gift. I have to say I have really enjoyed being able to easily personalize my gifts with my HUGE collection of JustRite Stamper Letter sets. I have several and they also saved me this year too. I use my small alpha ALL the time. Not sure how I lived without that one. As you can see it made this wrap really special and personal.
I then stamped, colored and cut a cookie for the center design.
Since she loves pink, I thought of a way to combine her favorite color for the holder, and keep it cookie related-using Kraft, dark chocolate, sweet blush, berry sorbet, and white. Ribbon is also from Papertrey Ink.
The polka dot patterned paper is from Polka Dot Parade.
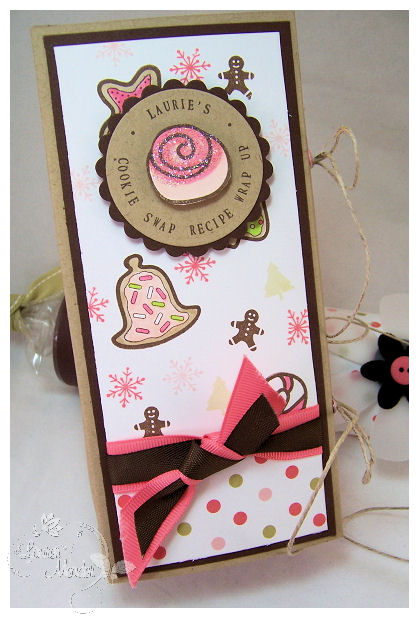
The main paper you see-with all the cookies, and snowflakes, I made myself! I’m beyond in LOVE with the way it came out. I would TOTALLY BUY IT if I saw it.
I have had this set from A Chemistry With Paper called Holiday Treats. I LOVE that set, and it was absolutely perfect for what I needed today. I also used some other small stamp elements from the Holiday Treats from Papertrey Ink.
Here is a close up view to the ties.
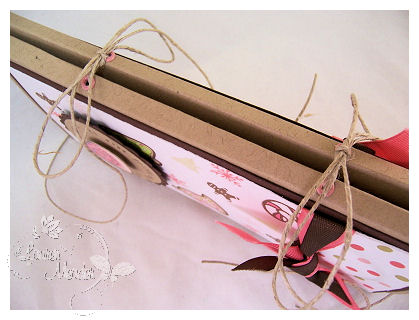
I decided that I would use eyelets to keep this sturdy for lots of wear and tear from tying closed, swap to swap.
All unwrapped
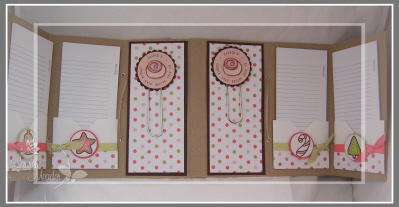
As you can see In modified this version from the original as I didn’t make 6 pockets for my recipe cards, instead I did 2 panels with a altered large paper clip to house any little notes or other things she may want to have handy!
Here is a closer view of the clip-
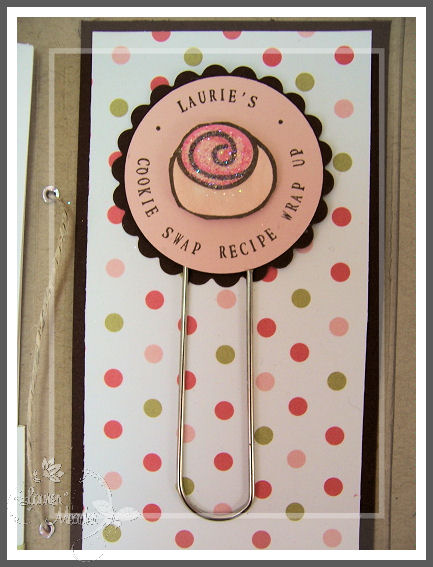
I used my same design element, as on the cover of my Wrap-Up! Stamping again my personalized info
Close up view on the pockets-left
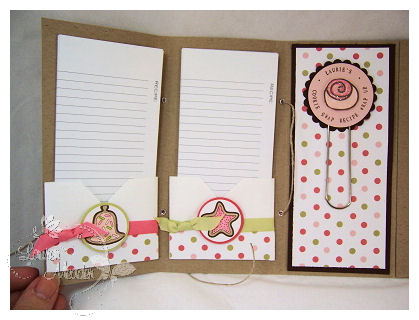
Now do you see my pockets? I found a way to make this go even quicker! Little envelopes that usually hold 3 X 3 notecards! They are PERFECT for the Recipe Wrap Up, and the recipe cards. I just added a strip of designer paper, and some ribbon, then my cookie decoration embellishments, made to match 😀
Other view of pockets on right
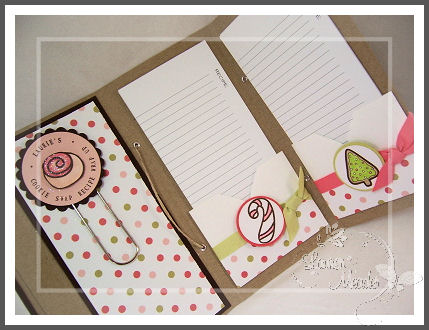
Each pocket holds 10 cards for this one. So she has 40 swap cards, blank- for her to do with what she likes.
Now you may be wondering what the LONG Tube like thing is!
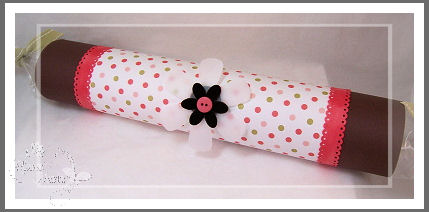
Well, I thought a great companion for her gift would be a magazine of all Gourmet Cookie Recipes, so I purchased the newest Martha Stewart Cookie magazine to give her some great recipes to try for her next swap. I honestly contemplated keeping it for me! LOL!
I didn’t want to give it in a plain ole bag, or plainly wrap it, so I made a tube from cardstock, and added cellophane to the ends. Rolled it up, and decorated. Just untie the ends, and slide out the magazine! Pretty cute huh?
I think it was a really nice co-ordinated gift 😀 Plus it was fun to make.
The dotted borders are actually Doodlebug Paper Frills-colored with my Copic’s to match 😀
PERFECTION!
Since we are talking cookies, and swapping-PLEASE share your favorite cookie recipe here if you have time!
I will share my favorite cookie-the easy way 😀
Do you likeRaspberry Linzer Cookies? They are beyond amazing! My favorite cookie-I think. I have a thing for Raspberry and Lemon stuff (like little tarts or lemon square/bars, tarts-anything! PIE!! OMG! I need to go have dinner)
Short on time? Here is my cheater way to get them done F-A-S-T!
Can you tell I loathe cooking? It totally cuts into my stamp time 😀
I just buy the pre-made Pillsbury sugar cookie dough.
Roll it out, and cut with my circle cookie cutter.
Now, make sure that exactly 1/2 of the circle cookies have a shape cut in the center.
(you can also do shapes like a heart, then do a little heart cut in the center)
FYI-You need 2 cookies for the sandwich-one has a hold in it.
Bake as directed.
Let cool.
Spread Seedless Raspberry Jam on the solid shape, and apply top cookie with cut out. Sprinkle on powdered sugar and you are DONE!!
Easy peasy, and so yummy. No one will guess how super simple that was.
On more DIVINE Raspberry treat! You can have this made in less than 15 minutes-tops! (Doesn’t count chilling time)
Its a Trifle. If you use what I tell you-really low fat and pretty low calories too-if you don’t over eat!
NOTE: I omitted the macaroons for a healthier, yet still scrumptious version
2 pkgs pound cake (Sara Lee frozen section)
1 tub of Fat Free Cool Whip (it does still taste fab)
1- 4 pk of Fat Free vanilla pudding cups (they are Handi-snacks. Then you don’t have to make the pudding-just pour it out of the containers!) (OK you MAY need 2 pks, I can’t remember :C)
1 jar of seedless raspberry jam
1 pkg of fat free/sugar free raspberry jello (make per instructions)
OK direction time
Cut pound cake into slices. Spread on raspberry jam, making pound cake/jam sandwiches.
Once sandwiches are made, cut into smaller sandwich cubes.
Layer sandwich cubes on bottom to trifle bowl.
Layer vanilla pudding, whipped cream.
Repeat steps until you are at top (DO NOT TOP WITH WHIP CREAM YET!)
Now take the prepared jello mixture, and pour it over the dessert. (TRUST ME ITS AMAZING)
Be sure to poke lots of holes so the jello does coagulate and form pockets of jello. You want the pound cake to soak up the juice (and no its NOT a soggy bread thing-that would NOT go over well with me!)
Let sit at least 4 hours in fridge.
Top with whipped cream before serving.
Scoop out & enjoy!
So that does it for me here.
I will be back tomorrow to post and wish you all a happy holiday!
Thank you for stopping by
My Etsy

Who I Designed For
Blogroll
- Alicia
- Alli Miles
- Ally Blankenship
- Amber
- Andi @ crafts on a whim
- Angel R
- Angie Z
- Anne Kranitz
- Becky O
- Bee
- Beth Silaka
- Bethany Paull
- Beverly Nash
- Bobbie
- Cambria
- Cammie
- Card of the Week
- Card Positioning System (CPS)
- Cards for Cancer
- Catherine Doucette
- Charmaine
- Cheryl Sims
- Chriss Rollins
- Christina
- Christine Ewing
- Christine Wooden
- Colleen Schaan
- Craft Critique
- Craft Gossip
- Crystal
- Dawn Easton
- Emily Giovanni
- Geny
- Holly
- Igne Groot
- Inspirational Craft Blogs
- Irene
- Jami Sibley
- Jeanne Streiff
- Jen del Muro
- Jeni Bond
- JenMarie
- Jenn Balcer
- Jenn Diercks
- Jenn O
- Jennifer E
- Jennifer Mick
- Jennifer Pereda
- Jennifer-Sweet Treat
- Joanne Basile
- Jodi Collins
- Julia Stainton
- Julie Masse
- Karen
- Kathryn Berthiaume
- Katie Cotton
- Kelley Holland
- Kendra
- Kim Scholfield
- Kris’s Color Stripes! Get inspired here
- Kristen Dubosque
- Kristin Eberline
- Kristine
- Laura @ Sunshine Stamper
- Laura Turnmire
- Laurie Schmidlin
- Lesa Rapp
- Linda Duke
- Linda-LSN
- Lindsey Botkin
- Lisa (lakind scs)
- Lisa Kind
- Lori Craig
- Maggie
- Mara Campbell
- Maria
- Maria Levine
- Mary
- MaryJo
- Melanie M
- Monique Hansen
- Moxie Fab World
- Pam Imholz
- PaperCrafts Connection
- Peppers and Pollywogs Kids party site
- Rebecca Grohall
- Rita
- Robyn
- Rose Ann
- Sarah Vrolyk
- Sharon Harnist
- Sharon Johnson
- Sharon Rivera (a chemisrty with paper)
- Sherrie
- Sophia Landry
- Storage Units, Ink, & More Blog
- Sue Berker
- Susan (Rainy)
- Tangii Crane
- Tracy
- Tricia Traxler
- Trudee
- Velta
- VivLyn
- Zena
MTME Pretty Palette Color Team
MTME Pretty Patterns Sketch Team
My Time Made Easy TM LLC
Shop till you drop!
Lauren Meader
About Me
Copyrighted material
Subscribe To My Blog
Pages
- About me
- Alexa’s Story!
- My Crafty Corner!
- My Time Made Easy™ LLC
- Our Make A Wish Trip to Disney!
- Resume/Publication List
Calendar
Archives
- August 2013
- July 2013
- June 2013
- May 2013
- April 2013
- March 2013
- February 2013
- January 2013
- December 2012
- November 2012
- October 2012
- September 2012
- August 2012
- July 2012
- June 2012
- May 2012
- April 2012
- March 2012
- February 2012
- January 2012
- December 2011
- November 2011
- October 2011
- September 2011
- August 2011
- July 2011
- June 2011
- May 2011
- April 2011
- March 2011
- February 2011
- January 2011
- December 2010
- November 2010
- October 2010
- September 2010
- August 2010
- July 2010
- June 2010
- May 2010
- April 2010
- March 2010
- February 2010
- January 2010
- December 2009
- November 2009
- October 2009
- September 2009
- August 2009
- July 2009
- June 2009
- May 2009
- April 2009
- March 2009
- February 2009
- January 2009
- December 2008
- November 2008
- October 2008
- September 2008
- August 2008
- July 2008
- June 2008
- May 2008
- April 2008
- March 2008
- February 2008
- January 2008
- December 2007
- November 2007
- October 2007
- September 2007
- August 2007
- July 2007
- June 2007
- May 2007
- April 2007
- March 2007
- January 2007
Categories
- About Me
- All That Scraps
- blogger challenge
- camera/photo play
- Cards
- Contests
- family stuff
- FOR SALE
- Home decor/3-D items
- How to FAKE it!
- Introduction
- JUGS Challenge
- JustRite Stampers
- Lizzie Anne Designs
- My family stuff
- My Stamping Space
- My Time Made Easy
- My Time To Color Challenge
- My Time to Create Challenge
- My Timeless Template Challenge
- My Timeless Templates
- Mytime Mail
- MYTIME MOVIE/VIDEOs
- Papertrey Newsletter
- Pink Cat Studio
- Pretty Palette Challenge
- Pretty Patterns Sketch
- Product Opinions and Must haves
- Recipe's
- Saturday Sketch
- Smilebox Creations
- Stampavie
- Tutorials
- Uncategorized
- videos
Most Popular
- Create your own Onesie Card Tutorial-and important NOTE! PLEASE READ (2529)
- Saturday Sketch-Boxed bag holder (2333)
- Going GREEN! Fancy Flower Flourish-Closure Video (1478)
- Fabulous Favorite - Giveaway! (1336)
- a Prayer Request (1231)
- QUICK-Easter Baskets from Nestabilities-PTI style-and blog challenge (1063)
- Teaser Sketch (999)
- February Release Giveway! (and a little peek) (996)
- Group Post and Rambling Rose Video Tutorial (985)
- GIVEAWAY! Who wants it all?! (895)
Recent Comments (RSS)
- 바카라사이트: 비슷한 주제에 대한 흥미로운 정보를
- 바카라사이트: "여기에 제공해 주신 귀중한 정보와
- 온라인홀덤: 유익한 웹 사이트를 게시하는 데
- 홀덤나라: 나는 당신의 블로그를 정말 좋아합니다.
- lisa: Technology, too, has left an
- 주소모음: 흠 !! 이 블로그는 정말
- FutureGen Apps: Thank You For Sharing fantastic
- 웹툰사이트: 터키에서 온라인 스포츠 베팅을 할
- 툰코: It is a really very
- 온라인홀덤: I’ll be sure to come
Copyright © 2007 - My Time, My Creations, My Stampendence - is proudly powered by WordPress
This blog has been Tweaked and Designed by Sara Williams